Baby Hat Crochet Patterns
The Whimsical Whoo Hat: A Free Crochet Pattern for a Textured, Color-Blocked Owl Baby Hat
Anonymous
•
July 28, 2026
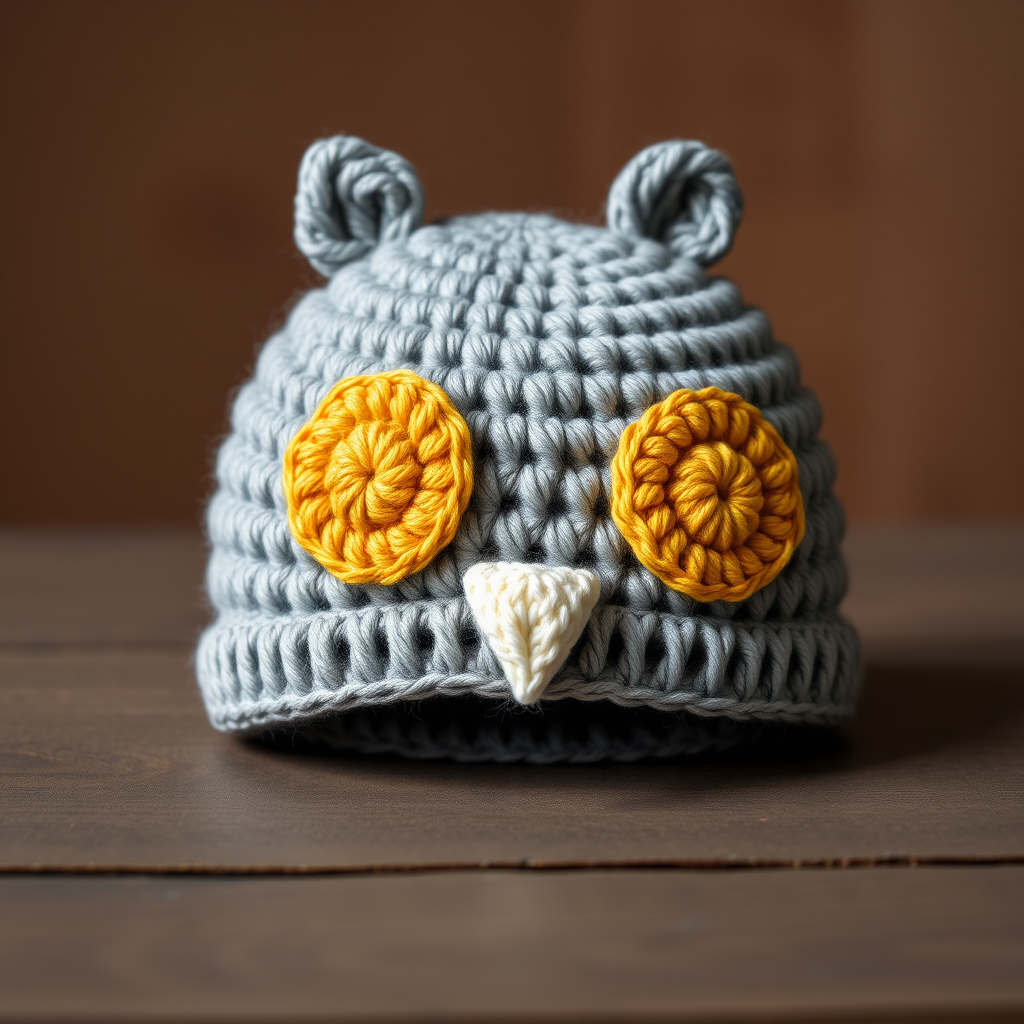
Introducing the Whimsical Whoo Hat
This isn't your average owl hat. The Whimsical Whoo Hat uses a clever combination of post stitches and color blocking to create a modern, textured owl face that's both adorable and sophisticated. Perfect for keeping your little one cozy and stylish, this free crochet pattern is designed for beginners and experienced crafters alike. The textured stitch pattern adds depth and visual interest, while the color-blocked eyes and beak create a playful, whimsical look that's sure to delight.
Materials Needed
Before you begin, gather the following materials:
- Yarn: Worsted weight (#4) yarn in three colors:
- Main Color (MC): Soft heather grey (approximately 100 yards)
- Contrast Color 1 (CC1): Warm mustard yellow (approximately 30 yards)
- Contrast Color 2 (CC2): Creamy off-white (approximately 20 yards)
- Hook: Size H/8 (5.0 mm) crochet hook
- Gauge: 14 stitches and 10 rows = 4 inches in half double crochet
- Other: Yarn needle, scissors, stitch markers (optional)
Step-by-Step Instructions
Sizes
0-3 months (3-6 months, 6-12 months). Instructions for smallest size given first, with larger sizes in parentheses.
Abbreviations
- ch: chain
- sl st: slip stitch
- sc: single crochet
- hdc: half double crochet
- dc: double crochet
- fpdc: front post double crochet
- bpdc: back post double crochet
- inc: increase (2 stitches in one stitch)
- dec: decrease (single crochet two together)
- MC: Main Color
- CC1: Contrast Color 1
- CC2: Contrast Color 2
Hat Body (worked in rounds from the top down with MC)
- Make a magic ring. Ch 2 (does not count as a stitch). Work 10 hdc into the ring. Join with a sl st to the first hdc. (10 hdc)
- Ch 2. *Work 2 hdc in each stitch around.* Join. (20 hdc)
- Ch 2. *Hdc in next stitch, 2 hdc in next stitch* around. Join. (30 hdc)
- Ch 2. *Hdc in next 2 stitches, 2 hdc in next stitch* around. Join. (40 hdc)
- Ch 2. *Hdc in next 3 stitches, 2 hdc in next stitch* around. Join. (50 hdc)
- Ch 2. *Hdc in next 4 stitches, 2 hdc in next stitch* around. Join. (60 hdc)
- 7-12 (7-14, 7-16). Ch 2. Hdc in each stitch around. Join. (60 hdc)
Eye Patches (make 2 with CC1)
- Make a magic ring. Ch 1. Work 8 sc into the ring. Join with a sl st to the first sc. (8 sc)
- Ch 1. *Work 2 sc in each stitch around.* Join. (16 sc)
- Ch 1. *Sc in next stitch, 2 sc in next stitch* around. Join. (24 sc)
- Ch 1. *Sc in next 2 stitches, 2 sc in next stitch* around. Join. (32 sc)
- Fasten off, leaving a long tail for sewing.
Pupils (make 2 with CC2)
- Make a magic ring. Ch 1. Work 8 sc into the ring. Join with a sl st to the first sc. (8 sc)
- Fasten off, leaving a long tail for sewing.
Beak (with CC2)
- Ch 5.
- Sc in 2nd ch from hook and in next 2 ch. 3 sc in last ch. Working on the opposite side of the chain, sc in next 2 ch. 2 sc in the last ch. Join with a sl st to the first sc. (10 sc)
- Ch 1. Sc in next 3 stitches, 2 sc in next 3 stitches, sc in next 3 stitches, 2 sc in last stitch. Join. (14 sc)
- Fasten off, leaving a long tail for sewing.
Ear Tufts (make 2 with MC)
- Ch 6.
- Sc in 2nd ch from hook and in next 4 ch. Ch 1, turn. (5 sc)
- Sc in next 2 stitches, dec, sc in last stitch. Ch 1, turn. (4 sc)
- Sc in next stitch, dec, sc in last stitch. Ch 1, turn. (3 sc)
- Dec, sc in last stitch. Ch 1, turn. (2 sc)
- Dec. Fasten off, leaving a long tail for sewing.
Assembly
- Sew the pupils to the center of the eye patches.
- Position the eye patches on the front of the hat, about 3-4 rows up from the bottom edge and about 2 inches apart. Sew them in place.
- Sew the beak below and between the eye patches.
- Sew the ear tufts to the top of the hat, slightly to the sides.
Finishing
Weave in all ends. Optionally, add a pom-pom to the top of the hat for extra cuteness.
Also Check Out: We think you'd love this beautiful pattern on our sister site: The Enchanted Forest Mushroom Bag Free Pattern


