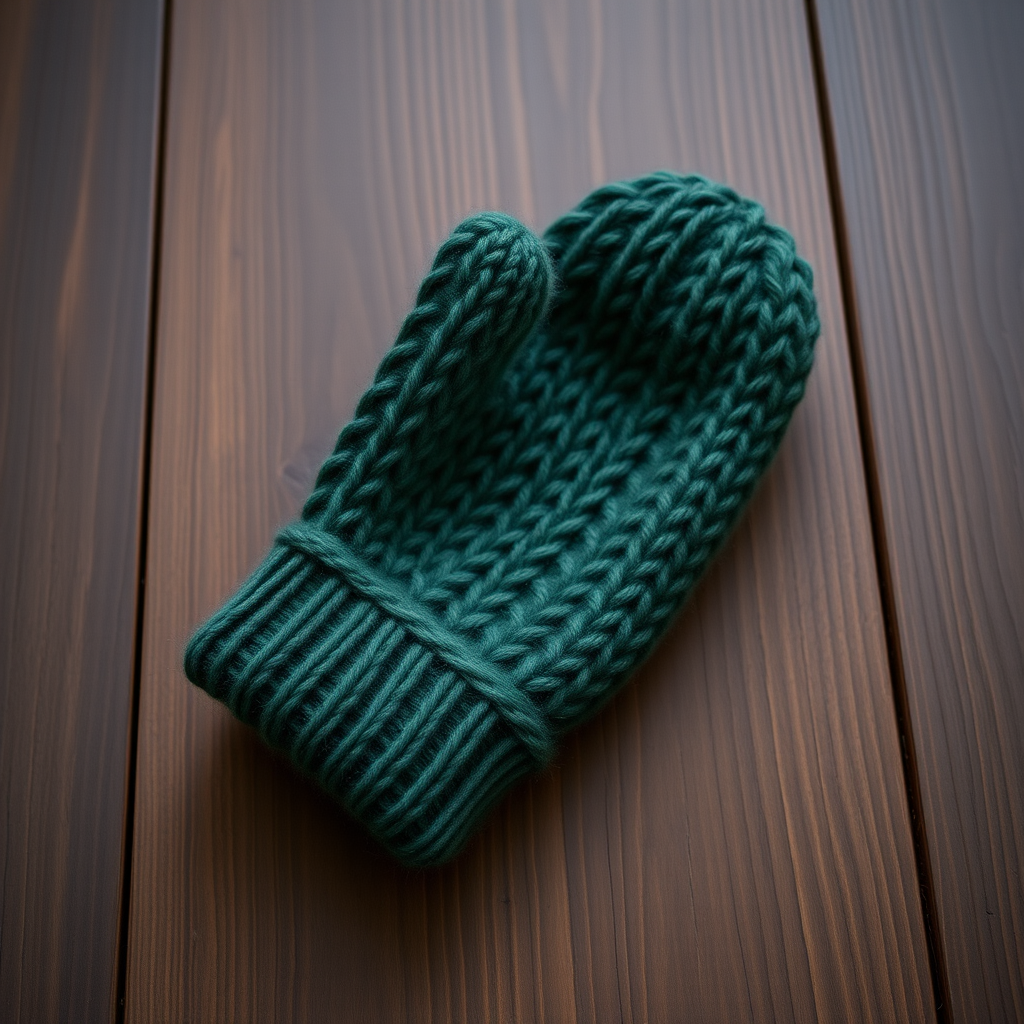
The Emberglow Brioche Mittens Free Pattern – Knit a Cozy Sunset Ridge Mitten

Introducing the Emberglow Brioche Mittens: A Cozy Sunset Ridge Knitting Pattern
Wrap your hands in the warm gradient of a winter sunset with these plush brioche-stitch mittens. The two-tone honeycomb texture is as delightful to knit as it is to wear. This free pattern guides you through creating a pair of mittens that are not only functional but also a stunning accessory, featuring a deep burnt orange and soft cream colorway that evokes the cozy feeling of a crisp autumn evening. Whether you're a seasoned knitter looking for a new texture challenge or a confident beginner ready to expand your skills, the Emberglow Brioche Mittens are the perfect project to keep your hands busy and warm.
Brioche knitting is renowned for producing a fabric that is incredibly squishy, warm, and reversible. The two-color brioche rib creates a beautiful, dimensional honeycomb pattern that looks far more complex than it actually is. This pattern is worked in the round from the cuff up, making it a portable and manageable project. Let's dive into the materials and steps you'll need to create your very own pair of sunset-inspired mittens.
Materials Needed for Your Brioche Mittens
Before you begin, gather the following materials to ensure a smooth and enjoyable knitting experience. The quality of your yarn will greatly affect the final look and feel of your mittens, so choose a soft, durable worsted weight yarn that you love.
- Yarn: Worsted weight yarn in two colors: Color A (deep burnt orange) and Color B (soft cream) – approximately 180 yards of each color. This will be enough for a pair of mittens.
- Needles: US 7 (4.5 mm) double-pointed needles (or a circular needle if you prefer the magic loop method).
- Notions: Stitch markers, a waste yarn holder or scrap yarn, a tapestry needle for weaving in ends, and scissors.
- Gauge: 20 stitches and 28 rows = 4 inches in brioche stitch (blocked). It's crucial to check your gauge to ensure your mittens fit properly.
Step-by-Step Instructions for the Emberglow Brioche Mittens
This pattern is broken down into clear sections, from the ribbed cuff to the final decreases. Read through the notes carefully before you start. The key to beautiful brioche is consistent tension and paying attention to which color you are working with on each round.
Knitting Notes & Abbreviations
- brk: Brioche knit – knit the yarnover and the slipped stitch together.
- brp: Brioche purl – purl the yarnover and the slipped stitch together.
- M1: Make one – increase one stitch.
- K2tog: Knit two stitches together (decrease).
- sl1: Slip one stitch purlwise.
- yo: Yarnover.
The two-color brioche stitch is worked over four rounds, with two rounds for each color. This creates the distinctive, reversible honeycomb texture. Don't be intimidated by the yarnovers and slipped stitches – they work together to create the plush fabric.
Creating the Ribbed Cuff
We'll start with a classic ribbed cuff to give the mittens a snug, secure fit around your wrist.
- With Color A, cast on 40 stitches. Distribute them evenly across your double-pointed needles and join in the round, being very careful not to twist your stitches.
- Work in a K1, P1 ribbing pattern for 12 rounds. This will create a stretchy, neat cuff that anchors the mitten.
Working the Brioche Body and Thumb Gusset
Now we'll begin the beautiful brioche pattern. The first two rounds establish the stitch, and then we'll repeat the final two rounds to create the fabric. We'll also be increasing stitches to create a gusset for your thumb.
- Round 1 (Color A): *Yarnover, slip 1 purlwise, knit 1; repeat from * to the end of the round.
- Round 2 (Color B): *Yarnover, slip 1 purlwise, purl the yarnover and slipped stitch together (brp); repeat from * to the end of the round.
- Round 3 (Color A): *Knit the yarnover and slipped stitch together (brk), yarnover, slip 1 purlwise; repeat from * to the end of the round.
- Round 4 (Color B): *Yarnover, slip 1 purlwise, brp; repeat from * to the end of the round.
- Repeat Rounds 3 and 4 to continue the pattern. After completing 4 brioche rounds in total, you will begin the thumb gusset increases.
- Increase Round (Color A): Work 19 stitches in pattern, M1 (make one), place a stitch marker, M1, work the remaining stitches in pattern. You should now have 42 stitches on your needles.
- Continue working in the brioche pattern, working the increase round every 4th round (on a Color A round). Do this until you have 10 stitches between your markers. This section will be the gusset for your thumb.
Opening for the Thumb
Once your gusset is large enough, we'll separate it from the main hand of the mitten to create the thumb hole.
- On a Color A round, work in pattern until you reach the first marker.
- Carefully place the 10 gusset stitches (between the markers) onto a piece of waste yarn or a stitch holder. Remove the markers.
- Cast on 2 new stitches over the gap you've created for the thumb.
- Continue working in the brioche pattern to the end of the round. You will now have 34 stitches total for the main hand of the mitten.
Knitting the Hand
With the thumb set aside, you'll continue working on the main body of the mitten until it's long enough to cover your fingers.
- Continue working in the established brioche pattern (Rounds 3 and 4) until the mitten measures approximately 7 inches from the cast-on cuff, or until it reaches the top of your pinky finger when tried on.
Shaping the Top with Decreases
To shape the rounded top of the mitten, we'll switch to working with a single color (Color A) to make the decreases cleaner and easier to manage.
- Round 1: *Brk, yarnover, slip 1; repeat from * to the end of the round.
- Round 2: *K2tog (knit the yarnover and slipped stitch together), slip 1 purlwise; repeat from * to the end of the round. You will now have 34 stitches.
- Round 3: *K2tog, k1; repeat from * to the end of the round. You will now have 23 stitches.
- Round 4: *K2tog; repeat from * to the end of the round, ending with a k1. You will now have 12 stitches.
- Cut your yarn, leaving a long tail. Thread the tail onto a tapestry needle and draw it through the remaining 12 stitches. Pull tight to close the top of the mitten and weave in the end securely.
Finishing the Thumb
Now we'll bring the thumb stitches back to life and knit them up to match the rest of the mitten.
- Carefully place the 10 gusset stitches from the waste yarn holder back onto your needles.
- Pick up and knit 2 stitches from the cast-on edge of the thumb gap. You should now have 12 stitches for the thumb.
- Work in the two-color brioche pattern (Rounds 3 and 4) for 6 rounds, or until the thumb covers about half of your thumbnail.
- To shape the thumb top: *K2tog; repeat from * to the end of the round. You will now have 6 stitches.
- Cut your yarn, thread it through the remaining 6 stitches, pull tight to close, and secure the end.
Final Finishing Touches
Your mittens are almost complete! The final steps are simple but important for a professional finish.
- Weave in all loose ends carefully on the inside of the mittens using your tapestry needle.
- Block your mittens lightly. This helps to even out the brioche texture and gives them a polished, professional look. Lay them flat to dry.
Congratulations! You've just completed a beautiful pair of Emberglow Brioche Mittens. The plush, textured fabric and warm sunset colors are sure to make these a favorite in your winter wardrobe. Whether you keep them for yourself or gift them to a loved one, these mittens are a testament to the cozy, handmade warmth that only knitting can provide. Happy knitting!