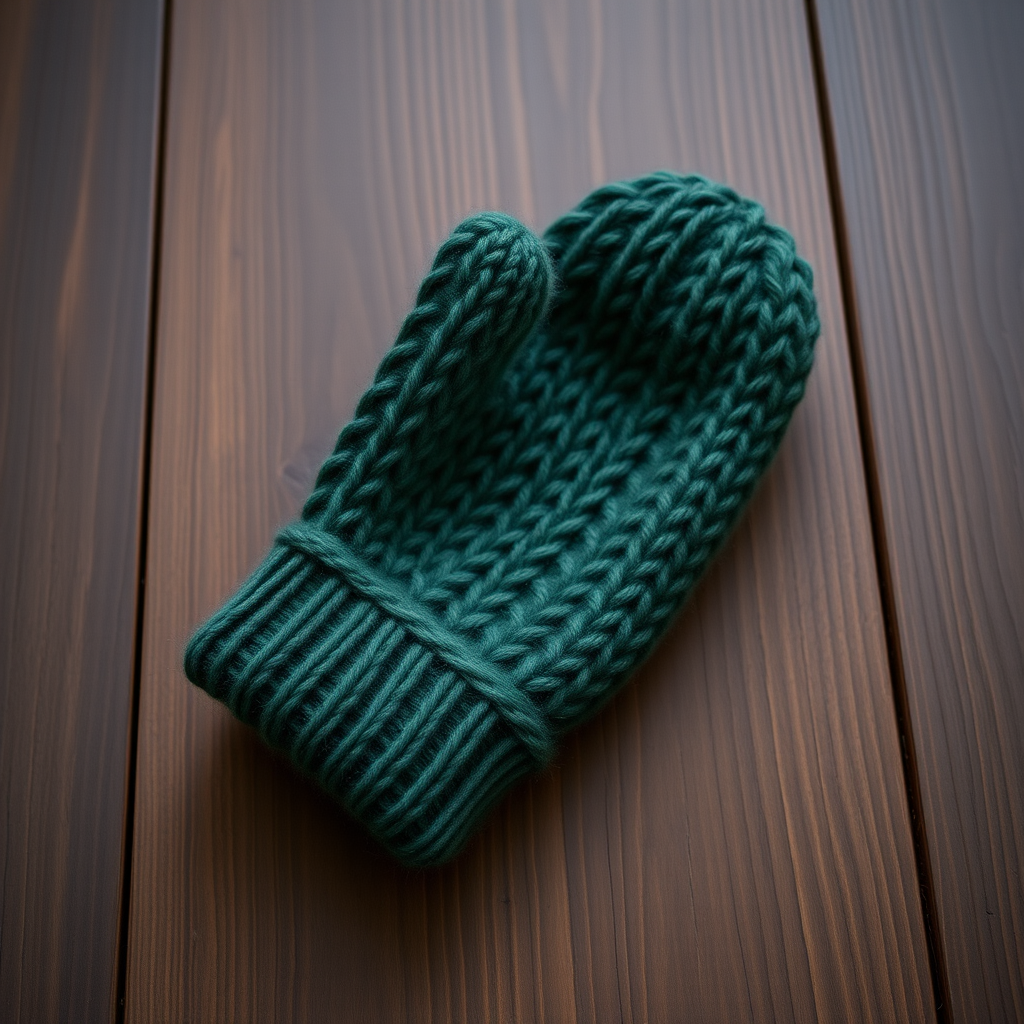
Frosted Bramble Berry Mittens Free Pattern – Knit Cozy Textured Hand Warmers

Frosted Bramble Berry Mittens: A Cozy Knitting Pattern for Textured Hand Warmers
Wrap your hands in the plush, berry-studded texture of these hand-knit mittens, featuring a modern bramble stitch that mimics a winter berry patch. This pattern offers a snug, warm fit with a delicate ribbed cuff and a touch of rustic charm. Whether you're a seasoned knitter looking for a quick weekend project or a brave beginner ready to tackle your first pair of mittens, this free pattern is designed to guide you through every step with clarity and confidence. The result is a pair of hand warmers that are as beautiful to look at as they are cozy to wear.
This pattern creates a dense, plush fabric that invites touch, with a color palette that evokes a frosty berry patch in autumn. The contrast between the deep berry main color and the crisp cream cuff adds a wintry accent that makes these mittens truly special.
Materials Needed
Before you begin, gather the following materials. Having everything ready will make your knitting experience smooth and enjoyable.
Yarn
- Worsted weight yarn (approximately 200-250 yards total)
- Main Color (MC): Deep Berry (e.g., burgundy or plum) – approximately 180-200 yards
- Contrast Color (CC): Cream or Soft White – approximately 20-50 yards (for cuff and optional trim)
Needles
- US 6 (4.0 mm) double-pointed needles (or circular needle for magic loop method) – for the main body
- US 5 (3.75 mm) double-pointed needles – for the ribbed cuff
Additional Supplies
- Stitch holder or scrap yarn for holding thumb stitches
- Tapestry needle for weaving in ends
- Stitch markers (optional, but helpful)
- Scissors
Gauge
20 stitches and 26 rows = 4 inches in stockinette stitch on larger needles (US 6). Adjust needle size as needed to achieve this gauge for the correct finished size.
Step-by-Step Instructions
This pattern is for Adult Medium size (approximately 7.5 inches hand circumference, 10 inches long from cuff to tip). The instructions below are detailed and comprehensive, perfect for a beginner who wants to create a beautiful, professional-looking pair of mittens.
Abbreviations
- CO: cast on
- K: knit
- P: purl
- K2tog: knit two together (right-leaning decrease)
- SSK: slip, slip, knit (left-leaning decrease)
- M1L: make one left (increase – pick up bar between stitches from front, knit through back loop)
- M1R: make one right (increase – pick up bar between stitches from back, knit through front loop)
- St(s): stitch(es)
- MC: main color
- CC: contrast color
Cuff (Make Both Alike)
Step 1: With smaller needles (US 5) and MC yarn, CO 40 stitches.
Step 2: Distribute stitches evenly across your double-pointed needles (or set up for magic loop). Join in the round, being very careful not to twist your stitches. Place a stitch marker at the beginning of the round if desired.
Step 3: Work in K2, P2 ribbing for 2.5 inches. This means: *Knit 2, Purl 2* and repeat from * to * around. Continue this pattern for every round until the cuff measures 2.5 inches from the cast-on edge. The ribbing creates a stretchy, snug cuff that will keep the cold air out.
Hand (Worked in the Round on Larger Needles)
Step 4: Switch to larger needles (US 6). Work in stockinette stitch (knit every round) for 2 rounds. This smooth section will help the bramble pattern pop.
Bramble Berry Pattern (Worked over 4 Rounds)
This is the signature texture of your mittens. It creates a beautiful, raised "berry" effect. Follow these 4 rounds carefully:
- Round 1: *K1, P1, K1, P1* repeat from * to * to end of round.
- Round 2: *P1, K1, P1, K1* repeat from * to * to end of round.
- Round 3: *K1, P1, K1, P1* repeat from * to * to end of round.
- Round 4: *P1, K1, P1, K1* repeat from * to * to end of round.
Step 5: Repeat these 4 rounds until the piece measures 4 inches from the cuff, ending with Round 4. This creates the textured body of the mitten.
Thumb Gusset (Right Mitten)
The thumb gusset adds width to accommodate your thumb. Work this section carefully, as it shapes the mitten.
Step 6: Begin the increases:
- Round 1: K20, M1L, K1, M1R, K19 (42 sts total)
- Round 2: K all stitches (no increases)
- Round 3: K20, M1L, K3, M1R, K19 (44 sts total)
- Round 4: K all stitches
Step 7: Continue increasing in this manner, adding 2 stitches between the M1s each time. This means on each increase round, you'll knit one more stitch before the M1L and one more stitch after the M1R. Continue until you have 13 stitches between the increases (total 52 stitches on your needles).
Step 8: On the next round: K20, place the next 13 stitches on a stitch holder or scrap yarn, K19. You will now have 39 stitches remaining on your needles for the hand.
Thumb Gusset (Left Mitten)
Step 9: Work the same as the right mitten but mirror the increases: K19, M1L, K1, M1R, K20. When placing the thumb stitches, place the 13 thumb stitches after the first 19 stitches.
Hand (Continued)
Step 10: Continue in the Bramble Berry pattern (starting with Round 1) over the 39 stitches until the hand measures 3.5 inches from the thumb opening, ending with Round 4. This gives your hand enough room to be comfortable.
Decreases for Top of Mitten
Now we'll shape the top of the mitten with gentle decreases.
Step 11: Work the decrease rounds:
- Round 1: *K1, K2tog, K1, SSK, K1* repeat from * to * to end of round (30 sts remain)
- Round 2: *K1, K2tog, SSK, K1* repeat from * to * to end of round (20 sts remain)
- Round 3: *K2tog, SSK* repeat from * to * to end of round (10 sts remain)
- Round 4: K2tog around (5 sts remain)
Step 12: Cut the yarn, leaving a 6-inch tail. Thread the tail through a tapestry needle, then thread it through the remaining 5 stitches. Pull tight to close the top of the mitten. Weave in the end securely.
Thumb
Step 13: Transfer the 13 thumb stitches from the holder to the larger needles (US 6).
Step 14: With the right side facing you, pick up 3 stitches along the gap where the thumb meets the hand. You should now have 16 stitches total on your needles.
Step 15: Distribute the stitches evenly on your needles and join in the round. Work in stockinette stitch (knit every round) for 2 inches.
Step 16: Decrease for the thumb top: *K2tog* around (8 sts remain).
Step 17: Cut the yarn, leaving a 6-inch tail. Thread through the remaining 8 stitches, pull tight, and weave in the end.
Finishing
Step 18: Weave in all loose ends using a tapestry needle. Be sure to weave them in securely so they don't come undone with wear.
Step 19: Block the mittens lightly. To block, wet the mittens with lukewarm water, gently squeeze out excess water (don't wring), and lay them flat to dry on a towel. Shape them gently while they dry.
Step 20 (Optional): Add a CC color trim by crocheting a single crochet edge around the cuff using CC yarn. This adds a beautiful, crisp finish that echoes the cream cuff.
Tips for Success
- Check your gauge: Taking the time to knit a gauge swatch will ensure your mittens fit perfectly. If your gauge is off, adjust your needle size accordingly.
- Use stitch markers: Place a marker at the beginning of your round to help you keep track of where you are in the pattern.
- Count your stitches: After each increase round, count your stitches to make sure you haven't missed any.
- Take breaks: Knitting in the round can be repetitive. Take breaks to rest your hands and avoid mistakes.
Your Frosted Bramble Berry Mittens are now complete! These cozy, textured hand warmers are perfect for chilly winter days, and the beautiful bramble stitch pattern is sure to draw compliments. The deep berry and cream color combination evokes a frosty berry patch, making these mittens a true winter treasure. Enjoy wearing them, or gift them to someone special who appreciates the warmth of handmade items.
Happy knitting!