The Ember Glow Fireman Hat: A Free Knitting Pattern for a Textured, Cozy, and Modern Home Decor Piece
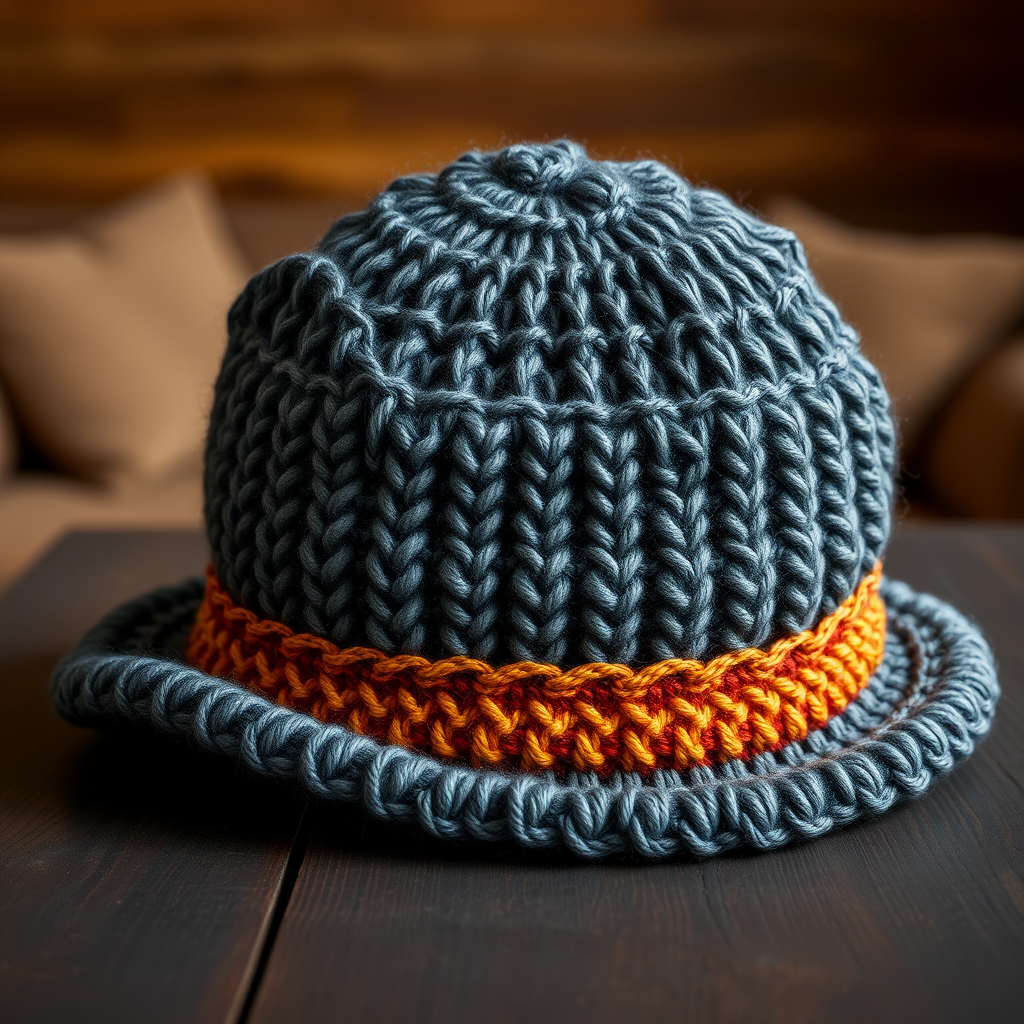
Introducing the Ember Glow Fireman Hat: A Modern Knitted Home Decor Piece
This isn't your average beanie; it's a sculptural, textured wall hanging or decorative basket that captures the warmth and spirit of a fireman's helmet. Knit in a rich, heathered palette of charcoal, rust, and gold, this piece adds a touch of rugged elegance to any room. Whether you hang it on a wall as a cozy art piece or use it as a decorative basket for small treasures, the Ember Glow Fireman Hat is a satisfying project that combines texture, color, and modern design. This free knitting pattern is perfect for intermediate knitters looking to create something unique for their home.
Materials Needed
Before you begin, gather the following materials to ensure a smooth knitting experience:
- Yarn: Worsted weight (Category 4) yarn in three colors:
- Color A (Charcoal/Black) - 100g
- Color B (Rust/Deep Orange) - 80g
- Color C (Gold/Mustard) - 50g
- Needles: US Size 7 (4.5mm) 16-inch circular knitting needles and a set of double-pointed needles (DPNs) in the same size for the crown.
- Notions: Stitch marker, tapestry needle for weaving in ends, scissors.
- Gauge: 18 stitches and 24 rows = 4 inches in Stockinette stitch (knit on right side, purl on wrong side) after blocking. Always check your gauge for best results.
Step-by-Step Instructions
This pattern is knit in the round from the brim up, using a combination of knit and purl stitches to create a textured, helmet-like shape. The brim is worked flat, then joined to form a circle.
Brim (worked flat)
- With Color A, cast on 12 stitches.
- Row 1 (WS): Purl all stitches.
- Row 2 (RS): Knit all stitches.
- Repeat Rows 1-2 until the piece measures 20 inches from the cast-on edge, ending with a WS row.
- Bind off all stitches loosely. Sew the short ends together to form a ring. This is the brim.
Body (worked in the round)
- With Color A and circular needle, pick up and knit 96 stitches evenly around the brim. Place a marker for the beginning of the round.
- Round 1: Knit all stitches.
- Round 2: Purl all stitches.
- Rounds 3-4: Knit all stitches.
- Round 5: *K2, p2; repeat from * around.
- Round 6: *P2, k2; repeat from * around.
- Rounds 7-8: Repeat Rounds 5-6.
- Round 9: With Color B, knit all stitches.
- Round 10: With Color B, purl all stitches.
- Rounds 11-12: With Color B, knit all stitches.
- Round 13: With Color B, *k2, p2; repeat from * around.
- Round 14: With Color B, *p2, k2; repeat from * around.
- Rounds 15-16: Repeat Rounds 13-14.
- Round 17: With Color C, knit all stitches.
- Round 18: With Color C, purl all stitches.
- Rounds 19-20: With Color C, knit all stitches.
- Round 21: With Color C, *k2, p2; repeat from * around.
- Round 22: With Color C, *p2, k2; repeat from * around.
- Rounds 23-24: Repeat Rounds 21-22.
- Round 25: With Color A, knit all stitches.
- Round 26: With Color A, purl all stitches.
- Rounds 27-28: With Color A, knit all stitches.
- Round 29: With Color A, *k2, p2; repeat from * around.
- Round 30: With Color A, *p2, k2; repeat from * around.
- Rounds 31-32: Repeat Rounds 29-30.
Crown Shaping (switch to DPNs when necessary)
As you decrease, the circumference will shrink. When stitches become too tight on the circular needle, switch to double-pointed needles (DPNs). Distribute stitches evenly across 3 or 4 DPNs.
- Round 33: With Color A, *k10, k2tog; repeat from * around. (88 stitches)
- Round 34: Knit all stitches.
- Round 35: *k9, k2tog; repeat from * around. (80 stitches)
- Round 36: Knit all stitches.
- Round 37: *k8, k2tog; repeat from * around. (72 stitches)
- Round 38: Knit all stitches.
- Round 39: *k7, k2tog; repeat from * around. (64 stitches)
- Round 40: Knit all stitches.
- Round 41: *k6, k2tog; repeat from * around. (56 stitches)
- Round 42: Knit all stitches.
- Round 43: *k5, k2tog; repeat from * around. (48 stitches)
- Round 44: Knit all stitches.
- Round 45: *k4, k2tog; repeat from * around. (40 stitches)
- Round 46: Knit all stitches.
- Round 47: *k3, k2tog; repeat from * around. (32 stitches)
- Round 48: Knit all stitches.
- Round 49: *k2, k2tog; repeat from * around. (24 stitches)
- Round 50: Knit all stitches.
- Round 51: *k1, k2tog; repeat from * around. (16 stitches)
- Round 52: Knit all stitches.
- Round 53: *k2tog; repeat from * around. (8 stitches)
- Cut yarn, leaving a 10-inch tail. Thread tail through remaining stitches, pull tight, and secure. Weave in all ends.
Finishing
- Block the hat: Gently wet the hat and shape it over a bowl or a small balloon to create a rounded, helmet-like form. Allow to dry completely. This will help the textured pattern stand out and give the hat its distinctive shape.
- Optional hanging loop: You can add a loop of yarn at the top for hanging, or use it as a decorative basket. To make a loop, cut a 12-inch piece of Color A, fold it in half, and sew the ends securely to the top of the hat.
- Weave in any remaining ends with a tapestry needle. Trim excess yarn.
Your Ember Glow Fireman Hat is now complete! Enjoy your cozy, modern home decor piece that brings warmth and texture to any space.


