The Driftwood Drape Jacket Free Pattern – A Sculptural Asymmetrical Knit
The Driftwood Drape Jacket Free Pattern – A Sculptural Asymmetrical Knit
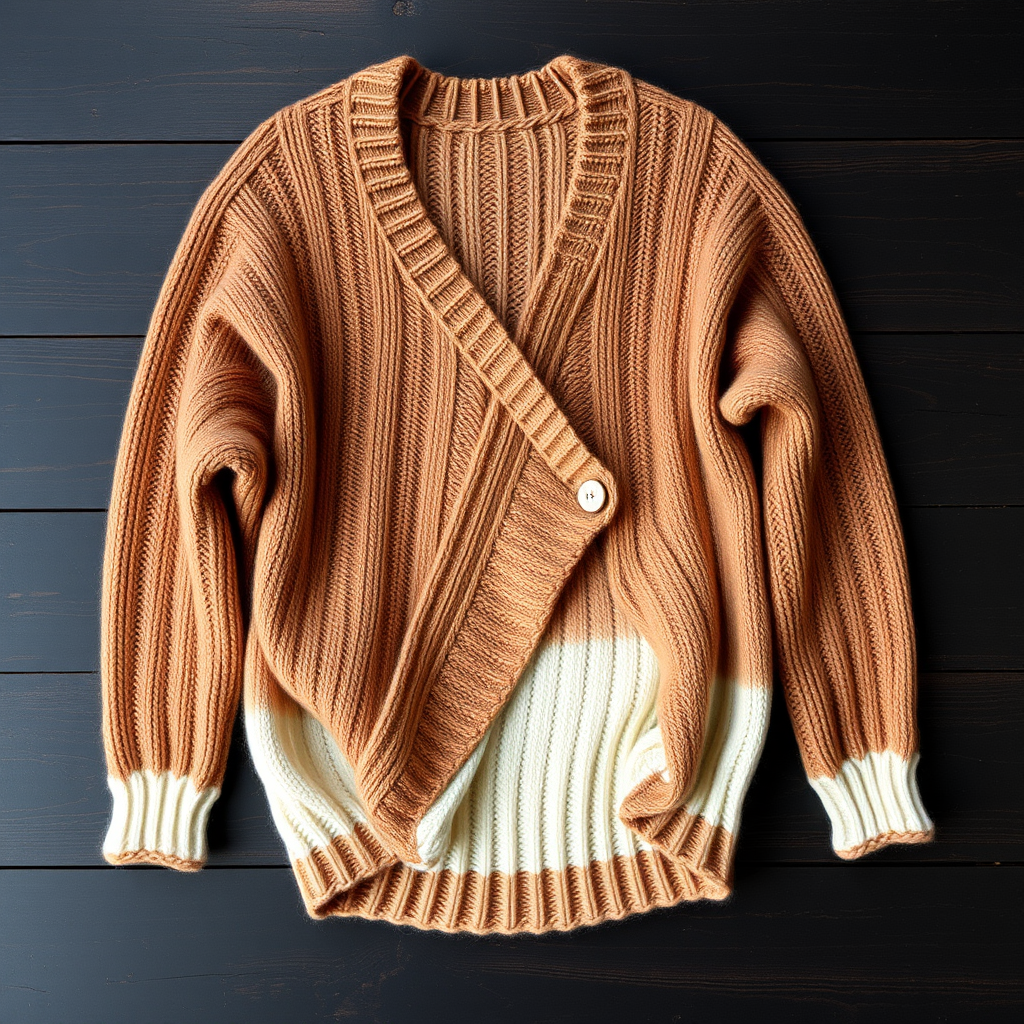
Imagine a jacket that drapes like a woven shawl but fits like a cardigan, with a single dramatic point that sweeps across your body. That's the magic of the Driftwood Drape Jacket. This free knitting pattern creates a statement piece for cool evenings, featuring textured seed-stitch bands and a soft gradient yarn that transitions from deep taupe to cream. The asymmetrical silhouette is both modern and timeless, making it a standout addition to any handmade wardrobe. Whether you're a confident beginner or an experienced knitter looking for a unique project, this pattern offers a rewarding challenge with stunning results.
Materials Needed
Before you begin, gather the following materials to ensure a smooth knitting experience:
- Yarn: Worsted weight yarn in a gradient or tonal colorway. You'll need approximately 500g total: 300g in a warm taupe and 200g in a soft cream, or use a self-striping gradient skein for a seamless color transition.
- Needles: US 9 (5.5 mm) circular needles, 32 inches or longer for the large body; US 8 (5 mm) needles for ribbing.
- Gauge: 16 stitches and 24 rows = 4 inches in stockinette stitch on US 9 needles (blocked). Always check your gauge to ensure proper fit.
- Notions: Stitch holders (or waste yarn), stitch markers, tapestry needle for weaving in ends, and scissors.
Step-by-Step Instructions
This jacket is knit in one piece from the top down, with a unique asymmetrical point created by short rows and increases. The body is worked flat, then the sleeves are picked up and knit in the round. Follow these detailed instructions carefully, and you'll create a beautiful, sculptural garment.
Special Stitches
Familiarize yourself with these techniques before starting:
- M1L (Make 1 Left): Insert left needle from front to back under the bar between stitches, knit through the back loop. This creates a left-leaning increase.
- M1R (Make 1 Right): Insert left needle from back to front under the bar between stitches, knit through the front loop. This creates a right-leaning increase.
- Short Row Wrap & Turn (W&T): Work to the specified stitch, slip the next stitch purlwise, bring yarn to front, slip the stitch back to left needle, turn work. When working the wrapped stitch later, pick up the wrap and knit/purl it together with the stitch to hide the wrap.
Neck and Left Shoulder (Cast On)
- With US 9 needles, cast on 60 stitches loosely. A loose cast-on is essential for a comfortable neckline.
- Row 1 (RS): Knit all stitches.
- Row 2 (WS): Purl all stitches.
- Row 3 (RS): K1, M1R, knit to last stitch, M1L, K1. (62 stitches)
- Row 4 (WS): Purl all stitches.
- Repeat Rows 3-4 two more times. You should now have 66 stitches on your needle. This creates the gentle shaping for the neck and left shoulder.
Shape the Asymmetrical Point (Short Rows)
This section creates the dramatic diagonal point that defines the jacket's silhouette. Work the short rows exactly as written:
- Row 9 (RS): K40, W&T.
- Row 10 (WS): Purl back to start (do not work the wrapped stitch).
- Row 11 (RS): K30, W&T.
- Row 12 (WS): Purl back.
- Row 13 (RS): K20, W&T.
- Row 14 (WS): Purl back.
- Row 15 (RS): K10, W&T.
- Row 16 (WS): Purl back.
- Row 17 (RS): Knit all stitches, picking up and working the wraps as you go. This is crucial to avoid holes. (66 stitches)
- Row 18 (WS): Purl all stitches.
Body Increases (Worked in Stockinette with Seed Stitch Edges)
Now you'll create the A-line shape of the body with regular increases:
- Row 19 (RS): K1, M1R, knit to last stitch, M1L, K1. (68 stitches)
- Row 20 (WS): Purl all stitches.
- Repeat Rows 19-20 every 4th row (i.e., on Rows 23, 27, 31, etc.) until you have 100 stitches on the needle. This gradual increase creates a beautiful, gentle A-line flare.
Divide for Sleeves
When the piece measures 12 inches from the cast-on edge (measured at the center), it's time to separate the sleeves from the body:
- Next RS row: K15 (left front), place next 20 stitches on a holder for left sleeve, cast on 10 stitches under the arm, K30 (back), place next 20 stitches on a holder for right sleeve, cast on 10 stitches under the arm, K15 (right front). You should now have 80 stitches for the body.
Body
- Continue in stockinette stitch (knit RS, purl WS) until the body measures 18 inches from the underarm cast-on.
- Switch to US 8 needles and work in seed stitch for 2 inches. Seed stitch pattern: Row 1: K1, P1 across; Row 2: P1, K1 across. This creates a lovely textured border.
- Bind off loosely in pattern. A loose bind-off ensures the hem doesn't pull or pucker.
Sleeves
- Transfer the 20 held stitches from one sleeve to US 9 double-pointed needles or a short circular needle.
- Pick up and knit 10 stitches from the underarm cast-on, plus 2 stitches at each edge to avoid gaps. You should have 34 stitches total.
- Place a marker at the underarm center. Knit in the round in stockinette stitch (knit every round) for 14 inches, decreasing 2 stitches every 6 rounds (k2tog, knit to 2 sts before marker, ssk) until 20 stitches remain. This creates a gently tapered sleeve.
- Switch to US 8 needles and work in seed stitch for 1 inch.
- Bind off loosely. Repeat for the second sleeve.
Finishing
- Weave in all ends carefully using a tapestry needle. Make sure to secure them well so they don't unravel with wear.
- Block the jacket flat to the measurements, paying special attention to the asymmetrical point to make it lie flat and drape beautifully. Blocking is essential for this pattern to achieve the sculptural shape.
Your Driftwood Drape Jacket is now complete! The finished piece features a warm gradient from deep taupe at the shoulders to soft cream at the hem, with sleeves echoing the same color transition. The smooth stockinette body is framed by subtle, nubby seed-stitch borders at the hem and cuffs, while the striking asymmetrical point sweeps diagonally from the right shoulder down to the left hip, creating a sculptural, wrapped silhouette. With no buttons or closures, this jacket relies on its beautiful drape to stay in place, making it as practical as it is artistic. Enjoy wearing your one-of-a-kind creation!


