Snowy Windowpane Satchel: Free Crochet Pattern
Snowy Windowpane Satchel: Free Crochet Pattern
Introduction
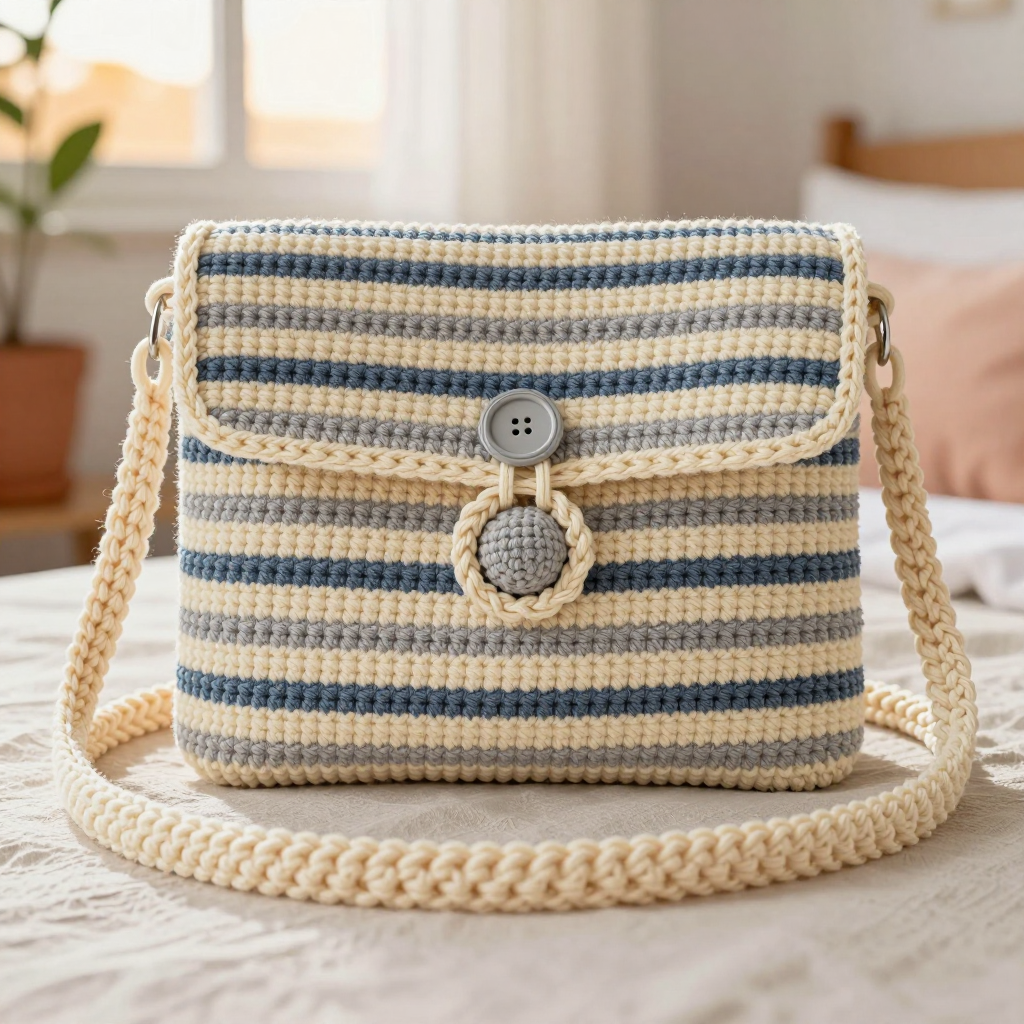
The Snowy Windowpane Satchel is a cozy, envelope-style bag made from one simple flat rectangle that folds up into a sweet little purse. It is written for confident beginners who know single crochet and are ready to try easy color changes, and it is gentle enough for anyone who loves calm, repetitive stitching. Worked in soft cream, light gray, and dusty blue stripes, it has a quiet hygge look that feels like a snowy windowpane on a winter morning. The finished bag is soft but sturdy, with a round stuffed button and a long strap that sits comfortably across the body.
Materials Needed
- Yarn: Worsted weight (category 4) acrylic or wool blend. Color A (cream): 200 yards. Color B (light gray): 150 yards. Color C (dusty blue): 100 yards.
- Hook: 5 mm (H-8) crochet hook.
- Notions: Tapestry needle, scissors, stitch marker, small amount of polyester fiberfill for the button, and a sewing needle and thread (optional, for securing the button).
- Finished size: 12 inches wide x 10 inches tall (folded), with a 4-inch flap.
Abbreviations
- ch — chain: make a loop of yarn and pull it through the loop on your hook.
- sc — single crochet: insert hook into stitch, yarn over, pull up a loop, yarn over, pull through both loops.
- sl st — slip stitch: insert hook into stitch, yarn over, pull through both the stitch and the loop on your hook.
- inc — increase: work 2 single crochet into the same stitch.
- dec — decrease: work 2 single crochet together to make one stitch.
- st(s) — stitch(es).
- Rnd — round: a full circle of stitches worked around.
- [ ] x6 — repeat the instructions inside the brackets six times.
Gauge
16 stitches x 18 rows = 4 inches in single crochet. To check, crochet a small swatch in single crochet and measure a 4-inch section; if you have more stitches than 16, go up a hook size, and if you have fewer, go down.
Tips Before You Start
- Change colors on the last yarn-over of the stitch before the new color row begins, so the color change sits neatly at the edge.
- Keep your tension relaxed and even; the bag is worked flat, so consistent rows keep the rectangle from pulling in at the corners.
- Count your 48 stitches at the end of every row — the windowpane stripes only look straight if the stitch count stays the same.
- Leave 6-inch tails when you fasten off so you have plenty of yarn for weaving in later.
Step-by-Step Instructions
Bag Base
Worked flat in rows, changing colors for the windowpane pattern.
With A, ch 49.
Row 1: sc in 2nd ch from hook and each ch across (48 sts).
Row 2: sc in each st across (48 sts).
Row 3: change to B, sc in each st across (48 sts).
Row 4: sc in each st across (48 sts).
Row 5: change to A, sc in each st across (48 sts).
Row 6: sc in each st across (48 sts).
Row 7: change to C, sc in each st across (48 sts).
Row 8: sc in each st across (48 sts).
Row 9: change to A, sc in each st across (48 sts).
Row 10: sc in each st across (48 sts).
Row 11: change to B, sc in each st across (48 sts).
Row 12: sc in each st across (48 sts).
Rows 13–40: repeat Rows 1–12 twice more, then repeat Rows 1–4 once more (48 sts). Total 40 rows.
Fasten off.
Fold and Seam
Fold the rectangle in half widthwise, right sides together, so the bottom edge meets Row 20. Whipstitch or single crochet the side edges together to form a bag, leaving the top open. Turn right side out.
Flap
With A, join yarn at the top right corner of the bag opening. Work sc evenly across the top edge (48 sts).
Row 1: sc in each st across (48 sts).
Row 2: sc in each st across (48 sts).
Row 3: change to B, sc in each st across (48 sts).
Row 4: sc in each st across (48 sts).
Row 5: change to A, sc in each st across (48 sts).
Row 6: sc in each st across (48 sts).
Row 7: change to C, sc in each st across (48 sts).
Row 8: sc in each st across (48 sts).
Row 9: change to A, sc in each st across (48 sts).
Row 10: sc in each st across (48 sts).
Row 11: change to B, sc in each st across (48 sts).
Row 12: sc in each st across (48 sts).
Rows 13–16: change to A, sc in each st across (48 sts).
Fasten off.
Button Loop
With A, ch 10, join with sl st to form a ring. Sc in each ch around (10 sts). Fasten off. Sew the loop to the center of the flap edge.
Button
With B, make a magic ring, 6 sc in ring (6 sts).
Rnd 1: 6 sc in magic ring (6 sts).
Rnd 2: inc x6 (12 sts).
Rnd 3: [sc, inc] x6 (18 sts).
Rnd 4: sc in each st around (18 sts).
Stuff lightly.
Rnd 5: [sc, dec] x6 (12 sts).
Rnd 6: dec x6 (6 sts).
Fasten off, leaving a long tail. Sew the button to the bag front, centered, opposite the loop.
Strap
With A, ch 4.
Row 1: sc in each st across (3 sts).
Work in rows, repeating Row 1, until the strap measures 40 inches. Fasten off. Sew the ends to the sides of the bag at the top edge.
Edging
With A, sc evenly around the entire outer edge of the flap and bag opening. Fasten off. Weave in ends.
Assembly and Finishing
Seam the bag sides as described in Fold and Seam, then turn the bag right side out and shape the corners with your fingers. Sew the button loop to the center of the flap edge and the stuffed button to the bag front directly opposite it, checking that the loop fits over the button before you knot the thread. Sew the strap ends firmly to the sides of the bag at the top edge, going over the join twice for strength. Weave in all ends on the wrong side, then block lightly: mist the bag with water, stuff it with a folded towel to hold its shape, and let it dry flat away from direct heat.
Pro Tips and Variations
- Swap the dusty blue for a deep berry or forest green for a different seasonal look while keeping the same stripe sequence.
- Make the strap longer for a crossbody fit, or shorter and wider for a shoulder bag.
- Add a fabric lining by hand-sewing a simple rectangle pouch inside the bag before attaching the strap for extra structure.