Starlight Ember Camping Blanket Free Pattern – Knit a Cozy Night-Sky Throw
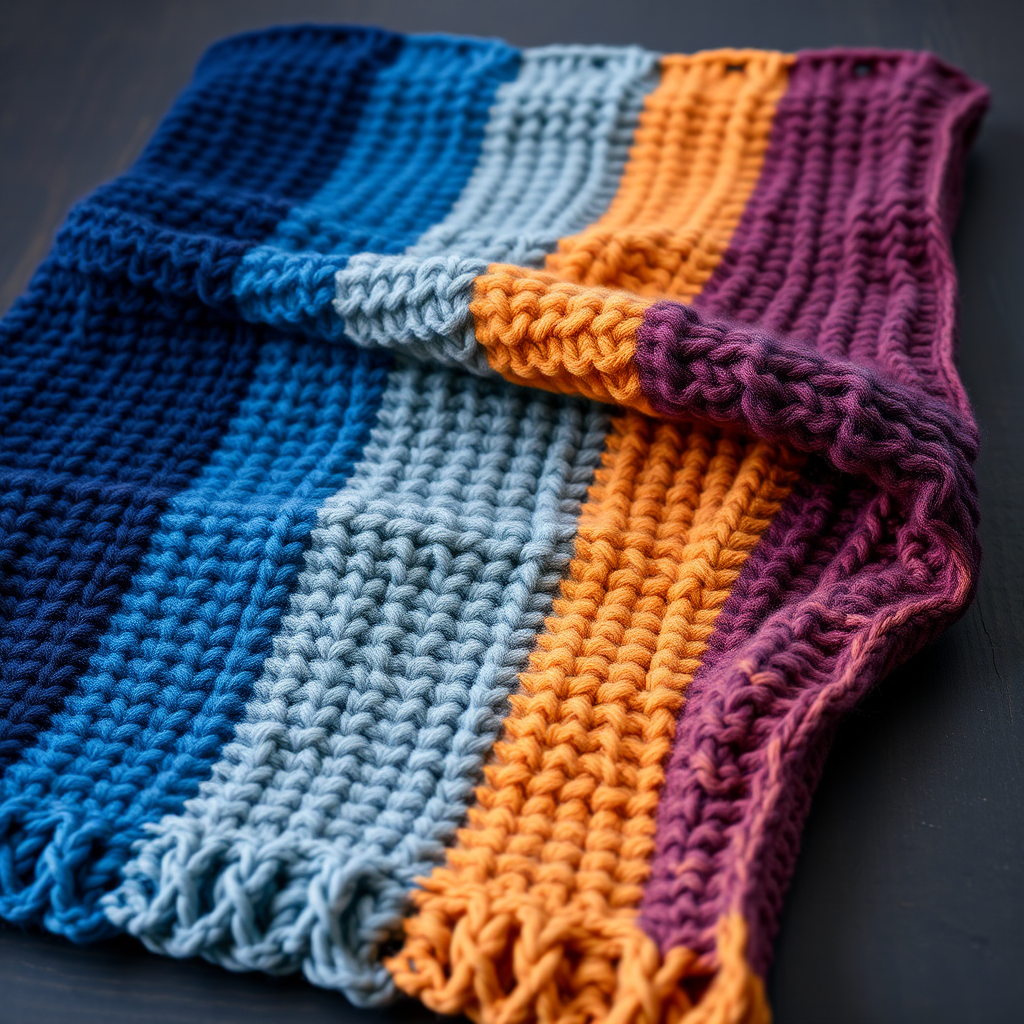
Starlight Ember Camping Blanket Free Pattern – Knit a Cozy Night-Sky Throw
Imagine wrapping yourself in the magic of a crackling campfire under a canopy of stars. The Starlight Ember Camping Blanket captures that perfect outdoor evening in a uniquely textured, gradient knit throw. With deep twilight blues flowing into smoky indigo and warm amber speckles, this blanket is crafted for ultimate coziness—whether you're stargazing by the fire, curling up in a cabin, or simply dreaming of your next adventure.
This free knitting pattern is designed for intermediate beginners who want to expand their skills. The clever use of two strands held together creates a thick, plush fabric that works up faster than you'd expect, while the gradient color transitions and textured stitch bands produce a stunning, one-of-a-kind result. Best of all, it's knit in one piece from the bottom up—no seaming required!
Materials Needed
Before you begin, gather these supplies to ensure a smooth knitting experience:
Yarn
- Color A (Deep Midnight Blue): 800g worsted weight yarn
- Color B (Smoky Indigo): 600g worsted weight yarn
- Color C (Ember Amber): 400g worsted weight yarn
Tip: Choose a soft, machine-washable wool or acrylic blend for easy care. The blanket uses two strands held together, so you'll need approximately 1800g total yarn.
Needles & Notions
- US 9 (5.5mm) circular knitting needles with a 32-inch cable
- Stitch markers (optional, for tracking sections)
- Tapestry needle for weaving in ends
- Scissors
Gauge
18 stitches and 24 rows = 4 inches in stockinette stitch (with two strands held together). Always knit a gauge swatch first to ensure your finished blanket matches the intended dimensions of approximately 50 inches wide by 60 inches long.
Step-by-Step Instructions
This blanket is knit in one piece from the bottom up, using a combination of garter, stockinette, and a unique "ember" stitch pattern that creates a subtle, sparkly texture. Follow along carefully, and you'll have a gorgeous heirloom-quality throw in no time.
Abbreviations
- CO: cast on
- K: knit
- P: purl
- St(s): stitch(es)
- Rep: repeat
- RS: right side
- WS: wrong side
Pattern Notes
- The finished blanket measures 50 inches wide and 60 inches long.
- Work with two strands of yarn held together for a thicker, cozier fabric: one strand of Color A (or B) and one strand of Color C (for the ember sections).
- The "Ember Stitch" is a 4-row repeat that creates a bumpy, heathered texture—perfect for mimicking glowing campfire embers.
- Keep your tension consistent, especially when switching between stitch patterns.
Foundation
CO 225 sts with Color A (single strand).
Border (Rows 1-10)
Work in garter stitch (knit every row) for 10 rows. This creates a neat, sturdy edge that won't curl.
Main Body
Now the fun begins! You'll work in five distinct sections, gradually transitioning colors and stitch patterns to create the gradient night-sky effect. Each section is 40 rows long.
Section 1 (Rows 11-50): Deep Midnight Base
- Switch to holding one strand of Color A and one strand of Color C together.
- Row 11 (RS): K all sts.
- Row 12 (WS): P all sts.
- Row 13 (RS): *K1, P1; rep from * to end.
- Row 14 (WS): *P1, K1; rep from * to end.
- Rep Rows 11-14 until you have completed 40 rows total in this section (ending with a Row 14).
Pro tip: The K1, P1 ribbing creates a subtle seed-like texture that hints at the ember effect to come.
Section 2 (Rows 51-90): Smoky Indigo Transition
- Switch to holding one strand of Color B and one strand of Color C together.
- Row 51 (RS): K all sts.
- Row 52 (WS): P all sts.
- Row 53 (RS): *K2, P2; rep from * to end.
- Row 54 (WS): *P2, K2; rep from * to end.
- Rep Rows 51-54 until you have completed 40 rows total in this section (ending with a Row 54).
Pro tip: The K2, P2 ribbing adds more pronounced texture, marking the shift toward the warmer color palette.
Section 3 (Rows 91-130): Ember Amber Heart
- Switch to holding two strands of Color B together.
- Row 91 (RS): K all sts.
- Row 92 (WS): P all sts.
- Row 93 (RS): *K3, P1; rep from * to end.
- Row 94 (WS): *P3, K1; rep from * to end.
- Rep Rows 91-94 until you have completed 40 rows total in this section (ending with a Row 94).
Pro tip: This section creates the most pronounced texture—the K3, P1 pattern produces raised columns that feel wonderful against your skin.
Section 4 (Rows 131-170): Twilight Descent
- Switch to holding one strand of Color B and one strand of Color A together.
- Row 131 (RS): K all sts.
- Row 132 (WS): P all sts.
- Row 133 (RS): *K1, P3; rep from * to end.
- Row 134 (WS): *P1, K3; rep from * to end.
- Rep Rows 131-134 until you have completed 40 rows total in this section (ending with a Row 134).
Pro tip: Notice how the texture mirrors Section 3 but reversed—this creates a beautiful symmetry in the overall design.
Section 5 (Rows 171-210): Deep Midnight Return
- Switch to holding two strands of Color A together.
- Row 171 (RS): K all sts.
- Row 172 (WS): P all sts.
- Row 173 (RS): *K2, P2; rep from * to end.
- Row 174 (WS): *P2, K2; rep from * to end.
- Rep Rows 171-174 until you have completed 40 rows total in this section (ending with a Row 174).
Border (Rows 211-220)
- Continue with two strands of Color A.
- Work in garter stitch (knit every row) for 10 rows.
Bind Off
Bind off loosely in knit on the RS. A loose bind-off is crucial here—if it's too tight, the edge will pucker. Consider using a needle one size larger for the bind-off row if needed.
Finishing
- Weave in all ends carefully with a tapestry needle, making sure to secure them well since the blanket will be washed and used frequently.
- Gently block the blanket to even out the stitches and enhance the texture. Lay it flat on a clean surface, pin the edges to your desired dimensions, and mist with water. Allow to dry completely.
- Optional fringe: Add a simple fringe to the short ends using leftover yarn in coordinating colors for a rustic campfire look. Cut 12-inch strands, fold in half, and pull through the edge stitches using a crochet hook. Trim evenly.
Final Thoughts
Your Starlight Ember Camping Blanket is now ready to accompany you on all your outdoor adventures—or simply to grace your living room with its cozy, celestial charm. The gradient colors and textured bands make this a truly special piece that looks far more complex than it actually is to knit.
We'd love to see your finished creation! Share photos on social media with the hashtag #StarlightEmberBlanket and tag us so we can admire your handiwork. Happy knitting, and may your nights always be filled with warm embers and bright stars!


