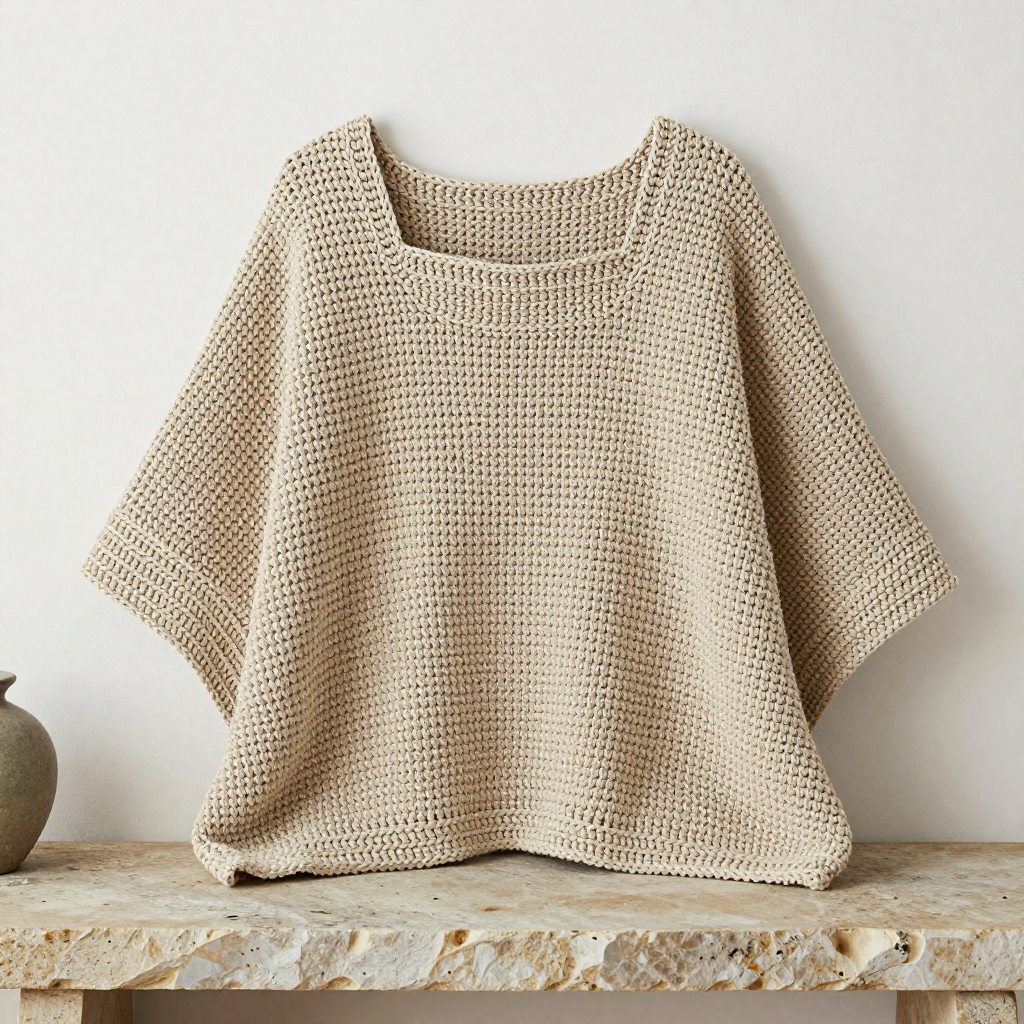
Seafoam Broomstick Lace Poncho Free Pattern

Introduction
Welcome to the Seafoam Broomstick Lace Poncho — a soft, drapey, coastal-inspired layer that looks far more complicated than it actually is. This project is perfect for a confident beginner who has mastered single crochet and is ready to learn one magical new skill: broomstick lace. The finished poncho is light and airy, with big open loops in horizontal bands separated by solid single-crochet stripes, finished with a delicate shell border and a neat crab-stitch neckline. It feels like a gentle sea breeze in garment form — soft seafoam green with pale sand and soft aqua stripes, draping beautifully over the shoulders. You will be so proud to wear this, and even prouder to say you made it.
Materials Needed
- Yarn: Worsted weight (category 4) yarn, approximately 900–1000 yards total:
- 600 yards seafoam green (Color A)
- 250 yards pale sand/cream (Color B)
- 100 yards soft aqua (Color C)
- Crochet hook: US H/8 (5.0 mm)
- Broomstick lace pin: 1-inch (25 mm) diameter broomstick lace pin — or a 25 mm knitting needle or a smooth wooden dowel
- Stitch markers (at least 4)
- Tapestry needle (blunt tip, large eye) for weaving in ends
- Scissors
- Measuring tape
- Blocking mats and pins (optional but recommended)
Finished size: Width shoulder-to-shoulder when folded: 26 inches across the top edge. Length from shoulder to lower point: 30 inches. Neck opening: 9 inches wide boat neck. The flat rectangle before folding measures 52 inches wide × 30 inches long.
Abbreviations and Beginner Glossary
- ch — chain: yarn over the hook, pull through the loop on your hook. Creates a foundation or a space.
- sc — single crochet: insert hook into stitch, yarn over, pull up a loop (2 loops on hook), yarn over, pull through both loops. One loop remains.
- dc — double crochet: yarn over, insert hook into stitch, yarn over, pull up a loop (3 loops on hook), yarn over, pull through 2 loops, yarn over, pull through remaining 2 loops.
- sl st — slip stitch: insert hook into stitch, yarn over, pull through both the stitch and the loop on your hook at the same time. Used to join rounds or move without adding height.
- sc2tog — single crochet two stitches together (a decrease): insert hook into first stitch, pull up a loop, insert hook into next stitch, pull up a loop (3 loops on hook), yarn over, pull through all 3 loops.
- RS — right side: the front, public-facing side of your work.
- WS — wrong side: the back side of your work.
- st(s) — stitch(es).
- rnd — round: a row worked in a circle, joined at the end.
- yo — yarn over: wrap the yarn over your hook.
- Shell — (2 dc, ch 1, 2 dc) all worked into the same stitch or space, creating a fan shape.
- Broomstick loop group — insert hook into the first loop on the pin, slide that loop off the pin, work the stated number of sc into that loop group; repeat across.
- Reverse sc (crab stitch) — single crochet worked backwards (right to left if you are right-handed): insert hook into the stitch to the right of your hook, pull up a loop, yarn over, pull through both loops. Creates a neat twisted cord edge.
Gauge
In broomstick lace pattern: 4 broomstick loops and 4 rows = 4 inches (10 cm).
In single crochet: 16 sc and 18 rows = 4 inches (10 cm).
Why gauge matters: Gauge is how many stitches and rows fit into a set measurement. If your stitches are bigger than the pattern's, your poncho will come out too large; if smaller, too small. Because this poncho is worked as one large rectangle, an off-gauge swatch can change the finished size by several inches.
How to make a gauge swatch: With Color A and your H/8 hook, chain 25. Work 2 rows of single crochet, then work one full broomstick pattern repeat (loop pass + return pass + 2 sc rows). Measure the center 4 inches with your tape. Count how many loops and rows fit in that 4 inches. If you have more than 4 loops, try a larger hook; if fewer, try a smaller hook. Always swatch before you begin.
Beginner Tips Before You Start
- Keep your loops loose. When you pull up loops onto the pin, do not pull the yarn tight. Loose, even loops are what give broomstick lace its beautiful drape.
- Use stitch markers. Place a marker in the first and last stitch of every sc row, and a marker at each 52-stitch quarter of the loop row. This keeps your 208 stitches easy to count.
- Count your loop groups. Every return pass must produce 52 loop groups (208 sc). If you come up short, you dropped a loop — fix it before moving on.
- Always work the loop pass with the right side facing you. This keeps the texture consistent and the stripes neat.
- Change colors on the last sc row of a section, not mid-loop, so the color change hides inside a solid band.
- Relax your tension. Broomstick lace is worked loosely; if your hand aches, you are gripping too hard. Take breaks.
Step-by-Step Instructions
Setup and Foundation
With Color A, ch 209 loosely.
Row 1 (RS): Sc in 2nd ch from hook and in each ch across — (208 sc). Turn.
Broomstick Pattern Repeat (Rows 2–5)
Row 2 (loop pass): Ch 1, pull up a loop in each sc across, placing all 208 loops onto the broomstick pin. Do not turn.
Row 3 (return pass): With RS facing, insert hook into first 4 loops on pin, pull them off together, work 4 sc into the group; *pull off next 4 loops, work 4 sc into group; repeat from * across — (52 loop groups, 208 sc). Turn.
Rows 4–5: Ch 1, sc in each sc across — (208 sc). Turn. Fasten off Color A after Row 5.
This four-row sequence (Rows 2–5) is your pattern repeat. You will repeat it many times below.
Stripe Sequence (Rows 6–145)
Work the broomstick pattern repeat (Rows 2–5) continuously, changing colors as listed. Each "pattern repeat" below means one full set of Rows 2–5.
- Rows 6–17: Color A (3 pattern repeats) — (208 sc)
- Rows 18–25: Color B (2 pattern repeats) — (208 sc)
- Rows 26–37: Color A (3 pattern repeats) — (208 sc)
- Rows 38–41: Color C (1 pattern repeat) — (208 sc)
- Rows 42–53: Color A (3 pattern repeats) — (208 sc)
- Rows 54–61: Color B (2 pattern repeats) — (208 sc)
- Rows 62–73: Color A (3 pattern repeats) — (208 sc)
- Rows 74–77: Color C (1 pattern repeat) — (208 sc)
- Rows 78–89: Color A (3 pattern repeats) — (208 sc)
- Rows 90–97: Color B (2 pattern repeats) — (208 sc)
- Rows 98–109: Color A (3 pattern repeats) — (208 sc)
- Rows 110–113: Color C (1 pattern repeat) — (208 sc)
- Rows 114–125: Color A (3 pattern repeats) — (208 sc)
- Rows 126–133: Color B (2 pattern repeats) — (208 sc)
- Rows 134–145: Color A (3 pattern repeats) — (208 sc)
End after a return pass row (a loop row) in Color A. Do not fasten off. Your rectangle now measures approximately 52 inches wide × 30 inches long.
Neck Opening and Folding
Step 1: Fold the rectangle in half widthwise with right sides together, aligning the two 52-inch edges. The fold becomes the center front and center back.
Step 2: Mark the center 9 inches of the top edge (the folded edge) for the boat neck. This section stays open — do not seam it.
Step 3: Seam the top edge from each outer corner inward to the neck markers using slip stitch in Color A, leaving the center 9 inches open.
Step 4: Seam the two short side edges together from the top edge down 12 inches for the shoulder/sleeve seam, leaving the lower 18 inches open for the armholes and drape.
Step 5: Turn right side out.
Shell-Stitch Border
With Color A, join yarn at the lower front point.
Rnd 1: Sc evenly around the entire lower edge and around both armhole openings, working 1 sc in each stitch or row end, and 3 sc in each corner. Join with sl st to first sc.
Rnd 2: Ch 3 (counts as first dc), *skip 2 sc, work Shell (2 dc, ch 1, 2 dc) in next sc; repeat from * around, adjusting so shells sit evenly; join with sl st to top of beginning ch-3.
Rnd 3: Sl st into first ch-1 space, ch 3, work Shell in same space, *work Shell in next ch-1 space; repeat from * around. Join. Fasten off.
Neck Edging
With Color A, join yarn at one side of the boat neck. Work 1 round of sc evenly around the neck opening, then 1 round of reverse sc (crab stitch). Fasten off.
Assembly and Finishing
Seaming: Use a tapestry needle and a length of Color A to whipstitch or slip stitch the shoulder seams and side seams as described in the Folding section. Work from the right side if you prefer an invisible seam, or from the wrong side for a flatter finish. Keep your stitches loose so the seams stretch with the fabric.
Weaving in ends: Thread each yarn tail onto the tapestry needle and weave it back and forth through the wrong side of the fabric for about 2 inches, changing direction once. Trim close to the fabric. Never knot your ends — knots work loose and create lumps.
Blocking: Mist the poncho lightly with water and pin it to the finished measurements on blocking mats, allowing the broomstick loops to open and drape. Pin the shell border flat and shape the neckline. Let it dry completely — usually 24 hours — before wearing. This step is what makes the lace look professional.
Pro Tips and Variations
- Change the color story: Swap the seafoam, sand, and aqua for a sunset palette (coral, peach, and gold) or a winter palette (charcoal, silver, and ice blue). Keep Color A as your dominant shade so the stripes stay balanced.
- Adjust the size: To make the poncho wider or narrower, add or remove chains in multiples of 4 (each loop group uses 4 stitches). Add or remove full pattern repeats to change the length — each repeat adds about 2 inches.
- Try a different yarn: A cotton-blend worsted gives a crisp, coastal look; a wool-blend gives warmth and springier drape. Always re-swatch, because different fibers behave differently.
- Customize the border: For a simpler finish, replace the shell border with two rounds of single crochet. For extra drama, work a picot edging (ch 3, sl st in same stitch) along the lower edge.