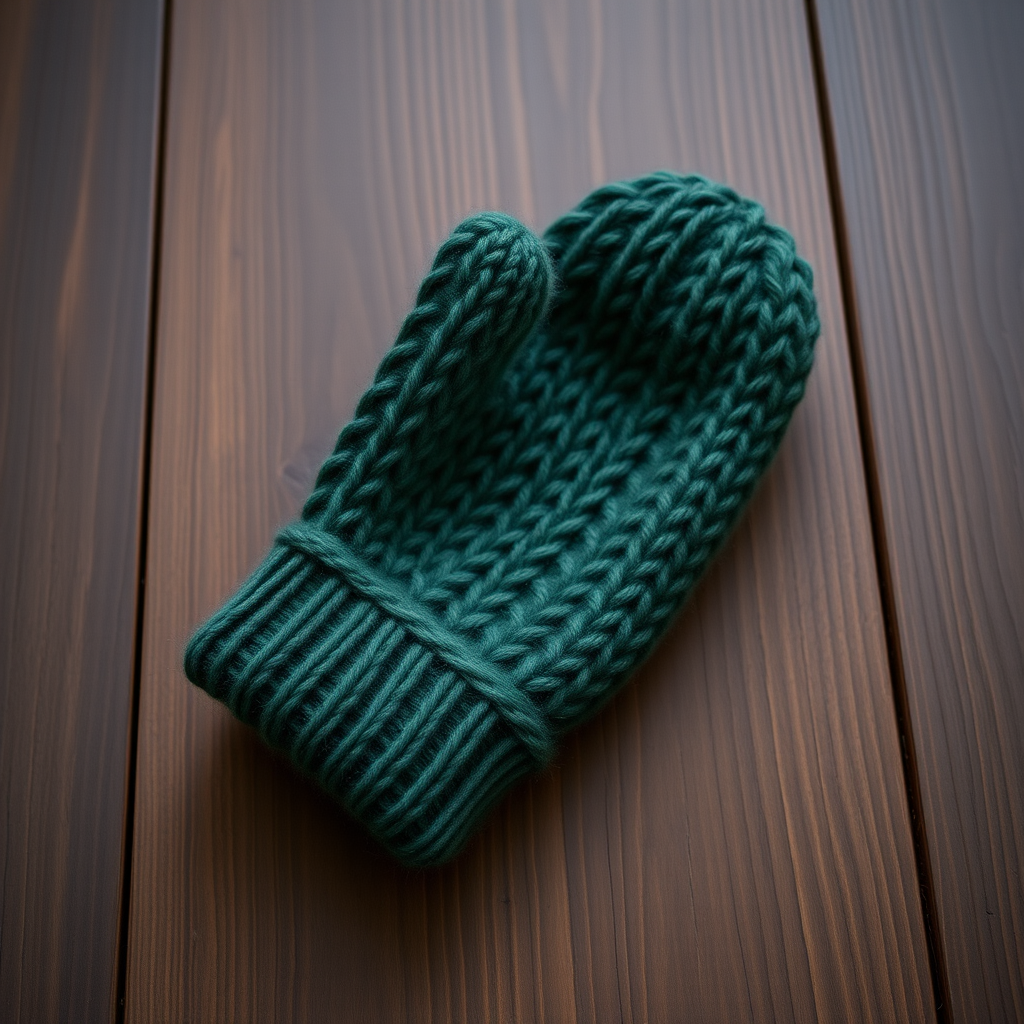
One Hank Wonder Mittens Free Pattern

One Hank Wonder Mittens: A Cozy, Beginner-Friendly Knitting Pattern
There's something truly magical about transforming a single hank of yarn into a pair of warm, handcrafted mittens. The One Hank Wonder Mittens are the perfect weekend project for knitters of all levels—especially beginners looking to expand their skills beyond simple scarves. This free pattern uses just one skein of worsted weight yarn, features a gorgeous honeycomb-like textured stitch that looks far more complex than it actually is, and includes a perfectly fitted thumb gusset that will make you feel like a pro.
Whether you're knitting a last-minute gift for a loved one or treating yourself to a cozy new accessory, these mittens deliver on both style and function. The rich, textured fabric is warm and squishy, while the classic ribbed cuff ensures a snug, comfortable fit. Let's dive into this delightful pattern that proves you don't need a mountain of materials to create something beautiful.
Materials Needed
Before you begin, gather the following supplies. The beauty of this pattern is its simplicity—you only need a few basic tools and one hank of yarn!
Yarn
- 1 hank (approx. 200 yards) of worsted weight yarn. Great options include Malabrigo Rios or Cascade 220. Choose a heathered or solid color to showcase the textured stitch pattern beautifully.
Needles & Notions
- US 6 (4.0 mm) double-pointed needles (or a circular needle if you prefer the magic loop method)
- Tapestry needle for weaving in ends
- Stitch markers (at least 2)
- Scrap yarn or stitch holder for the thumb stitches
Gauge
- 20 stitches and 28 rows = 4 inches in stockinette stitch (after blocking). Be sure to check your gauge to ensure a proper fit!
Step-by-Step Instructions
This pattern is worked in the round from the cuff down. The textured stitch is a simple 4-round repeat that creates a lovely honeycomb-like fabric. Follow along carefully, and you'll have a beautiful pair of mittens in no time.
Sizes & Abbreviations
Sizes: Adult Small (Medium/Large) to fit hand circumference 7 (8/9) inches.
Abbreviations:
- CO = cast on
- K = knit
- P = purl
- K2tog = knit two together (decrease)
- SSK = slip slip knit (decrease)
- PM = place marker
- SM = slip marker
- M1L = make one left (increase)
- M1R = make one right (increase)
- BO = bind off
Pattern Notes
Worked in the round from the cuff down. The textured pattern is a simple 4-round repeat that creates a lovely honeycomb-like fabric. All rounds are worked continuously without turning.
Step 1: The Cuff
CO 36 (40/44) stitches. Distribute evenly on DPNs (or use the magic loop method on a circular needle). Join in the round, being very careful not to twist your stitches. Place a marker at the beginning of the round.
Work K1, P1 ribbing for 2 inches. This creates a stretchy, snug cuff that will keep the cold air out.
Step 2: The Body (Textured Pattern)
Now you'll begin the beautiful honeycomb texture. Work the following 4-round repeat over all stitches:
- Round 1: *K2, P2* repeat to end of round.
- Round 2: *P2, K2* repeat to end of round.
- Round 3: *K2, P2* repeat to end of round.
- Round 4: *P2, K2* repeat to end of round.
Repeat these 4 rounds until the piece measures 3.5 (4/4.5) inches from the cast-on edge, ending with Round 4. This creates a lovely, squishy fabric with subtle depth.
Step 3: Thumb Gusset (Right Mitten)
Now we'll create the thumb opening. The gusset increases stitches gradually to accommodate your thumb.
- Round 1: K1, PM, M1R, K1, M1L, PM, knit to end of round (2 stitches increased).
- Round 2: Knit all stitches, slipping markers.
- Round 3: K1, SM, M1R, knit to marker, M1L, SM, knit to end of round.
Repeat Rounds 2 and 3 until there are 9 (11/13) stitches between the markers. End with a Round 2 (a plain knit round).
Next round: K1, SM, place the 9 (11/13) stitches between markers onto a scrap yarn holder. CO 1 stitch over the gap (using the backward loop method), SM, knit to end. You now have 36 (40/44) stitches on the needles.
Step 4: Thumb Gusset (Left Mitten)
For the left mitten, work the gusset symmetrically. Instead of starting with K1, you'll knit to the last stitch of the round, then place your markers. Here's how:
- Round 1: Knit to the last stitch, PM, M1R, K1, M1L, PM.
Then follow the same increase pattern as the right mitten, working Rounds 2 and 3 until you have 9 (11/13) stitches between markers. Complete the gusset exactly as described for the right mitten.
Step 5: The Hand
After the gusset is complete, continue in the established textured pattern (Rounds 1-4) over all stitches until the hand measures 4.5 (5/5.5) inches from the top of the thumb gusset, or until the mitten reaches the tip of your pinky finger. This ensures the mitten will be the perfect length.
Step 6: Decreases for the Top
Now we'll shape the top of the mitten with gentle decreases:
- Round 1: *K2tog, K1* repeat to end of round (24/27/30 stitches remain).
- Round 2: Knit all stitches.
- Round 3: *K2tog* repeat to end of round (12/14/15 stitches remain).
- Round 4: Knit all stitches.
- Round 5: *K2tog* repeat to end of round (6/7/8 stitches remain).
Cut the yarn, leaving a 6-inch tail. Thread the tail through the remaining stitches using your tapestry needle, pull tight to close the top, and secure the end inside the mitten.
Step 7: The Thumb
Now for the finishing touch—the thumb!
- Transfer the held thumb stitches onto DPNs.
- Pick up and knit 2 stitches from the gap (one from the CO stitch and one from the side). You now have 11 (13/15) stitches.
- Work in stockinette stitch (knit every round) for 2 (2.5/3) inches, or until the thumb covers the base of your thumbnail.
- Next round: *K2tog* repeat to end of round (6/7/8 stitches remain).
- Cut yarn, thread through remaining stitches, pull tight, and secure.
Step 8: Finishing Touches
Weave in all ends carefully using your tapestry needle. Block gently by wetting the mittens and laying them flat to dry—this helps even out the stitches and enhances the textured pattern. Repeat the entire process for the second mitten, remembering to work the thumb gusset on the opposite side for a mirror-image pair.
Final Thoughts
Congratulations! You've just knitted a beautiful pair of One Hank Wonder Mittens. These cozy hand warmers make wonderful gifts, and the one-hank requirement means you can knit them in a rainbow of colors without breaking the bank. The honeycomb texture is both elegant and practical, providing extra warmth and grip. Whether you're a beginner looking to tackle your first pair of mittens or an experienced knitter seeking a quick, satisfying project, this pattern delivers. Happy knitting!