Lily Pad Lullaby Baby Frog Hat Free Pattern – Crochet a Pondside Crown
Lily Pad Lullaby Baby Frog Hat Free Pattern – Crochet a Pondside Crown
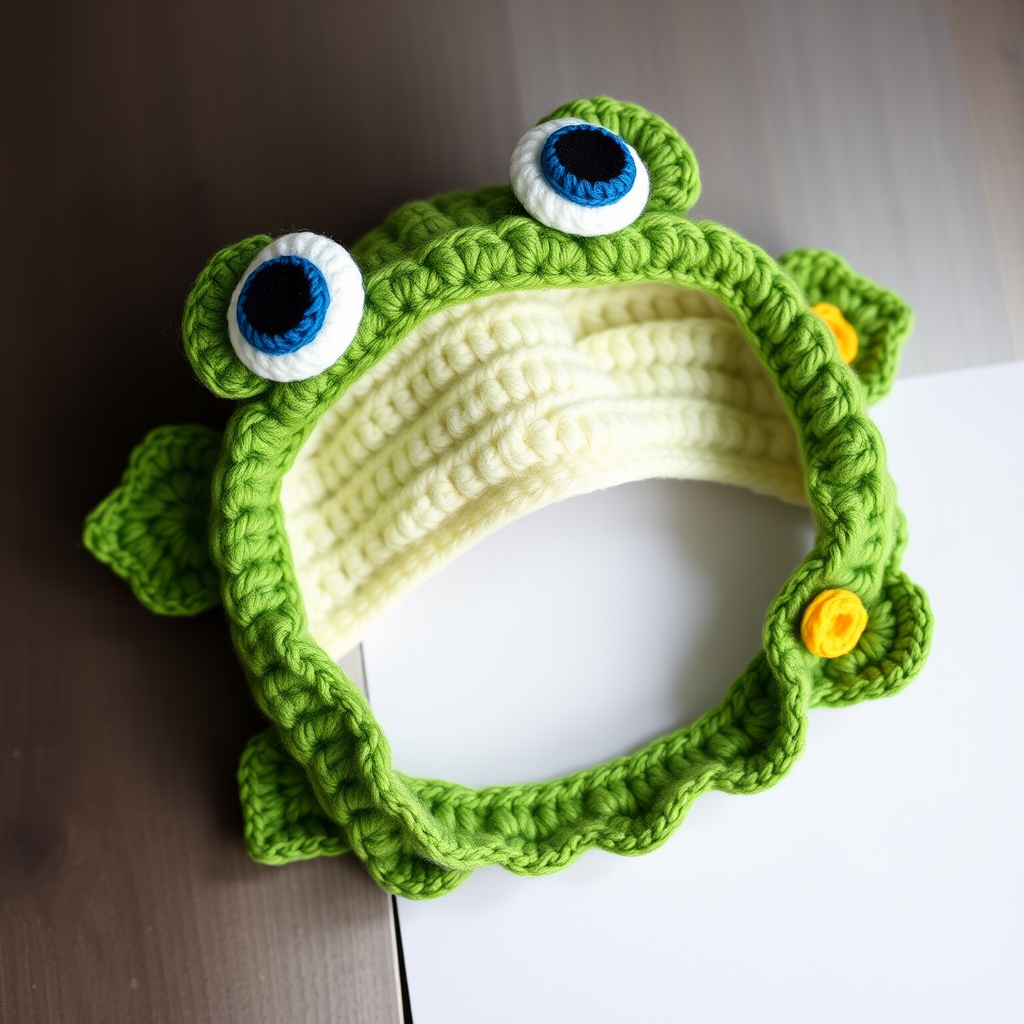
Wrap your little one in the quiet magic of a pond-side morning with this textured frog hat, complete with bulging eyes and a gentle lily pad brim. It's a soft, whimsical crown for the tiniest explorer. This free crochet pattern is perfect for beginners and experienced makers alike, creating an adorable, handmade gift for a newborn or infant. The rich leaf green, deep pond blue, and sunny yellow colors bring a playful, nature-inspired charm to any baby's wardrobe.
Materials Needed
Before you begin, gather the following supplies to ensure a smooth and enjoyable crochet session:
- Yarn: Worsted weight cotton or acrylic blend (e.g., Lion Brand Cotton-Ease) in three colors:
- Leaf Green (main hat body and brim)
- Pond Blue (eyes)
- Sunny Yellow (eye spots and optional flower)
- Hook: 5.0 mm (H-8) crochet hook
- Other: Yarn needle for weaving in ends, stitch markers (optional), fiberfill stuffing for the eyes
Gauge & Size
Gauge: 16 sc x 18 rows = 4 x 4 inches (10 x 10 cm) in single crochet.
Finished Size: 0-3 months (approx. 14-15 inches head circumference). Adjust hook size (e.g., 5.5 mm for larger, 4.5 mm for smaller) to fit other sizes.
Abbreviations
Familiarize yourself with these standard crochet abbreviations:
- ch = chain
- sc = single crochet
- hdc = half double crochet
- dc = double crochet
- sl st = slip stitch
- inc = 2 sc in same stitch
- dec = sc 2 together (invisible decrease)
- R = round
- MR = magic ring
Step-by-Step Instructions
Hat Body (Leaf Green)
Work in continuous rounds (do not join unless specified). Use a stitch marker to track the beginning of each round.
- R1: MR, 6 sc in ring. (6)
- R2: inc in each st around. (12)
- R3: (sc in next st, inc) around. (18)
- R4: (sc in next 2 sts, inc) around. (24)
- R5: (sc in next 3 sts, inc) around. (30)
- R6: (sc in next 4 sts, inc) around. (36)
- R7: (sc in next 5 sts, inc) around. (42)
- R8: (sc in next 6 sts, inc) around. (48)
- R9: (sc in next 7 sts, inc) around. (54)
- R10-16: sc in each st around. (54) – This creates the depth of the hat. Work 7 rounds straight without increases.
- R17: (sc in next 7 sts, dec) around. (48)
- R18: (sc in next 6 sts, dec) around. (42)
- R19: (sc in next 5 sts, dec) around. (36)
- R20: (sc in next 4 sts, dec) around. (30)
- R21: (sc in next 3 sts, dec) around. (24)
Finishing the crown: Fasten off, leaving a long tail (about 12 inches). Thread the tail onto a yarn needle. Weave the needle through the front loops of the remaining 24 stitches, then pull tight to cinch the top closed. Secure with a knot and weave in the end inside the hat.
Eyes (Make 2 – Pond Blue)
These are worked in the round, then stuffed and attached to the hat.
- R1: MR, 6 sc in ring. (6)
- R2: inc in each st around. (12)
- R3: (sc in next st, inc) around. (18)
- R4-6: sc in each st around. (18) – Work 3 rounds straight to form the dome of the eye.
- R7: (sc in next st, dec) around. (12)
- Stuff firmly with fiberfill. Ensure the eye is plump and round.
- R8: dec around. (6)
Attaching the eyes: Fasten off, leaving a long tail. Use the tail to sew the small opening shut (weave through front loops and pull tight). Then, position the eye on the top of the hat, slightly forward (toward the face), about 2 inches apart. Use the tail to sew securely to the hat, stitching around the base of the eye. Repeat for the second eye.
Eye Spots (Make 2 – Sunny Yellow)
These flat circles are sewn onto the front of each blue eye.
- R1: MR, 6 sc in ring. (6)
- R2: inc in each st around. (12)
Attaching: Fasten off, leaving a tail. Center the yellow spot on the front of each blue eye (the side facing forward). Sew it in place using small, neat stitches around the edge. Weave in ends.
Lily Pad Brim (Leaf Green)
This textured brim is worked in rows back and forth along the bottom edge of the hat, creating a scalloped, wavy lily pad effect.
- Row 1: With the hat right side out, attach the Leaf Green yarn with a sl st to the bottom edge (at the back of the hat). Ch 2 (counts as first hdc), hdc in each st across the front edge (about 30 hdc). Tip: Work into the front loop only of the bottom edge for a cleaner finish. Turn.
- Row 2: Ch 2, hdc in each st across. Turn.
- Row 3 (Scallop edge): Ch 2, hdc in next 2 sts, *ch 3, skip 2 sts, hdc in next 3 sts* repeat across to the end. Fasten off.
Note: The ch-3 spaces create the wavy, scalloped points of the lily pad. If you want a more pronounced wave, ch 4 instead of 3.
Finishing Touches
- Weave in all loose ends using a yarn needle.
- Optional Flower: To add extra charm, crochet a small flower in Sunny Yellow: MR, 5 sc in ring, then (ch 2, 2 dc, ch 2, sl st) in each sc to form 5 petals. Fasten off and sew to the side of the brim.
- Gently block the hat if desired to shape the brim and smooth the stitches.
Your Lily Pad Lullaby Baby Frog Hat is complete! This adorable, handmade creation is perfect for photos, baby showers, or simply keeping your little explorer cozy and stylish. The soft, textured yarn and whimsical design are sure to become a cherished keepsake. Happy crocheting!