Gilded Fern Lace Shawl Free Pattern – A Sunlit Crochet Heirloom

Gilded Fern Lace Shawl Free Pattern – A Sunlit Crochet Heirloom
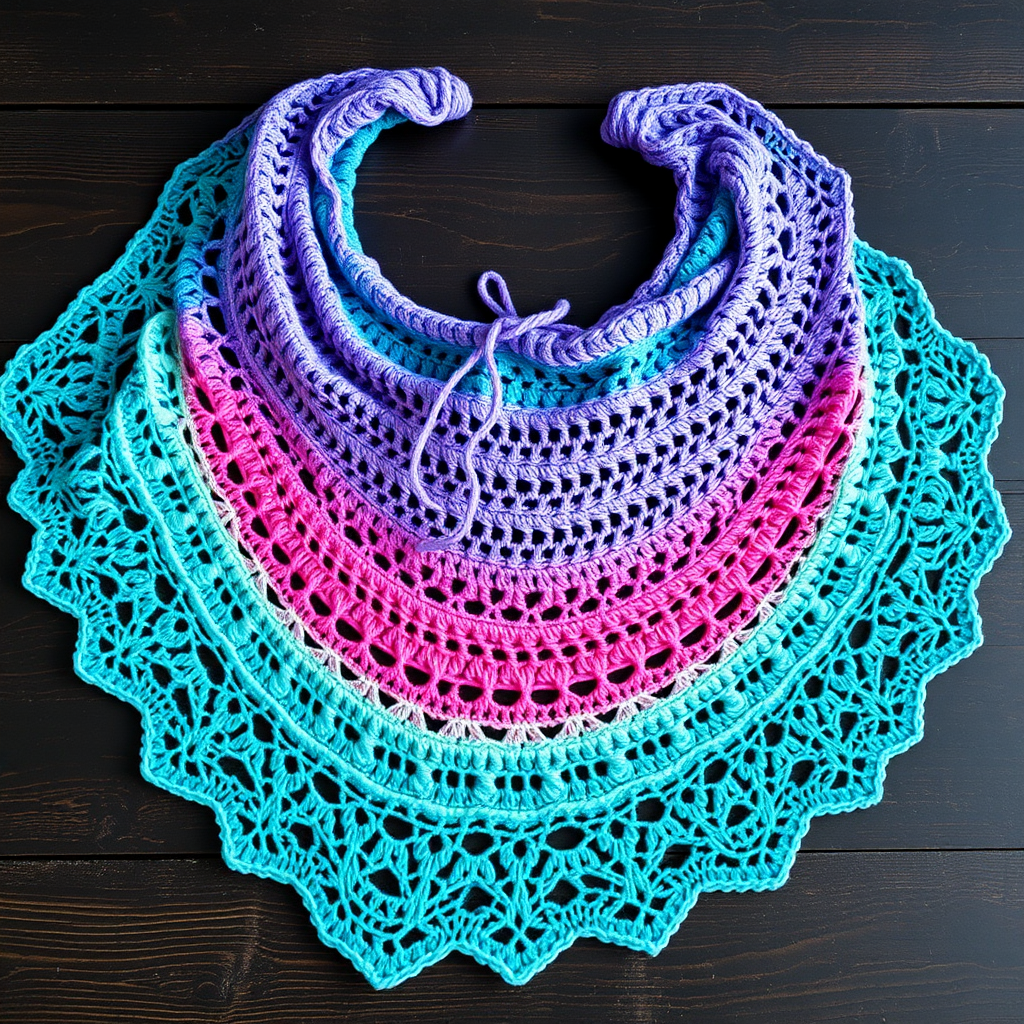
Wrap yourself in the warmth of golden hour with this intricate crochet shawl, where delicate fern motifs cascade down a sun-drenched gradient. Each stitch captures the dappled light of an autumn forest, creating a wearable piece of art that drapes like liquid honey. This heirloom-quality pattern is surprisingly accessible for beginners who are ready to stretch their skills—the repetitive rhythm of the rows makes it meditative, while the stunning result looks far more complex than the actual techniques required.
Whether you're crafting a gift for someone special or treating yourself to a luxurious handmade accessory, this shawl delivers on every level. The crescent shape drapes beautifully over shoulders, and the open lacework means it's perfect for transitional weather—light enough for cool summer evenings, layered beautifully over sweaters in autumn.
Materials Needed
Before you begin, gather these supplies to ensure a smooth crochet session:
- Yarn: Fingering weight yarn in a gradient of golden yellow to deep amber (approximately 800–900 yards). Recommended options include Malabrigo Sock in "Sunset" or a hand-dyed gradient set from your favorite indie dyer. The gradient is key to achieving that sunlit effect—if using solid colors, consider working with two or three complementary shades and switching as you go.
- Hook: US G/6 (4.0 mm) crochet hook. This size creates the perfect drape for fingering weight yarn—not too tight, not too loose.
- Gauge: 4 repeats of the fern lace pattern (16 stitches) and 8 rows = 4 inches (10 cm) in pattern, after blocking. Don't skip the gauge swatch—it ensures your finished shawl matches the intended dimensions.
- Extras: Tapestry needle for weaving in ends, blocking mats and pins (or a clean towel and rust-proof pins), and optionally, small beads to add shimmer to each picot.
Special Stitches
This pattern uses a handful of basic stitches plus one special technique. If you can chain, double crochet, and slip stitch, you're already 90% of the way there. Here's what you need to know:
- dc – double crochet: Yarn over, insert hook into stitch, yarn over and pull through (3 loops on hook), yarn over and pull through 2 loops, yarn over and pull through remaining 2 loops.
- ch – chain: Yarn over and pull through the loop on your hook.
- sl st – slip stitch: Insert hook into stitch, yarn over and pull through both the stitch and the loop on your hook in one motion.
- picot – ch 3, sl st into first ch: This creates a tiny decorative loop that catches the light beautifully.
- V-stitch – (dc, ch 1, dc) in same stitch: This creates a subtle "V" shape that adds texture and visual interest.
Step-by-Step Instructions
This shawl is worked top-down from the center back neck, increasing outward to form a wide crescent shape. The pattern combines simple chains and double crochets with intricate picot-finished fern motifs. Take your time, count your stitches carefully, and you'll be amazed at what you create.
Foundation
Foundation: Ch 5, join with sl st to form a ring.
This small ring is the seed from which your entire shawl grows. Make sure your slip stitch is snug but not tight—you'll be working into this ring for the first few rows.
Rows 1–3: Building the Center
Row 1: Ch 4 (counts as dc + ch 1), (dc, ch 1) 7 times into ring, join with sl st to 3rd ch of beginning ch-4. (8 dc, 8 ch-1 spaces)
You're creating a circle of double crochets separated by chain spaces. The ch-4 at the beginning counts as your first double crochet plus a chain—this keeps the row symmetrical.
Row 2: Ch 3 (counts as dc), dc in same st, ch 2, (2 dc in next dc, ch 2) 7 times, join. (16 dc, 8 ch-2 spaces)
Notice how you're working two double crochets into each single double crochet from the previous row. This doubling is what starts the expansion. The ch-2 spaces are getting slightly larger to accommodate the growth.
Row 3: Ch 3, dc in same st, ch 3, (2 dc in next dc, ch 3) 7 times, join. (16 dc, 8 ch-3 spaces)
Now your chain spaces grow to ch-3. You're still working two double crochets into each stitch from the row below, maintaining the same stitch count while the spaces between groups widen.
Rows 4–10: First Fern Motif
Row 4 (Fern Motif Start): Ch 3, 2 dc in same st, ch 5, skip next ch-3 space, (3 dc in next dc, ch 5, skip next ch-3 space) 7 times, join. (24 dc, 8 ch-5 spaces)
Here's where the magic begins. Instead of working into every stitch, you're skipping the chain spaces entirely and grouping three double crochets together. The ch-5 spaces create the open, airy gaps that will become the negative space between your fern fronds.
Row 5: Ch 3, dc in next 2 dc, ch 2, (dc in next 3 dc, ch 2) 7 times, join. (24 dc, 8 ch-2 spaces)
Now you're working one double crochet into each of the three double crochets from the row below, with a ch-2 between each group. The chain spaces shrink back down, creating a gentle waist in the motif.
Row 6: Ch 3, dc in next 2 dc, ch 3, (dc in next 3 dc, ch 3) 7 times, join. (24 dc, 8 ch-3 spaces)
The chain spaces grow again to ch-3. You're creating a subtle wave effect—the spaces widen and narrow, mimicking the natural curve of fern fronds.
Row 7: Ch 3, dc in next 2 dc, ch 4, (dc in next 3 dc, ch 4) 7 times, join. (24 dc, 8 ch-4 spaces)
Continuing the expansion, your chain spaces now reach ch-4. The rhythm is becoming familiar: work across the double crochets, chain the specified number, repeat.
Row 8 (Fern Leaf Formation): Ch 3, dc in next 2 dc, ch 5, (dc in next 3 dc, ch 5) 7 times, join. (24 dc, 8 ch-5 spaces)
The spaces are now ch-5, creating generous openings that will showcase the lace pattern beautifully. You're halfway through the first fern motif.
Row 9: Ch 3, dc in next 2 dc, ch 6, (dc in next 3 dc, ch 6) 7 times, join. (24 dc, 8 ch-6 spaces)
One more increase in the chain spaces—now ch-6. The fern fronds are reaching their full width.
Row 10 (Picot Edge): Ch 3, dc in next 2 dc, ch 3, picot, ch 3, (dc in next 3 dc, ch 3, picot, ch 3) 7 times, join. (24 dc, 8 picots)
This is the moment your fern fronds come alive! Instead of a simple chain space, you're creating a ch-3, then a picot (ch 3, sl st into first ch), then another ch-3. The picot forms a delicate loop that catches the light—this is the signature detail of the Gilded Fern pattern. Take your time with the picots; they're worth the extra attention.
Rows 11–15: First Expansion
Row 11 (Expansion): Ch 3, dc in same st, dc in next 2 dc, ch 2, (2 dc in next dc, dc in next 2 dc, ch 2) 7 times, join. (32 dc, 8 ch-2 spaces)
Now the shawl begins to grow more dramatically. You're working two double crochets into the first double crochet of each group, then one double crochet into each of the next two. This increases your stitch count from 24 to 32, adding 8 stitches per round.
Row 12: Ch 3, dc in same st, dc in next 3 dc, ch 3, (2 dc in next dc, dc in next 3 dc, ch 3) 7 times, join. (40 dc, 8 ch-3 spaces)
Another increase—now you have 40 double crochets. The pattern is simple: increase by one double crochet in each group, and add one chain to each chain space. This creates a steady, even expansion.
Row 13: Ch 3, dc in same st, dc in next 4 dc, ch 4, (2 dc in next dc, dc in next 4 dc, ch 4) 7 times, join. (48 dc, 8 ch-4 spaces)
48 double crochets now. Notice how the chain spaces grow in tandem with the stitch count—this keeps the proportions balanced.
Row 14: Ch 3, dc in same st, dc in next 5 dc, ch 5, (2 dc in next dc, dc in next 5 dc, ch 5) 7 times, join. (56 dc, 8 ch-5 spaces)
56 double crochets. The shawl is really taking shape now, widening into that beautiful crescent form.
Row 15: Ch 3, dc in same st, dc in next 6 dc, ch 6, (2 dc in next dc, dc in next 6 dc, ch 6) 7 times, join. (64 dc, 8 ch-6 spaces)
64 double crochets. You're building momentum—each row adds 8 stitches and extends the chain spaces by one chain.
Rows 16–24: Continuing the Expansion
Row 16 (Fern Motif Repeat): Ch 3, dc in same st, dc in next 7 dc, ch 7, (2 dc in next dc, dc in next 7 dc, ch 7) 7 times, join. (72 dc, 8 ch-7 spaces)
72 double crochets. The chain spaces are now ch-7, creating generous, airy openings.
Rows 17-24: Continue increasing in this manner, adding 8 dc and 1 ch to each chain space every row, until you have 128 dc and 8 ch-15 spaces.
This is the meditative part of the pattern. Each row follows the exact same formula: work two double crochets into the first double crochet of each group, one double crochet into each remaining double crochet, then chain the specified number (which increases by one each row). By Row 24, you'll have 128 double crochets and chain spaces of ch-15. Trust the pattern—it's working beautifully.
Row 25: Second Fern Layer
Row 25 (Second Fern Layer): Ch 3, dc in next 15 dc, ch 3, picot, ch 3, (dc in next 16 dc, ch 3, picot, ch 3) 7 times, join. (128 dc, 8 picots)
Just like Row 10, this row introduces picots to create the second layer of fern fronds. You're working across 16 double crochets (or 15 plus the initial ch-3 that counts as a double crochet), then creating the ch-3, picot, ch-3 sequence. The picots here are slightly wider apart than the first layer, reflecting the shawl's growth.
Rows 26–40: Second Major Expansion
Rows 26-40: Repeat the expansion pattern, working 16 rows of increases, ending with 256 dc and 8 ch-31 spaces.
This is the longest section of the pattern, but it follows the same rhythm you've already mastered. Each row adds 8 double crochets and extends the chain spaces by one chain. By Row 40, you'll have 256 double crochets and chain spaces of ch-31. The shawl is now impressively wide, ready for its final flourish.
Row 41: Final Fern Edge
Row 41 (Final Fern Edge): Ch 3, dc in next 31 dc, ch 3, picot, ch 3, (dc in next 32 dc, ch 3, picot, ch 3) 7 times, join. (256 dc, 8 picots)
The third and final layer of fern fronds. You're working across 32 double crochets (or 31 plus the initial ch-3), then adding the picot detail. This creates a beautiful, consistent rhythm of fern motifs across the entire shawl.
Row 42: Scalloped Border
Row 42 (Scalloped Border): Ch 1, sc in same st, *skip 2 dc, 5 dc in next dc, skip 2 dc, sc in next dc*, repeat from * to * around, join with sl st to first sc. Fasten off.
This final row creates a gorgeous scalloped edge that frames the entire shawl. The pattern is simple: single crochet, skip two stitches, work five double crochets into the next stitch, skip two stitches, single crochet. The five double crochets create a gentle fan shape, and the single crochets between them form the valleys between scallops. Work your way around the entire edge, then fasten off and weave in your ends.
Finishing and Blocking
Weave in all ends carefully with your tapestry needle. Take your time—neat ends make a professional-looking finished piece.
Blocking is essential for this shawl. The lace pattern needs to be opened up to show its full beauty. Here's how:
- Soak the shawl in lukewarm water with a gentle wool wash for 20–30 minutes.
- Gently squeeze out excess water (never wring or twist).
- Lay the shawl on a clean towel and roll it up to remove additional moisture.
- Place the shawl on blocking mats and pin it out to its full dimensions, stretching the lace gently.
- Pay special attention to the picots and scallops—pin each one to its full extent so they stand out beautifully.
- Allow to dry completely, ideally overnight.
Once dry, unpin and admire your work. Optionally, you can add a delicate bead to each picot for extra shimmer—simply thread a small bead onto a matching thread and sew it to the tip of each picot. This adds a subtle sparkle that catches the light beautifully.
Your Gilded Fern Lace Shawl is complete. This heirloom-quality piece will be treasured for years to come, whether worn draped over your shoulders on a cool evening or displayed as a work of art. The gradient colors and intricate fern motifs make it truly one-of-a-kind—a sunbeam woven into fabric, just for you.
Happy crocheting, and may your stitches always be golden!