Flamingo Pink Lace Shawl Free Pattern – A Featherlight Knitted Wrap with Cascading Shells
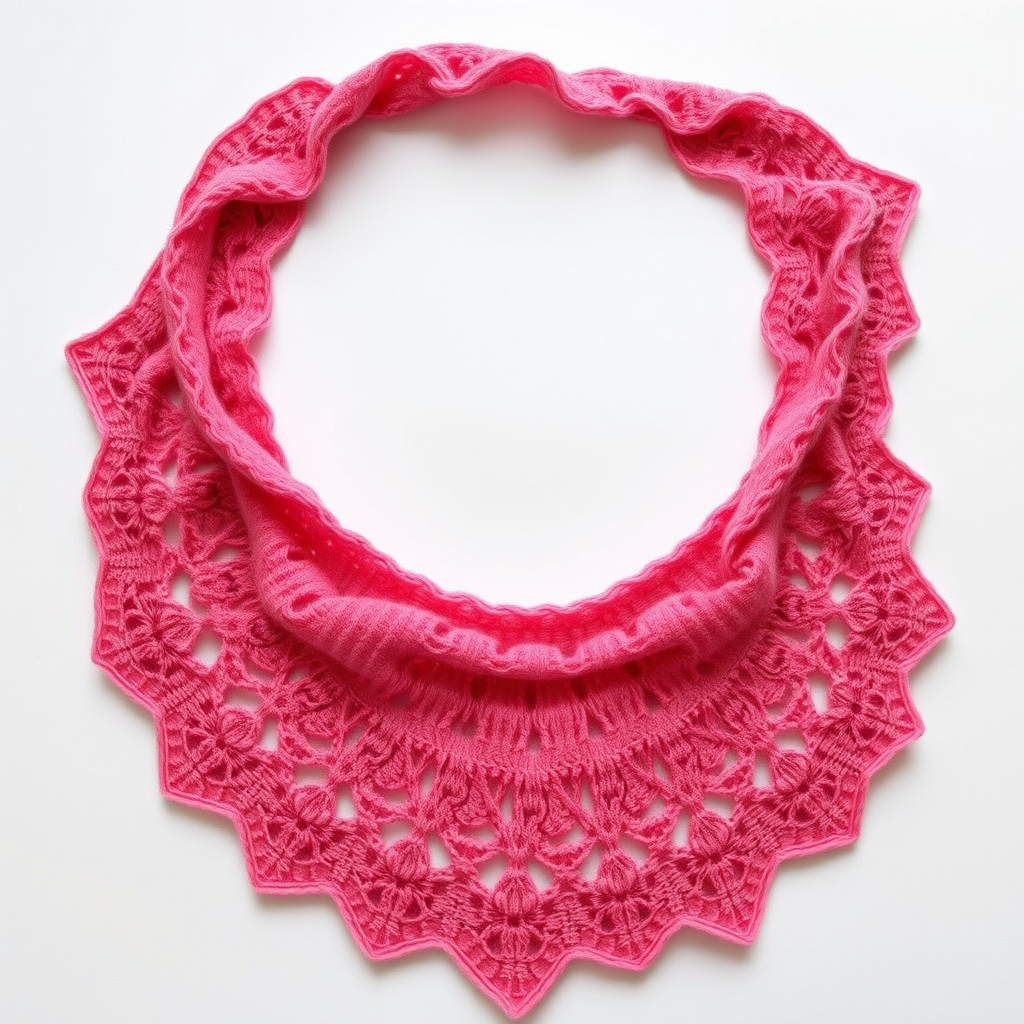
Flamingo Pink Lace Shawl Free Pattern – A Featherlight Knitted Wrap with Cascading Shells
Wrap yourself in the softest blush of summer with this airy, featherlight shawl. Its cascading shell lace mimics the gentle flutter of flamingo wings, perfect for breezy evenings. This free knitting pattern creates a stunning triangular wrap that drapes beautifully over the shoulders, adding a touch of elegance to any outfit. The delicate lacework, combined with the vibrant flamingo pink hue, makes this shawl a true statement piece. Whether you're a seasoned knitter looking for a relaxing project or a confident beginner ready to tackle lace, this pattern offers a rewarding experience with breathtaking results.
Materials Needed
Before you begin, gather the following materials to ensure a smooth knitting experience:
- Yarn: Fingering weight yarn (e.g., Malabrigo Sock in 'Flamingo Pink') – 400 yards. The soft, vibrant color and lightweight nature of fingering weight yarn are essential for achieving the featherlight, translucent quality of this shawl.
- Needle: US 6 (4.0 mm) circular knitting needle, 32 inches or longer. The long circular needle is crucial for accommodating the increasing number of stitches as the shawl grows.
- Other: Stitch markers (at least 2), tapestry needle for weaving in ends, blocking pins and a spray bottle for the final blocking process.
Gauge: 20 stitches and 28 rows = 4 inches in stockinette stitch (blocked). While gauge is important for size, the beauty of this shawl is that it's quite forgiving. A slightly different gauge will simply result in a slightly larger or smaller shawl.
Step-by-Step Instructions
This shawl is knitted from the top center down, with increases at the edges and center to form a triangular shape. The lace pattern is a repeat of 12 rows that creates cascading shells. Follow these detailed instructions carefully, and you'll be amazed at what you create.
Abbreviations
Familiarize yourself with these standard knitting abbreviations before you start:
- k = knit
- p = purl
- yo = yarn over
- k2tog = knit two together (right-leaning decrease)
- ssk = slip slip knit (left-leaning decrease)
- kfb = knit front and back (increase)
- pm = place marker
- sm = slip marker
Setup
- Cast on: Cast on 3 stitches.
- Garter Stitch Base: Knit 6 rows (this will create a small garter stitch tab).
- Pick Up Stitches: Now, rotate your work. Pick up and knit 3 stitches along the side edge of the tab, and then 3 stitches from the cast-on edge. You should now have 9 stitches on your needle.
- Place Markers: Place your markers as follows: k3, pm, k3, pm, k3. The center marker divides the shawl into two halves; the side markers are for edge increases.
Increase Rows (Rows 1-4)
These first rows establish the increase rhythm for the entire shawl. The increases always happen on right-side (RS) rows, creating a neat, symmetrical shape.
- Row 1 (RS): k3, yo, k to center marker, yo, sm, k1, yo, k to last 3 sts, yo, k3. (This adds 4 stitches: one at each edge and one on each side of the center stitch).
- Row 2 (WS): k3, p to last 3 sts, k3. (Purl the yarn overs normally. For this lace pattern, we want the holes, so do not twist them).
- Row 3 (RS): k3, yo, k to center, yo, sm, k1, yo, k to last 3, yo, k3.
- Row 4 (WS): k3, p to last 3, k3.
Shell Lace Pattern (Rows 5-12)
Now you will begin the beautiful shell lace pattern. This 8-row repeat is worked between the edge stitches and the center spine. The increases on RS rows continue as established. The pattern is written for the stitches between the markers, excluding the center stitch and the 3 edge stitches on each side.
Row 5 (RS): k3, yo, *k1, yo, k2tog, k3, ssk, yo, k1, yo, k2tog, k3, ssk, yo, k1* repeat from * to * until center marker, yo, sm, k1, yo, repeat from * to * to last 3 sts, yo, k3.
Row 6 (WS): k3, p all stitches to last 3, k3.
Row 7 (RS): k3, yo, *k2, yo, k2tog, k1, ssk, yo, k3, yo, k2tog, k1, ssk, yo, k2* repeat to center, yo, sm, k1, yo, repeat to last 3, yo, k3.
Row 8 (WS): k3, p to last 3, k3.
Row 9 (RS): k3, yo, *k3, yo, k2tog, ssk, yo, k5, yo, k2tog, ssk, yo, k3* repeat to center, yo, sm, k1, yo, repeat to last 3, yo, k3.
Row 10 (WS): k3, p to last 3, k3.
Row 11 (RS): k3, yo, *k4, yo, ssk, k1, k2tog, yo, k3, yo, ssk, k1, k2tog, yo, k4* repeat to center, yo, sm, k1, yo, repeat to last 3, yo, k3.
Row 12 (WS): k3, p to last 3, k3.
Pro Tip: As you work the lace pattern, you'll notice the stitch count between the markers increases with each repeat. Don't worry if the pattern doesn't seem to line up perfectly on the first few rows – the structure will become clear as you complete more repeats. The key is to always maintain the edge stitches (k3 at the beginning and end of every row) and the center spine (k1 between the markers).
Continuing the Pattern
Repeat Rows 5-12 until the shawl measures approximately 20 inches from the center spine, ending with a WS row (Row 6, 8, 10, or 12). You can easily adjust the size of your shawl by working more or fewer repeats of the lace pattern. Just remember to always end on a WS row before starting the edging.
Picot Edging
This delicate picot bind-off creates a beautiful, scalloped edge that perfectly complements the lace pattern.
- On the next RS row, begin the picot bind-off: k2, *yo, k2tog, k1, pass the first stitch over the second* repeat from * to end.
- Continue this bind-off across the entire row until all stitches are bound off.
Finishing
- Weave in Ends: Carefully weave in all loose ends using a tapestry needle. Be sure to weave them in securely so they don't show on the right side of the shawl.
- Blocking: This step is crucial for lace knitting. Soak the shawl in lukewarm water with a gentle wool wash for about 20 minutes. Gently squeeze out excess water (do not wring or twist). Lay the shawl on a clean towel and roll it up to remove more water.
- Pin Out: Lay the shawl on a blocking mat or a clean, dry towel. Gently stretch it to its full dimensions, pinning out the points of the lace pattern and the edges. The lace will "bloom" and open up, revealing the beautiful shell pattern.
- Dry: Spray the shawl with water to ensure it's evenly damp, then let it dry completely before unpinning. This can take 24-48 hours depending on your environment.
Once dry, your Flamingo Pink Lace Shawl is ready to wear! Drape it over your shoulders for a touch of elegance, or wrap it around your neck for a cozy yet airy accessory. The featherlight fabric and cascading shell pattern will make it a cherished piece in your handmade wardrobe.


