Emberfall Crescent Shawl Free Pattern – A Knitted Sunset Gradient Wrap
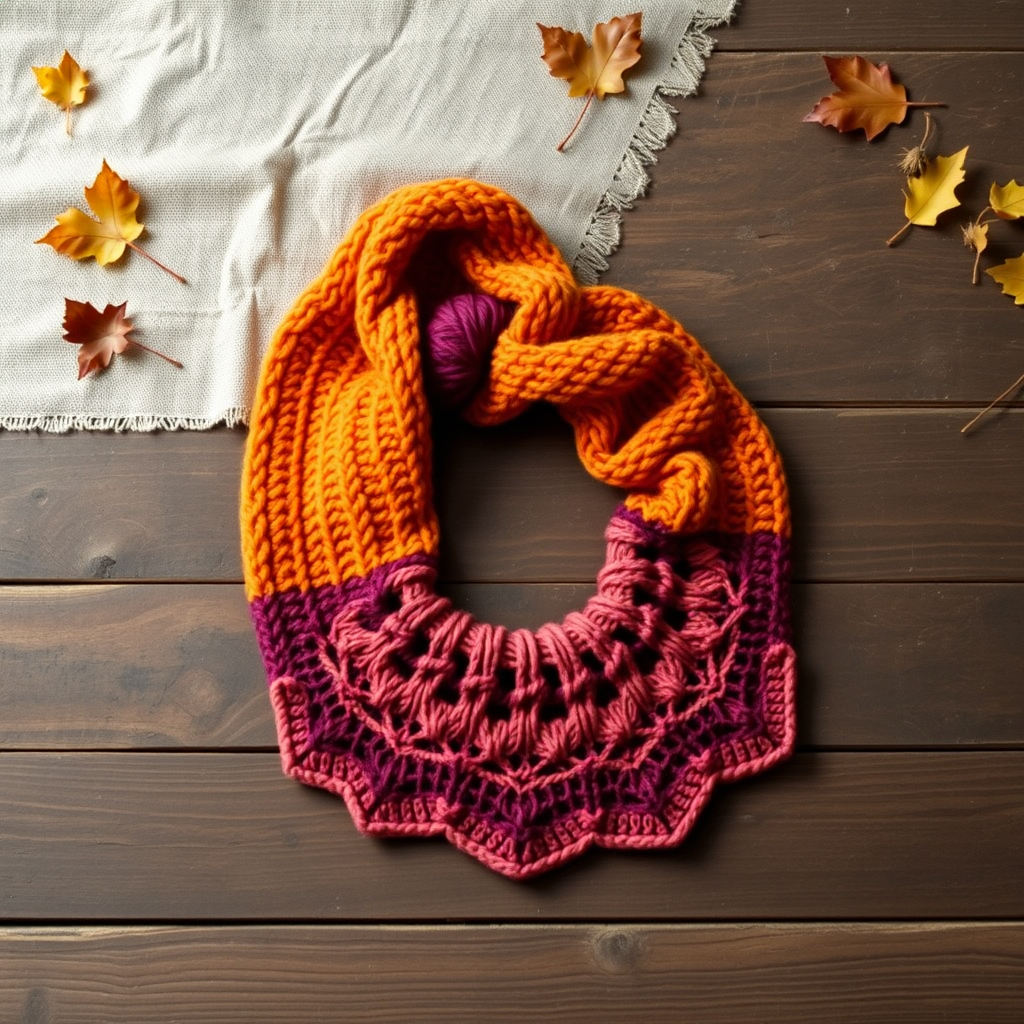
Emberfall Crescent Shawl Free Pattern – A Knitted Sunset Gradient Wrap
Wrap yourself in the warm hues of a fading autumn sky with this breathtaking crescent-shaped shawl. Knitted in a soft gradient of burnt orange, amber, and deep plum, the Emberfall Crescent Shawl captures the essence of a cozy, colorful fall evening. The delicate lace edge and plush garter stitch body make it a versatile layering piece—perfect for cool evenings, thoughtful handmade gifts, or a rewarding weekend project. This free pattern is designed with beginners in mind, offering clear instructions and a rhythmic, meditative knit that builds confidence with every row.
Materials Needed
Before you begin, gather the following supplies. Having everything ready will make your knitting experience smooth and enjoyable.
- Yarn: Fingering weight yarn in 3 colors (approx. 400g total):
- Color A: Burnt Orange (approx. 150g)
- Color B: Amber (approx. 125g)
- Color C: Deep Plum (approx. 125g)
- Needles: US 6 (4.0 mm) circular knitting needle, 32-inch (80 cm) or longer to accommodate the growing number of stitches.
- Notions: Stitch markers (at least 2), tapestry needle for weaving in ends, blocking pins and mats, and a lifeline (scrap yarn or thread) for safety.
- Gauge: 20 stitches and 28 rows = 4 inches in garter stitch (blocked). Gauge is important for achieving the correct size and drape, so take a moment to knit a swatch.
Step-by-Step Instructions
This shawl is worked from the top center down, increasing on both sides of a central spine. The pattern is divided into clear sections: Setup, Body, Color Transition, Lace Edge, and Finishing. Follow along carefully, and you'll have a stunning crescent shawl in no time.
Pattern Notes
- The shawl is worked from the top center down, increasing on both sides of a central spine.
- Use a lifeline after every 10 rows to make blocking easier and to safeguard your work.
- All slipped stitches are slipped purlwise with yarn in front (wyf).
- The center stitch is always knit on the right side and purled on the wrong side, creating a subtle spine.
Setup
With Color A (burnt orange), cast on 5 stitches using the long-tail method.
- Row 1 (WS): Slip 1, k2, p1, k1. (5 stitches)
- Row 2 (RS): Slip 1, k1, yo, k1 (center stitch), yo, k2. (7 stitches)
- Row 3 (WS): Slip 1, k2, p1, k3. (7 stitches)
- Row 4 (RS): Slip 1, k1, yo, k3, yo, k2. (9 stitches)
- Row 5 (WS): Slip 1, k2, p3, k3. (9 stitches)
- Row 6 (RS): Slip 1, k1, yo, k5, yo, k2. (11 stitches)
- Row 7 (WS): Slip 1, k2, p5, k3. (11 stitches)
Tip: Place a stitch marker on either side of the center stitch to easily identify it in the following rows.
Body (Garter Stitch with Increases)
Continue with Color A. Work the following two rows repeatedly until you have 101 stitches on the needle, ending with a wrong-side row.
- Row 8 (RS): Slip 1, k1, yo, knit to center stitch, yo, k1 (center), yo, knit to last 2 stitches, yo, k2. (4 increases)
- Row 9 (WS): Slip 1, k2, purl to last 3 stitches, k3. (No increases)
Note: The increases create the crescent shape. The garter stitch body is simple and relaxing, perfect for mindful knitting.
Color Transition
Once you have 101 stitches, switch to Color B (amber). Work the same increase rows (RS and WS) for 20 more rows, so you have 141 stitches. Then switch to Color C (deep plum) and work the same increase rows until you have 181 stitches, ending with a wrong-side row.
Pro Tip: When changing colors, do so at the beginning of a right-side row for a clean, seamless transition. Weave in ends as you go or leave them for the finishing stage.
Lace Edge
With Color C, work the following lace pattern to create a delicate, airy finish.
- Row 1 (RS): Slip 1, k1, *yo, k2tog, k1; repeat from * to last 2 stitches, yo, k2. (Increase 1 stitch at each end)
- Row 2 (WS): Slip 1, k2, purl to last 3 stitches, k3.
- Row 3 (RS): Slip 1, k1, *k2tog, yo, k1; repeat from * to last 2 stitches, yo, k2.
- Row 4 (WS): Slip 1, k2, purl to last 3 stitches, k3.
Repeat rows 1-4 three more times (12 rows total). Then work rows 1-2 once more to complete the lace border.
Bind Off
Bind off loosely to maintain the stretchy, scalloped edge:
- K1, *k1, pass first stitch over second; repeat from * until one stitch remains. Cut yarn and pull through the last loop to secure.
Tip: Use a larger needle (e.g., US 8) for binding off if your bind-off feels too tight.
Finishing
Weave in all ends using a tapestry needle, being careful not to distort the stitches. Then, block your shawl to shape:
- Soak the shawl in lukewarm water with a drop of wool wash for 20 minutes.
- Gently squeeze out excess water (do not wring).
- Lay flat on a towel and shape into a crescent, stretching the lace edge gently to open up the eyelets.
- Pin the points and allow to dry completely before unpinning.
Once dry, your Emberfall Crescent Shawl is ready to wear or gift. The gradient of warm autumn colors will drape beautifully, and the lace edge adds a touch of elegance to any outfit.
Happy knitting! We'd love to see your finished shawl—share your progress and photos in the comments below or tag us on social media.


