Driftwood Dune Chunky Throw Blanket Free Pattern – Knitted with Woven Texture and Tassel Trim
Driftwood Dune Chunky Throw Blanket Free Pattern – Knitted with Woven Texture and Tassel Trim
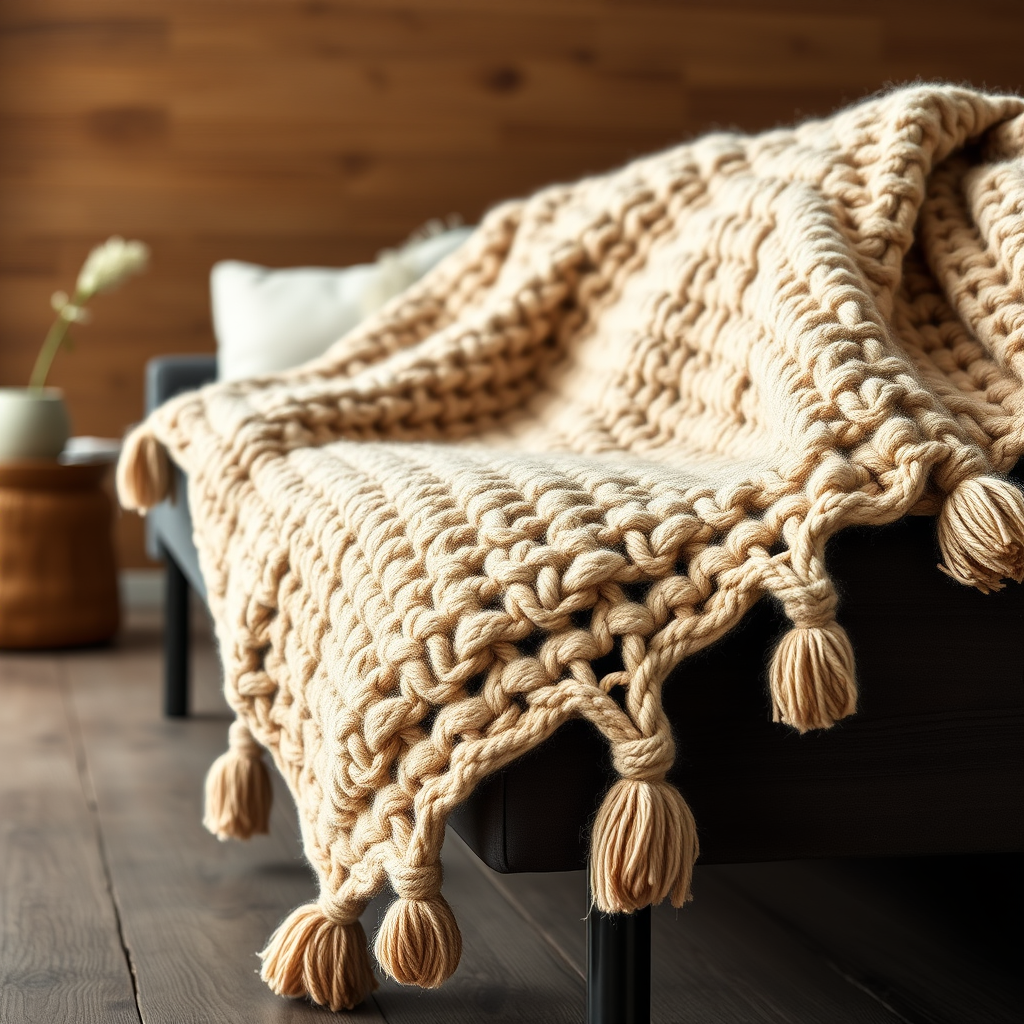
Wrap yourself in the serene comfort of this oversized chunky throw, featuring a unique woven-slip stitch texture that mimics sun-bleached driftwood. The soft, heathered yarn and elegant tassel fringe make it a stunning centerpiece for any modern living space. This pattern is perfect for beginners looking to create a statement piece for their home—the repetitive stitch pattern is meditative, and the super bulky yarn works up quickly, giving you a cozy, luxurious throw in just a weekend.
Whether you're curling up with a book, adding a layer of texture to your sofa, or searching for a heartfelt handmade gift, this blanket delivers both style and warmth. The woven slip stitch creates a dense, drapey fabric that feels substantial yet soft, and the tassel trim adds a bohemian touch that elevates the entire design.
Materials Needed
Before you begin, gather the following supplies. Having everything ready will make your knitting experience smooth and enjoyable.
Yarn
- Weight: Super bulky weight yarn (size 6) in heathered sand, oat, and driftwood gray
- Total Yardage: Approximately 1200 yards (you can use 3-4 skeins of your chosen yarn, depending on yardage per skein)
- Suggested Yarn: Lion Brand Wool-Ease Thick & Quick (or any similar super bulky yarn that meets gauge)
Needles & Tools
- Knitting Needle: US 15 (10 mm) circular knitting needle, 36-inch cable (the long cable is essential to hold all 100 stitches comfortably)
- Tapestry Needle: For weaving in ends and finishing tassels
- Crochet Hook: Size J/10 (6 mm) or similar, for attaching tassels (optional but helpful)
- Scissors: For cutting yarn and trimming tassels
- Measuring Tape: To check your gauge and finished measurements
Gauge
8 stitches and 12 rows = 4 inches in woven slip stitch pattern (after blocking).
Always knit a gauge swatch before starting your project. This ensures your finished blanket will match the intended dimensions. If your gauge is off, adjust your needle size accordingly—larger needles for fewer stitches per inch, smaller needles for more.
Step-by-Step Instructions
Follow these detailed instructions carefully, and you'll have a beautiful, professional-looking throw in no time. The pattern is written for a finished size of approximately 50 inches wide x 60 inches long (including tassels).
Abbreviations
- CO = cast on
- K = knit
- P = purl
- sl = slip stitch purlwise (insert needle as if to purl, but just transfer the stitch to the right needle without working it)
- wyif = with yarn in front (yarn held to the front of the work)
- wyib = with yarn in back (yarn held to the back of the work)
- BO = bind off
- st(s) = stitch(es)
- rep = repeat
Pattern Notes
- The woven slip stitch creates a dense, textured fabric that is warm and drapey.
- Work all slipped stitches purlwise to keep the yarn on the correct side and maintain an even tension.
- Use a long-tail cast on for a stretchy edge that will accommodate the tassels beautifully.
- Always slip stitches purlwise unless otherwise noted—this keeps the stitch orientation consistent.
Cast On and Setup
CO 100 stitches loosely. Take your time with this step; a loose cast-on ensures your edge won't pucker. If you find your cast-on is too tight, try using a needle one size larger just for the cast-on row, then switch to your US 15 needle.
Row 1 (RS): Knit all stitches.
Row 2 (WS): Purl all stitches.
These two rows create a clean, flat foundation for the woven pattern to build upon.
Woven Slip Stitch Pattern
Now you'll begin the main pattern. The sequence of rows creates the beautiful woven texture that mimics driftwood. Pay close attention to whether you're working on the right side (RS) or wrong side (WS) of your work.
Row 3 (RS): K1, *sl 1 wyif, K1; rep from * to last st, K1.
Explanation: Knit the first stitch, then slip the next stitch purlwise with the yarn held in front. Knit the following stitch. Repeat this sequence across the row, ending with a knit stitch.
Row 4 (WS): P1, *sl 1 wyib, P1; rep from * to last st, P1.
Explanation: Purl the first stitch, then slip the next stitch purlwise with the yarn held in back. Purl the following stitch. Repeat across the row, ending with a purl stitch.
Row 5 (RS): Knit all stitches.
Row 6 (WS): Purl all stitches.
Row 7 (RS): K2, *sl 1 wyif, K1; rep from * to last 2 sts, K2.
Explanation: This row is offset by one stitch from Row 3, creating the staggered, woven effect. Knit the first two stitches, then repeat the slip-knit sequence until you have two stitches left, which you knit.
Row 8 (WS): P2, *sl 1 wyib, P1; rep from * to last 2 sts, P2.
Explanation: Purl the first two stitches, then repeat the slip-purl sequence until two stitches remain, which you purl.
Repeat Rows 3-8 until the piece measures approximately 58 inches from the cast-on edge, ending with a Row 6 or Row 8 (a wrong-side row). This ensures you finish at a clean point in the pattern, ready for binding off on the right side.
Finishing
BO all stitches knitwise on the next RS row. Bind off loosely to maintain the stretchy edge—if you bind off too tightly, the edge will pull in and distort the shape of your blanket. When you have one stitch left, cut your yarn leaving a 12-inch tail, and pull it through the last loop to secure.
Weave in all ends with a tapestry needle. Thread the needle with each yarn tail and weave it through the purl bumps on the wrong side of the work, going back and forth a few times to secure. Trim any excess yarn close to the fabric.
Tassel Trim
The tassels are the finishing touch that gives this blanket its bohemian charm. Follow these steps carefully for even, beautiful tassels.
- Cut 12-inch lengths of yarn. You'll need approximately 50 tassels total (25 per edge). Each tassel uses 3 strands of yarn.
- For each tassel, take 3 strands and fold them in half. This gives you a loop at one end and six loose ends at the other.
- Insert a crochet hook through the edge of the blanket at the cast-on or bind-off edge, every 2 inches along the edge. Push the hook through from front to back.
- Catch the folded loop of the yarn with the hook and pull it through the fabric, creating a small loop on the front side.
- Pull the loose yarn ends through the loop and tighten gently. Pull the tassel snug against the edge, but not so tight that it puckers the fabric.
- Trim tassel ends evenly to 4 inches. Use sharp scissors and hold the tassel strands together as you trim for a clean, uniform look.
- Repeat along both the cast-on and bind-off edges. Space your tassels approximately 2 inches apart, adjusting slightly so they're evenly distributed across the full width of the blanket.
Once all tassels are attached and trimmed, give your blanket a gentle shake to fluff the tassels and settle the fabric. If desired, you can lightly steam block the blanket to even out the stitches, but the super bulky yarn typically doesn't require aggressive blocking.
Your Driftwood Dune Chunky Throw is now complete! Drape it over your favorite chair, snuggle up on the couch, or gift it to someone special. The woven texture and tassel trim make it a timeless piece you'll treasure for years to come.


