Aurora Mist Crescent Shawl Free Pattern – Crochet a Dreamy Gradient Wrap

Wrap Yourself in Color: The Aurora Mist Crescent Shawl
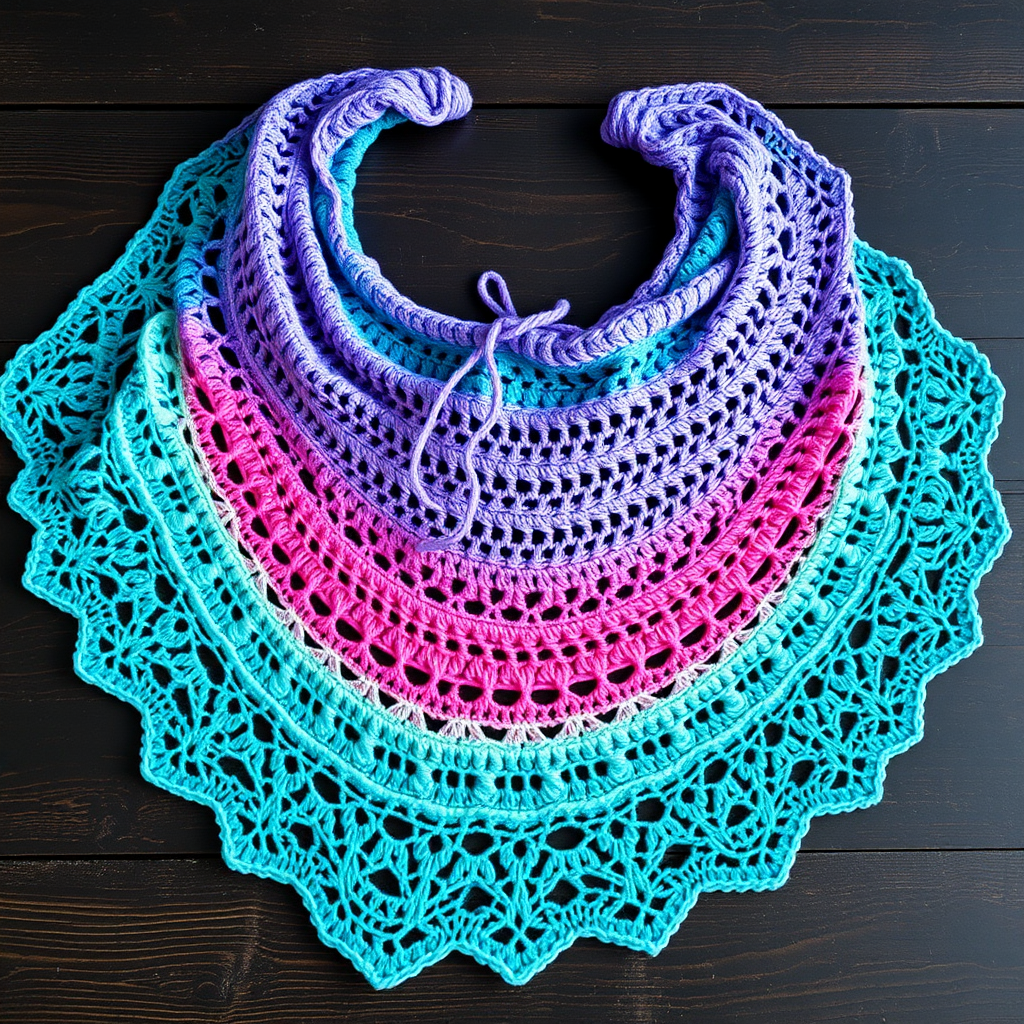
There are some crochet projects that are more than just yarn and hooks—they are wearable art. The Aurora Mist Crescent Shawl is exactly that. This free crochet pattern allows you to transform a single skein of hand-dyed, gradient yarn into a stunning, crescent-shaped wrap. Featuring a delicate mesh stitch that mimics drifting clouds, this shawl is designed to showcase the beautiful color transitions of variegated yarn. Whether you are looking for a boho layering piece or a lightweight summer wrap, this pattern is perfect for intermediate beginners looking to create a masterpiece.
Because the pattern is worked from the center top down, the gradient of your yarn will naturally flow from the top edge to the bottom, creating a watercolor effect that is impossible to replicate with solid colors. Let’s dive into how you can create this dreamy accessory at home.
Materials Needed
Before you begin, ensure you have the right tools to make this project smooth and enjoyable. The beauty of this pattern is its simplicity—you only need a few items.
- Yarn: 1 skein (approx. 460-500 yds) of fingering weight yarn in a gradient or hand-dyed colorway. (e.g., Malabrigo Sock in 'Cumbre' or a custom gradient from Etsy). The color transitions are the star of the show here.
- Crochet Hook: US G/6 (4.0 mm) crochet hook. This size allows for a drapey fabric while keeping the mesh stitches defined.
- Other: Yarn needle for weaving in ends, blocking mats, and rust-proof pins.
Gauge: 4 mesh pattern repeats (each repeat = ch 2, dc) and 8 rows = 4 inches (10 cm) in pattern stitch, after blocking. Note: Gauge is important for yardage, but since this is a "use what you have" project, don't stress too much—just keep your tension consistent.
Step-by-Step Instructions
This pattern uses US crochet terms. The shawl is worked from the center top down, increasing at both ends to form the crescent shape. Important: Ch 3 counts as a dc throughout. Blocking is essential to open up the lace and show the gradient beautifully, so don't skip that final step!
Getting Started: The Foundation
We begin with a simple foundation that sets up the first mesh space.
- Foundation Row: Ch 5. Dc in the 5th ch from hook (this creates a ch-2 space and a dc). Turn. (1 mesh)
Building the Crescent Shape
Now we start the increases. The key to the crescent shape is increasing at both the beginning and end of every row. We do this by working two meshes into the first and last mesh spaces.
- Row 1: Ch 3 (counts as dc), dc in the ch-2 space, ch 2, dc in the same ch-2 space (this is an increase at the beginning), dc in the top of the turning ch (increase at the end). Turn. (3 meshes)
- Row 2: Ch 3, dc in the first ch-2 space, *ch 2, dc in the next ch-2 space; repeat from * across until you reach the last ch-2 space, ch 2, dc in the last ch-2 space, dc in the top of the turning ch. Turn. (5 meshes)
- Row 3: Ch 3, dc in the first ch-2 space, ch 2, dc in the same space (increase), *ch 2, dc in the next ch-2 space; repeat from * across until you reach the last ch-2 space, ch 2, dc in the last ch-2 space, ch 2, dc in the same space (increase), dc in the top of the turning ch. Turn. (7 meshes)
Understanding the Increase: You might notice that Row 2 didn't have increases, but the mesh count went up. This is because the increases in Row 1 and Row 3 add two meshes each time. To get the steady crescent curve, we need to increase on every row. So, we will repeat Row 3 for all subsequent rows. This will create a steady increase of 2 meshes per row.
- Rows 4-10 (and beyond): Repeat Row 3 for all subsequent rows. Continue until you have used most of your yarn, leaving about 10 yards for the edging. The number of rows will depend on your yarn amount and desired size. A typical crescent shawl has about 30-40 rows. Pro-tip: Weigh your yarn before you start and periodically to know when you are at the 10-yard mark.
Finishing the Edging
Once you have reached your desired size, it’s time to add a clean, delicate edge to the curved bottom.
- Edging: Do not turn. Work a round of single crochet (sc) evenly along the entire curved edge of the shawl (the bottom edge). At the two top corners, work 3 sc in the corner space. At the center top, work 1 sc in each row end. Fasten off and weave in ends.
The Magic of Blocking
This is the most crucial step for a lace project. Blocking transforms your fabric from a scrunched-up tube into an airy, drapey shawl.
- Blocking: Soak the shawl in lukewarm water with a drop of wool wash for 20 minutes. Gently squeeze out excess water (do not wring). Lay flat on a blocking mat, pinning out the points of the mesh to open up the lace. Allow to dry completely.
Once dry, unpin and wear your new favorite accessory! The Aurora Mist Crescent Shawl is a joy to make and an even greater joy to wear. The gradient yarn does all the hard work, creating a stunning visual effect with a simple stitch pattern. Happy crocheting!