The Woven Willow Pillow Cover: A Free Knitting Pattern for a Textured, Modern Home Accent
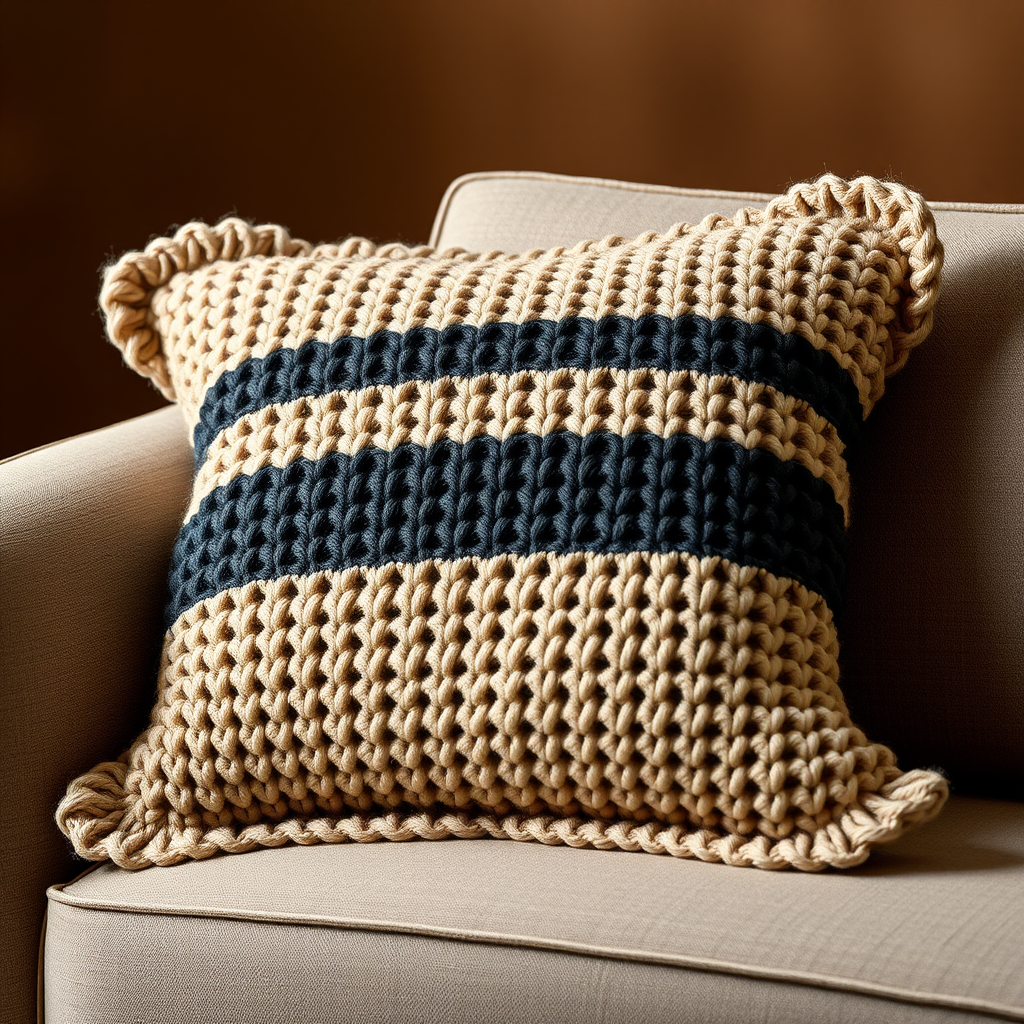
Transform Your Home with the Woven Willow Pillow Cover
Bring a touch of modern, organic texture to your living space with this free knitting pattern for the Woven Willow Pillow Cover. This project creates a sophisticated, tactile accent piece that mimics the look of handwoven natural fibers. The front panel features a stunning woven stitch pattern that adds incredible depth and warmth, while the simple stockinette back ensures a clean, polished finish. Perfect for beginners looking to expand their skills or experienced knitters wanting a quick, satisfying project, this pillow cover uses super bulky yarn for a plush, chunky result that knits up fast. The contrasting color weave adds a striking, modern detail that will elevate any room.
Materials Needed
Before you begin, gather the following materials. Using the exact specifications will ensure your pillow cover matches the intended size and texture.
- Yarn: Super Bulky weight yarn (approx 200 yards per 100g) in two contrasting colors:
- Color A (Main): 2 skeins (approx 400 yards total) – for the main body and back panel. Example: Warm oatmeal.
- Color B (Contrast): 1 skein (approx 200 yards total) – for the woven stripes and optional fringe. Example: Deep charcoal.
- Needles & Notions:
- US 11 (8mm) knitting needles (straight or circular for flat knitting).
- Tapestry needle for weaving in ends and seaming.
- Stitch markers (optional, for counting pattern repeats).
- Additional: 18-inch square pillow form (or 18-inch pillow insert).
Gauge
10 stitches x 14 rows = 4 inches in stockinette stitch (after blocking). Always check your gauge to ensure the correct finished size. If your gauge is off, adjust needle size accordingly.
Step-by-Step Instructions
This pillow cover is worked flat in two separate pieces (front and back) and then seamed together. The front uses a woven stitch pattern with slipped stitches, while the back is simple stockinette. Follow each step carefully for a flawless result.
Abbreviations
- CO: Cast on
- K: Knit
- P: Purl
- St(s): Stitch(es)
- RS: Right side
- WS: Wrong side
- sl1 wyib: Slip 1 stitch purlwise with yarn held in back (on RS rows)
- sl1 wyif: Slip 1 stitch purlwise with yarn held in front (on WS rows)
Front Panel (Woven Stitch Pattern)
Note: The woven stitch pattern is created by slipping stitches, which pulls the contrasting color (Color B) through the main color (Color A) to create the woven effect. The pattern is worked over a multiple of 5 stitches, plus 4 edge stitches on each side.
- Cast On: With Color A, CO 40 stitches.
- Row 1 (RS): K4, *sl1 wyib, K4; repeat from * to last 4 stitches, K4. (This sets the pattern: 4 knit edge stitches, then a slipped stitch, then 4 knits, repeating across.)
- Row 2 (WS): P4, *sl1 wyif, P4; repeat from * to last 4 stitches, P4. (On wrong side, purl the edge stitches and purl between slipped stitches, but slip the stitch with yarn in front.)
- Row 3: K4, *K1, sl1 wyib, K3; repeat from * to last 4 stitches, K4. (The slipped stitch shifts one stitch to the right.)
- Row 4: P4, *P1, sl1 wyif, P3; repeat from * to last 4 stitches, P4.
- Row 5: K4, *K2, sl1 wyib, K2; repeat from * to last 4 stitches, K4. (The slipped stitch shifts again.)
- Row 6: P4, *P2, sl1 wyif, P2; repeat from * to last 4 stitches, P4.
- Row 7: K4, *K3, sl1 wyib, K1; repeat from * to last 4 stitches, K4. (The slipped stitch is now near the end of the repeat.)
- Row 8: P4, *P3, sl1 wyif, P1; repeat from * to last 4 stitches, P4.
- Repeat Rows 1-8 until the piece measures approximately 18 inches from the cast-on edge, ending with a WS row (Row 2, 4, 6, or 8). Bind off all stitches loosely in pattern (knit the knits and purl the purls as they appear, slipping stitches as needed).
Back Panel
- Cast On: With Color A, CO 40 stitches.
- Work in Stockinette Stitch:
- RS rows: Knit all stitches.
- WS rows: Purl all stitches.
- Continue until the piece measures 18 inches from the cast-on edge. Bind off all stitches loosely.
Assembly
- Block Both Pieces: Soak the front and back panels in lukewarm water for 15 minutes. Gently squeeze out excess water (do not wring). Lay flat on a towel, shape to 18 inches square, and pin if needed. Allow to dry completely. Blocking evens out the stitches and ensures both pieces match in size.
- Seam Three Sides: With RS facing out, place the front and back panels together, aligning edges. Thread a tapestry needle with Color B yarn. Using mattress stitch (for an invisible seam) or whip stitch (for a visible, decorative edge), seam three sides together. Leave one side open for inserting the pillow form.
- Insert Pillow Form: Carefully insert the 18-inch pillow form into the cover through the open side. Adjust so the corners fit neatly.
- Seam the Remaining Side: Using the same seaming technique, close the fourth side. Weave in all ends securely.
- Optional Fringe: For a decorative finish, cut 6-inch lengths of Color B yarn. Fold each length in half, use a crochet hook to pull the loop through the edge seam, and pull the ends through the loop to secure. Space fringe evenly along all four edges, trimming to an even length (approx 1-2 inches).
Your Woven Willow Pillow Cover is now complete! Place it on a sofa, armchair, or bed to enjoy the rich texture and modern, cozy aesthetic. This pattern is perfect for using up super bulky yarn scraps and makes a thoughtful handmade gift.


