The Willow Wisp Baby Booties Free Pattern – Knit a Soft Petal-Stitch Spring Heirloom
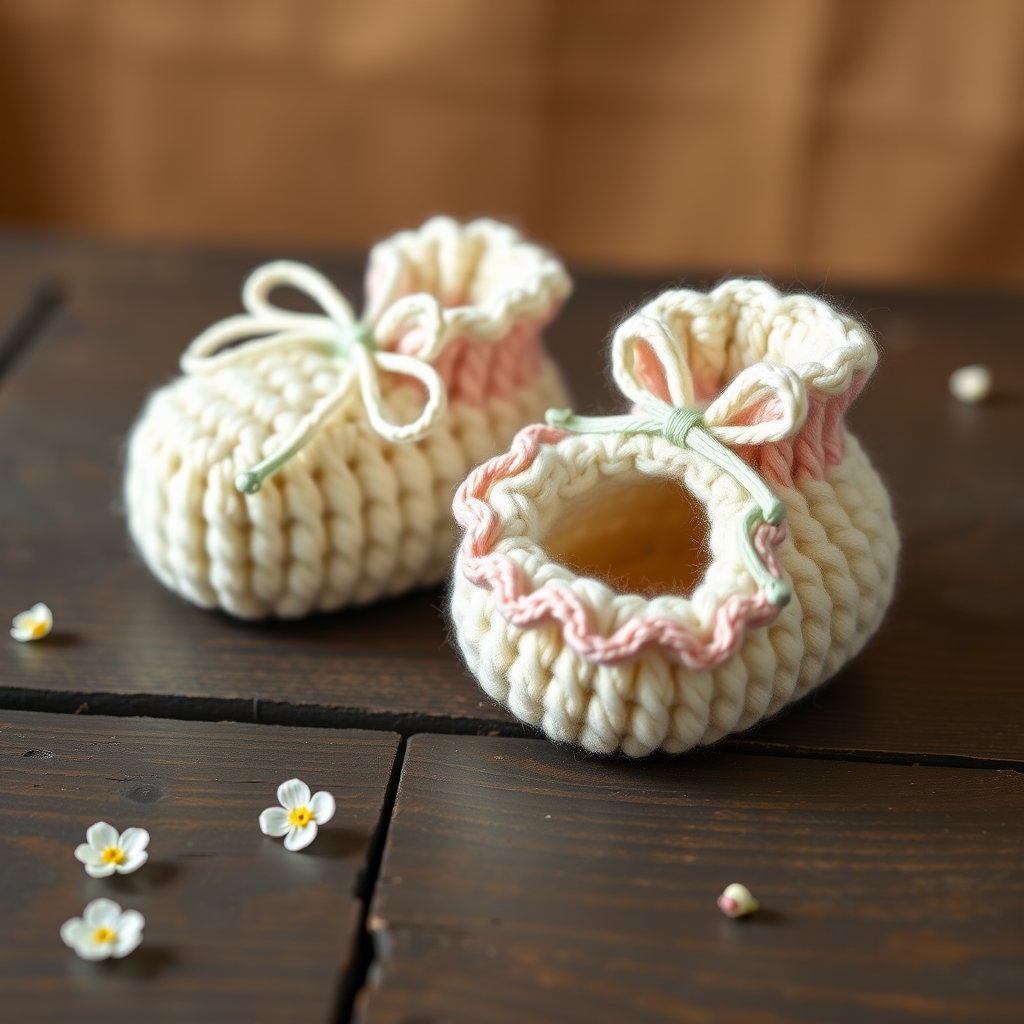
The Willow Wisp Baby Booties Free Pattern – Knit a Soft Petal-Stitch Spring Heirloom
Wrap tiny toes in the gentle embrace of a blooming meadow with these exquisite knitted booties. The Willow Wisp Baby Booties feature a delicate petal-stitch cuff and a sweet ribbon tie, creating a modern heirloom design that captures the fresh, airy spirit of spring. This pattern is perfect for knitters looking to create a truly special gift that will be treasured for generations. The combination of soft textures, delicate eyelets, and a charming ribbon detail makes these booties a joy to knit and an absolute delight to gift at baby showers, christenings, or springtime welcomes.
With their seamless construction and thoughtful design, these booties work up quickly and make an impressive statement. The petal stitch creates a stunning three-dimensional floral pattern across the instep, resembling tiny overlapping flower petals that seem to bloom right off the needles. Whether you're an experienced knitter seeking a new challenge or a confident beginner ready to expand your skills, this pattern offers a rewarding project with beautiful results.
Materials Needed
Before you begin your Willow Wisp Baby Booties, gather the following materials to ensure a smooth and enjoyable knitting experience:
Yarn
- Weight: DK weight (light worsted) superwash merino or cotton blend
- Amount: Approximately 100g (about 220 yards)
- Recommended Yarn: Cascade Yarns Ultra Pima or similar high-quality DK weight yarn
- Color Suggestions: Creamy ivory white for the main body, soft blush pink for the petal-stitch cuff, and a subtle sage green ribbon for contrast
Needles
- Size: US 5 (3.75 mm) knitting needles
- Type: Set of 4 double-pointed needles (DPNs) OR one circular needle for magic loop technique
Additional Supplies
- Satin ribbon (1/4 inch wide), approximately 20 inches per bootie
- Stitch markers (at least 2)
- Tapestry needle for weaving in ends
- Scissors
- Blocking mats and pins (optional but recommended)
Gauge
22 stitches and 30 rows = 4 inches in stockinette stitch (after blocking)
Always take time to check your gauge before beginning. If your gauge is off, adjust your needle size accordingly. A proper gauge ensures your booties will fit perfectly and have the correct drape and flexibility.
Step-by-Step Instructions
Follow these detailed instructions carefully to create your Willow Wisp Baby Booties. The pattern includes sizes for 0-3 months, 3-6 months, and 6-12 months, with finished sole lengths of 3.5, 4, and 4.5 inches respectively.
Sizes and Abbreviations
Sizes: 0-3 (3-6, 6-12) months
Finished sole length: 3.5 (4, 4.5) inches
Abbreviations:
- CO – cast on
- K – knit
- P – purl
- K2tog – knit two together (right-leaning decrease)
- SSK – slip slip knit (left-leaning decrease)
- YO – yarn over
- PM – place marker
- SM – slip marker
- BO – bind off
- RS – right side
- WS – wrong side
Special Stitch – Petal Stitch (worked over 4 stitches)
This beautiful stitch creates the signature floral pattern of the Willow Wisp Booties. Practice this stitch pattern on a swatch before beginning your project to ensure you're comfortable with the technique.
- Row 1 (RS): K4.
- Row 2 (WS): P4.
- Row 3: K2tog, YO, K2tog (this creates a small eyelet that forms the petal base).
- Row 4: P4.
Repeat these 4 rows for the pattern. The combination of decreases and yarn overs creates delicate openings that resemble flower petals when worked in sequence.
CUFF (Make 2)
Step 1: Cast On
CO 28 (32, 36) stitches. Distribute evenly on 3 DPNs (or use magic loop method on a circular needle). Join in the round, being extremely careful not to twist your stitches. Place a marker to indicate the beginning of the round.
Step 2: Ribbing Rounds 1-4
Round 1-4: *K2, P2; repeat from * around. This creates a classic ribbed cuff that will hug the baby's ankle comfortably while providing stretch and recovery.
Step 3: Eyelet Row (Round 5)
Round 5: *K2tog, YO, K2tog, P2; repeat from * around. This row creates the eyelet openings that will later accommodate your satin ribbon. The yarn overs create small holes while the decreases maintain your stitch count.
Step 4: Ribbing Rounds 6-8
Round 6-8: *K2, P2; repeat from * around. Continue the ribbing pattern to complete the cuff section.
Step 5: Begin Petal Stitch Pattern
Now you'll work the Petal Stitch pattern in the round. The P2 stitches between the petal sections act as the 'valleys' between petals, creating beautiful definition.
Round 9-12: *K4, P2; repeat from * around.
Round 13-16: *K2tog, YO, K2tog, P2; repeat from * around. (This forms the petal shape.)
Step 6: Repeat Petal Pattern
Repeat Rounds 9-16 once more for a standard cuff height, or twice for a taller, more dramatic cuff. The taller cuff creates a lovely flared effect that resembles a blooming flower.
HEEL AND FOOT
Step 1: Set Up Heel
Now you will work back and forth on the first 14 (16, 18) stitches for the heel, leaving the remaining 14 (16, 18) stitches on hold for the instep. You can place these instep stitches on a stitch holder or leave them on the needle while you work the heel flap.
Step 2: Heel Flap
Row 1 (RS): K14 (16, 18), turn.
Row 2 (WS): Slip 1, P13 (15, 17), turn.
Repeat these 2 rows for 10 (12, 14) rows total, ending with a WS row. The slipped stitches at the beginning of each WS row create a neat edge that makes picking up stitches easier later.
SHAPE HEEL
This short-row heel shaping creates a comfortable, anatomical fit for baby's foot.
Row 1 (RS): K8 (9, 10), SSK, K1, turn.
Row 2 (WS): Slip 1, P3, P2tog, P1, turn.
Row 3: Slip 1, K4, SSK, K1, turn.
Row 4: Slip 1, P5, P2tog, P1, turn.
Continue in this manner, working one more stitch before the decrease each time, until all heel stitches have been worked. You should have 8 (10, 10) stitches remaining on the heel needle. This creates a rounded heel cup that fits baby's foot perfectly.
GUSSET
Step 1: Pick Up Stitches
With the right side facing, pick up and knit 8 (10, 12) stitches along the side of the heel flap. Place a marker (this is the side marker). Knit across the instep stitches (the ones on hold) in the established Petal Stitch pattern. Place another marker. Pick up and knit 8 (10, 12) stitches along the other side of the heel flap. Knit across the heel stitches. You now have all stitches on the needles.
Step 2: Decrease Rounds
Round 1: Knit to 3 stitches before the first marker, K2tog, K1, SM, work instep in pattern, SM, K1, SSK, knit to end of round.
Round 2: Knit all stitches (work instep in pattern).
Repeat these 2 rounds until you have 28 (32, 36) stitches remaining. The decreases shape the gusset, creating a smooth transition from the heel to the foot of the bootie.
FOOT
Continue working in the round, keeping the instep in the Petal Stitch pattern and the sole in stockinette, until the foot measures 2.5 (3, 3.5) inches from the heel, or desired length (about 1 inch less than total foot length). The stockinette sole provides a smooth, comfortable surface against baby's delicate skin.
TOE SHAPING
Round 1: *K2, K2tog; repeat from * around.
Round 2: Knit all stitches.
Round 3: *K1, K2tog; repeat from * around.
Round 4: Knit all stitches.
Round 5: *K2tog; repeat from * around.
Cut yarn, leaving a 12-inch tail. Thread tail through remaining stitches, pull tight, and secure. This creates a rounded, seamless toe that's comfortable for baby and beautiful to behold.
FINISHING
Step 1: Weave in Ends
Using your tapestry needle, carefully weave in all loose ends on the inside of the bootie. Take your time to ensure ends are secure and invisible from the outside.
Step 2: Block Gently
Block the booties gently to shape them and enhance the petal stitch definition. Use a spray bottle to lightly mist the booties, then shape them on blocking mats and allow them to dry completely. This step helps the petal stitch open up and creates a more professional finish.
Step 3: Add Ribbon
Thread a satin ribbon (1/4 inch wide) through the eyelet row, starting at the front center of the bootie. Weave the ribbon in and out of the eyelets, then tie a small bow at the front. The ribbon not only adds charm but also helps keep the booties securely on baby's feet.
Step 4: Make the Second Bootie
Make a second bootie identically to complete the pair. For best results, keep track of your row counts and measurements to ensure both booties match perfectly.
Tips for Success
- Check your gauge: Always knit a gauge swatch before starting. This ensures your booties will be the correct size.
- Use stitch markers: Markers are essential for keeping track of your rounds and pattern repeats.
- Count your stitches: After each pattern round, count your stitches to ensure you haven't accidentally dropped or added any.
- Choose soft yarn: Baby skin is delicate, so choose a soft, washable yarn like superwash merino or a cotton blend.
- Block for best results: Blocking truly transforms these booties, opening up the petal stitch and giving them a professional finish.
These Willow Wisp Baby Booties make a thoughtful, handmade gift that will be cherished for years to come. The delicate petal stitch and sweet ribbon tie create a timeless design that captures the essence of spring. Whether you're knitting for your own little one or as a gift for a loved one's baby, these booties are sure to become a treasured heirloom. Happy knitting!


