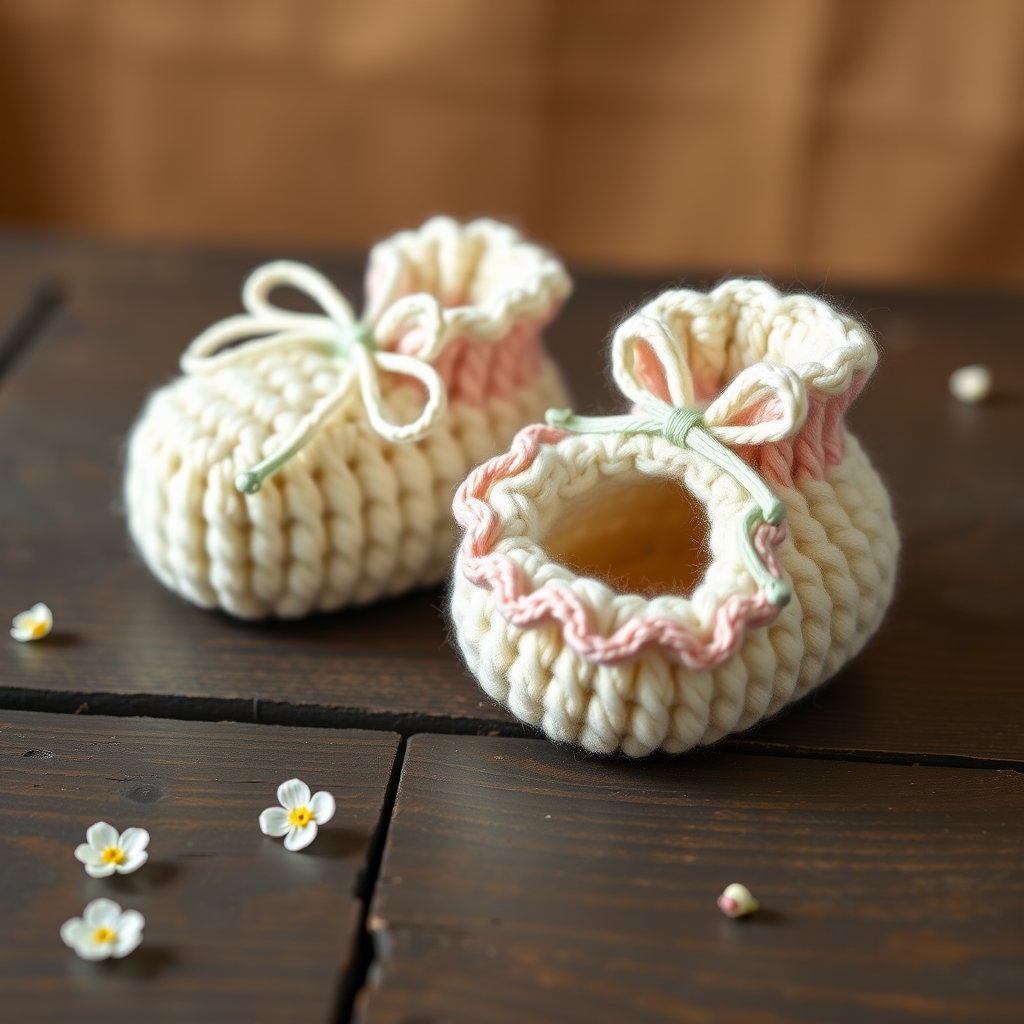
The Clover Cloud Baby Booties Free Pattern – A Knitted Garden of Soft Steps

The Clover Cloud Baby Booties Free Pattern – A Knitted Garden of Soft Steps
Wrap tiny toes in the softest cloud-like comfort with these adorable knitted booties, featuring a delicate clover leaf motif and a cozy folded cuff. This pattern is perfect for beginners and makes a heartfelt handmade gift for any new arrival. The combination of soft sage green and cream white creates a natural, garden-inspired look that's both timeless and utterly charming. Whether you're a seasoned knitter or just starting your crafting journey, these booties work up quickly and are sure to become a cherished keepsake.
Materials Needed
Before you begin, gather the following supplies. Having everything ready will make your knitting experience smooth and enjoyable.
- Yarn: Worsted weight (Category 4) yarn in two colors:
- Main Color (MC) – Soft Sage Green (approx. 50-60 yards)
- Contrast Color (CC) – Cream White (approx. 20-30 yards)
- Needles: US Size 6 (4.0 mm) knitting needles (or size needed to obtain gauge)
- Notions: Stitch markers (2), tapestry needle for weaving in ends, scissors
- Gauge: 20 stitches and 28 rows = 4 inches in stockinette stitch (important for correct sizing!)
Step-by-Step Instructions
Sizes & Abbreviations
Sizes: Newborn (0-3 months) – Sole length 3.5 inches; 3-6 months – Sole length 4 inches; 6-12 months – Sole length 4.5 inches. Instructions are for the smallest size, with larger sizes in parentheses.
Abbreviations: K = knit, P = purl, K2tog = knit two together, SSK = slip slip knit, YO = yarn over, PM = place marker, SM = slip marker, St(s) = stitch(es), MC = main color, CC = contrast color.
Notes: These booties are worked flat from the cuff down to the toe, then seamed. The clover motif is created with simple yarn overs and decreases, making it an excellent project for practicing basic lace techniques.
CUFF (Make 2)
With MC, cast on 30 (34, 38) sts.
Row 1 (RS): K2, P2, repeat to last 2 sts, K2.
Row 2 (WS): P2, K2, repeat to last 2 sts, P2.
Repeat Rows 1-2 for 6 (7, 8) rows total. End with a WS row. This creates a stretchy, ribbed cuff that will fold down beautifully.
LEG
Switch to stockinette stitch (K on RS, P on WS). Work even for 8 (10, 12) rows, ending with a WS row. This smooth section will showcase the clover motif beautifully.
CLOVER MOTIF (Worked on next RS row)
Now we'll create the charming clover leaf pattern. The yarn overs create the leaves, while the decreases keep the stitch count balanced. Don't worry if it looks a bit tricky at first – the rhythm becomes intuitive quickly.
Row 1 (RS): K2, YO, SSK, K1, YO, K2tog, K1, YO, SSK, K1, YO, K2tog, K to end. (You have increased 4 sts, but they are compensated by the decreases – total sts remain same)
Row 2 (WS): Purl all sts.
Row 3 (RS): K3, YO, SSK, K1, YO, K2tog, K1, YO, SSK, K1, YO, K2tog, K to last 2 sts, K2.
Row 4 (WS): Purl all sts.
Row 5 (RS): K4, YO, SSK, K1, YO, K2tog, K1, YO, SSK, K1, YO, K2tog, K to last 4 sts, K4.
Row 6 (WS): Purl all sts.
Row 7 (RS): K5, YO, SSK, K1, YO, K2tog, K1, YO, SSK, K1, YO, K2tog, K to last 6 sts, K6.
Row 8 (WS): Purl all sts.
Row 9 (RS): K6, YO, SSK, K1, YO, K2tog, K1, YO, SSK, K1, YO, K2tog, K to last 8 sts, K8.
Row 10 (WS): Purl all sts.
Row 11 (RS): K7, YO, SSK, K1, YO, K2tog, K1, YO, SSK, K1, YO, K2tog, K to last 10 sts, K10.
Row 12 (WS): Purl all sts.
Row 13 (RS): K8, YO, SSK, K1, YO, K2tog, K1, YO, SSK, K1, YO, K2tog, K to last 12 sts, K12.
Row 14 (WS): Purl all sts.
Row 15 (RS): K9, YO, SSK, K1, YO, K2tog, K1, YO, SSK, K1, YO, K2tog, K to last 14 sts, K14.
Row 16 (WS): Purl all sts.
Row 17 (RS): K10, YO, SSK, K1, YO, K2tog, K1, YO, SSK, K1, YO, K2tog, K to last 16 sts, K16.
Row 18 (WS): Purl all sts.
Row 19 (RS): K11, YO, SSK, K1, YO, K2tog, K1, YO, SSK, K1, YO, K2tog, K to last 18 sts, K18.
Row 20 (WS): Purl all sts.
Row 21 (RS): K12, YO, SSK, K1, YO, K2tog, K1, YO, SSK, K1, YO, K2tog, K to last 20 sts, K20.
Row 22 (WS): Purl all sts.
Row 23 (RS): K13, YO, SSK, K1, YO, K2tog, K1, YO, SSK, K1, YO, K2tog, K to last 22 sts, K22.
Row 24 (WS): Purl all sts.
Row 25 (RS): K14, YO, SSK, K1, YO, K2tog, K1, YO, SSK, K1, YO, K2tog, K to last 24 sts, K24.
Row 26 (WS): Purl all sts.
Row 27 (RS): K15, YO, SSK, K1, YO, K2tog, K1, YO, SSK, K1, YO, K2tog, K to last 26 sts, K26.
Row 28 (WS): Purl all sts.
Notice how the motif gradually shifts outward, creating a beautiful diagonal cascade of clover leaves down the front of the bootie.
INSTEP
Now we'll shape the instep using short rows. This creates a comfortable, anatomical fit for baby's foot.
Row 1 (RS): K20 (22, 24), turn.
Row 2 (WS): P10 (11, 12), turn.
Row 3 (RS): K to 1 st before the gap, SSK, turn. (The "gap" refers to the space between the last worked stitch and the unworked stitches)
Row 4 (WS): P to 1 st before the gap, P2tog, turn.
Repeat Rows 3-4 until 10 (11, 12) sts remain on the needle, ending with a WS row. Do not turn after the last WS row. You've now created a nicely shaped instep that will cradle baby's foot perfectly.
SOLE
Now we'll work the sole, picking up stitches along the sides to create a seamless bottom.
Row 1 (RS): K10 (11, 12) sts, pick up and knit 12 (14, 16) sts along the side of the instep, PM, K30 (34, 38) sts from the back of the heel, PM, pick up and knit 12 (14, 16) sts along the other side of the instep. Total: 64 (73, 82) sts.
Row 2 (WS): Purl all sts.
Row 3 (RS): K to 2 sts before first marker, K2tog, SM, K to next marker, SM, SSK, K to end. (Decrease 2 sts)
Row 4 (WS): Purl all sts.
Repeat Rows 3-4 until 30 (34, 38) sts remain. This gradual shaping creates a gently curved sole that's perfect for tiny feet.
TOE
Time to shape the toe and finish off your bootie.
Row 1 (RS): K2tog, K to last 2 sts, K2tog. (Decrease 2 sts)
Row 2 (WS): Purl all sts.
Repeat Rows 1-2 until 10 (12, 14) sts remain. Cut yarn, leaving a long tail (about 12 inches). Thread tail through remaining sts, pull tight, and secure. This gathers the toe closed for a rounded, adorable finish.
FINISHING
Your bootie is almost complete! Here's how to finish it beautifully.
Sew the back seam of the bootie from the cuff down to the heel using the mattress stitch or whip stitch for a neat, invisible join. Weave in all ends carefully with your tapestry needle. Fold the cuff down for a cozy, classic look. Repeat the entire process for the second bootie.
Pro Tip: To make these booties extra special, consider adding a small button or embroidered flower at the center of each clover motif. This adds a personal touch that new parents will treasure.
These Clover Cloud Baby Booties are more than just a knitting project – they're a labor of love. The soft sage green and cream white colors evoke a peaceful garden, while the cloud-like worsted weight yarn ensures maximum comfort for baby's delicate skin. Whether you're knitting for your own little one or as a gift for a baby shower, these booties are sure to bring smiles and warmth. Happy knitting!