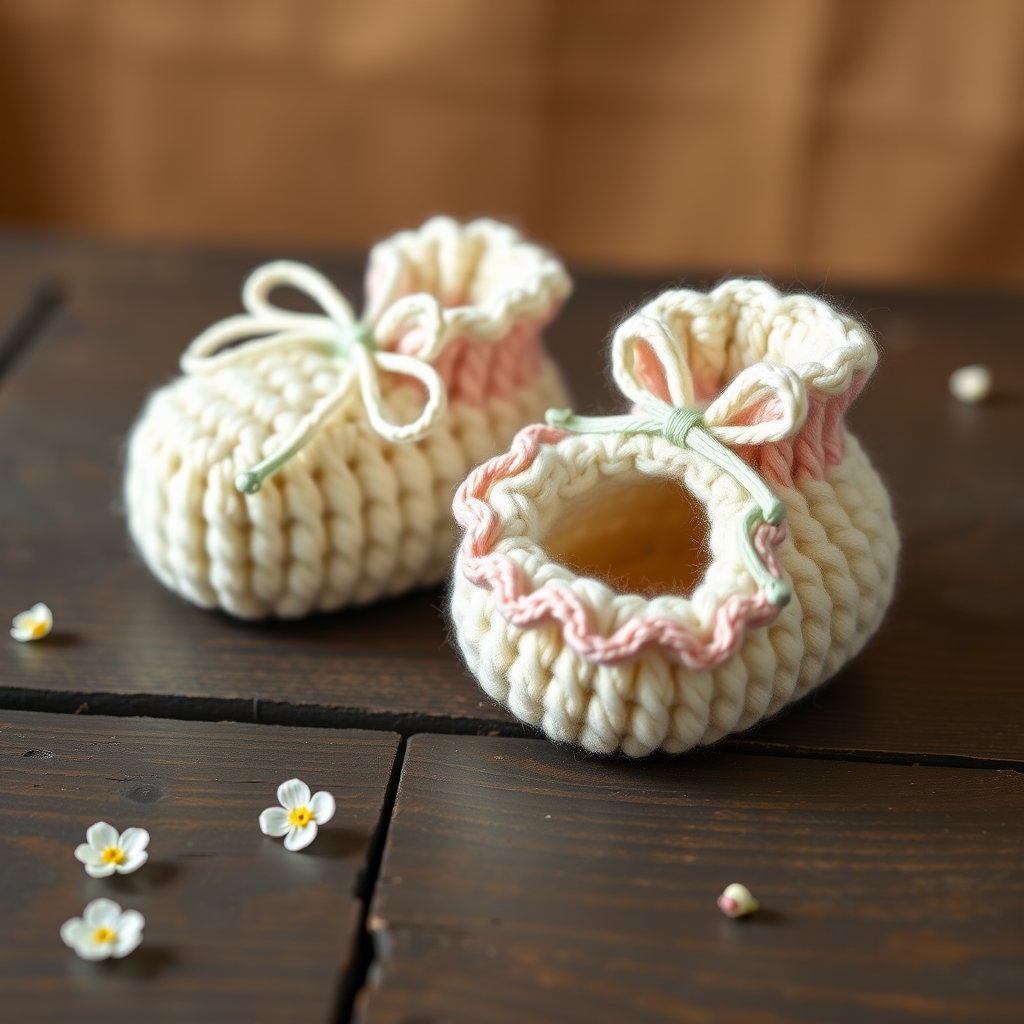
Ribbed Cuff Baby Booties Free Pattern – Knit Cozy Cloud Step Slippers

Ribbed Cuff Baby Booties Free Pattern – Knit Cozy Cloud Step Slippers
Wrap tiny toes in these cloud-soft ribbed cuff booties, featuring a delicate scalloped edge and a snug, stretchy fit. Knit flat and seamed, this pattern is perfect for beginners and makes a heartfelt handmade gift for baby showers, newborns, or your own little one. The creamy ivory texture and minimalist design create an heirloom-quality look that any parent will treasure.
Why You'll Love This Pattern
These booties are designed with simplicity and comfort in mind. The ribbed cuff provides a gentle, stretchy hold around the ankle, while the smooth stockinette foot allows natural movement. The scalloped edge adds a touch of elegance without complicating the knit. Best of all, the entire project uses just 50g of worsted weight yarn—perfect for using up stash yarn or splurging on a soft merino blend.
Materials Needed
Before you begin, gather the following supplies:
- Yarn: Worsted weight (#4) soft acrylic or merino blend, approximately 50g (80-100 yards) in your chosen color. The sample uses a creamy ivory white.
- Needles: US 6 (4.0 mm) knitting needles—straight or circular for flat knitting.
- Notions: Tapestry needle for seaming, stitch markers (optional but helpful), scissors.
- Gauge: 20 stitches x 28 rows = 4 inches in stockinette stitch (after blocking). Gauge is important for achieving the correct size, so take a moment to knit a swatch.
Sizes and Measurements
This pattern includes three sizes to accommodate growing babies:
- Newborn (0-3 months): Sole length 3.5 inches
- 3-6 months: Sole length 4 inches
- 6-12 months: Sole length 4.5 inches
Instructions are written for the newborn size, with larger sizes in parentheses. Choose the size closest to your baby's foot length for the best fit.
Abbreviations
Familiarize yourself with these standard knitting abbreviations before starting:
- K = knit
- P = purl
- K2tog = knit two together (decrease)
- SSK = slip slip knit (decrease)
- YO = yarn over (increase/hole)
- PM = place marker
- SM = slip marker
- BO = bind off
Step-by-Step Instructions
Cuff (Make 2)
Cast on 30 (34, 38) stitches using your preferred method. A long-tail cast-on works beautifully here.
Row 1 (Right Side): K2, *P2, K2; repeat from * to end of row.
Row 2 (Wrong Side): P2, *K2, P2; repeat from * to end of row.
Repeat Rows 1 and 2 until the cuff measures 2 (2.25, 2.5) inches from the cast-on edge, ending with a wrong-side row. This ribbed pattern creates a stretchy, snug cuff that will hug the baby's ankle comfortably.
Foot Shaping
Now we'll shape the foot by decreasing stitches evenly on the right side rows.
Next Row (Right Side): K1, place marker, K2tog, knit to the last 3 stitches, SSK, place marker, K1. You now have 28 (32, 36) stitches.
Next Row (Wrong Side): Purl all stitches.
Repeat these 2 rows until you have 18 (20, 22) stitches remaining, ending with a wrong-side row. Remove the markers as you go—they're no longer needed once you reach the final stitch count.
Instep
The instep shapes the top of the foot, creating a gentle curve that follows the baby's arch.
Row 1 (Right Side): K1, SSK, knit to the last 3 stitches, K2tog, K1. You now have 16 (18, 20) stitches.
Row 2 (Wrong Side): Purl all stitches.
Repeat these 2 rows until 8 (10, 12) stitches remain, ending with a wrong-side row. The decreases on both edges create a tapered, rounded toe shape.
Scalloped Edge
This delicate eyelet row creates the pretty scalloped detail at the top of the bootie.
Row 1 (Right Side): K1, *YO, K2tog; repeat from * to the last stitch, K1. The yarn overs create small holes that form the scalloped pattern.
Row 2 (Wrong Side): Purl all stitches.
Bind off loosely knitwise. Be careful not to bind off too tightly, as this edge should remain flexible and decorative.
Finishing
Now it's time to assemble your bootie:
- Fold the bootie in half with right sides together, matching the cast-on edge to the bind-off edge.
- Sew the back seam from the cuff down to the heel using a mattress stitch or whip stitch. This seam runs up the back of the bootie.
- Sew the sole seam from the heel to the toe, joining the bottom edges. This creates the flat, seamless sole.
- Turn the bootie right side out through the cuff opening.
- Weave in all loose ends with your tapestry needle, being careful to hide them within the fabric.
- Repeat the entire process for the second bootie.
Optional Embellishments
For an extra-special touch, thread a satin ribbon or crochet chain through the eyelet row created by the yarn overs. Tie it in a small bow at the front of the bootie. This not only adds charm but also helps keep the booties securely on wiggly feet. You could also add a small button or embroidered initial for a personalized gift.
Care Instructions
To keep these booties looking their best, hand wash in cool water with a gentle wool wash, then lay flat to dry. Reshape while damp to maintain the bootie's form. Avoid wringing or twisting, as this can distort the knit.
Tips for Success
- Check your gauge: A quick swatch ensures your finished booties match the intended size. If your gauge is off, adjust your needle size accordingly.
- Use stitch markers: They help you track your decreases and prevent mistakes, especially when knitting multiple sizes.
- Keep tension even: Consistent tension creates a professional finish. If you're new to knitting, practice on a swatch first.
- Block gently: Lightly steaming or wet-blocking the finished booties helps even out stitches and gives a polished look.
These ribbed cuff booties are a joy to knit and an even greater joy to gift. The combination of soft yarn, thoughtful shaping, and delicate scalloped detail makes them a standout handmade present. Whether you're a beginner looking for your first baby knit or an experienced crafter seeking a quick project, these booties deliver warmth, comfort, and style in every stitch.
Happy knitting! Your tiny recipient will feel the love in every cozy step.