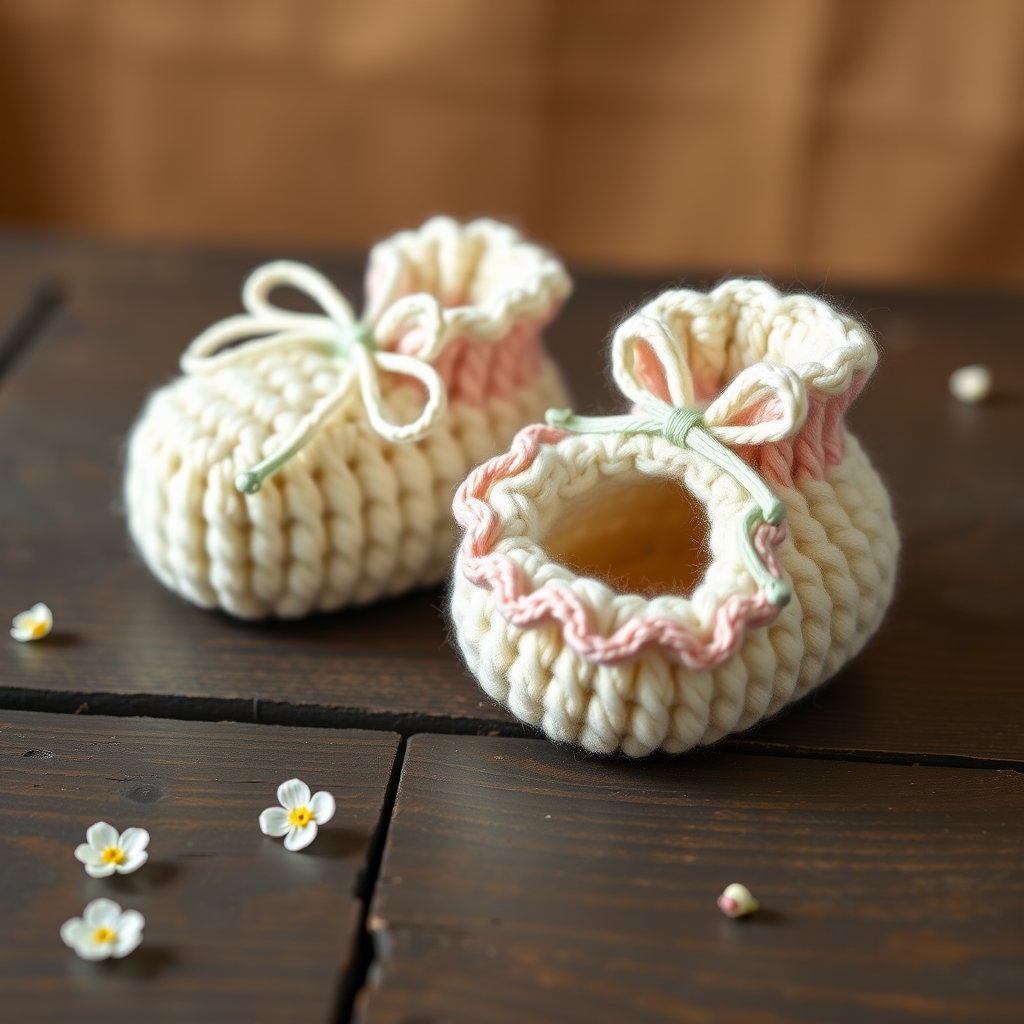
The Cloudberry Bloom Baby Booties Free Pattern – A Knitted Berry-Stitch Heirloom

The Cloudberry Bloom Baby Booties Free Pattern – A Knitted Berry-Stitch Heirloom
Wrap tiny toes in the softest hand-knit clouds with these berry-stitch booties, featuring a delicate scalloped cuff and a hidden ribbon tie. A modern heirloom piece that turns every little step into a story. Whether you're preparing for a baby shower or searching for the perfect newborn gift, these booties are a labor of love that will be treasured for years to come. The combination of a textured berry stitch and a smooth, creamy foot creates a stunning contrast that looks far more complex than it actually is—perfect for confident beginners ready to try something special.
Materials Needed
Before you begin, gather the following supplies to ensure a smooth knitting experience:
- Yarn: DK weight superwash merino wool (e.g., Malabrigo Rios in 'Cloudberry' and 'Cream') – 1 skein each. The superwash treatment makes these booties machine-washable, a practical choice for baby items.
- Needles: US 5 (3.75 mm) knitting needles (or size to obtain gauge). Straight needles work well, but circular needles can also be used for the flat pieces.
- Notions: Tapestry needle for seaming and weaving in ends, stitch markers (at least 2), and a stitch holder or scrap yarn to hold cuff stitches.
- Gauge: 22 stitches and 30 rows = 4 inches in stockinette stitch (blocked). Always knit a swatch to ensure your tension matches—this is crucial for achieving the correct finished size.
Step-by-Step Instructions
This pattern is written for Newborn (0-3 months) size, with larger (3-6 months) instructions in parentheses. The sole length will be approximately 3.5 (4) inches. Take your time, read through the entire pattern first, and don't hesitate to use stitch markers liberally—they are your best friend here.
Abbreviations
- k = knit
- p = purl
- k2tog = knit two together (decrease)
- ssk = slip slip knit (decrease)
- yo = yarn over (increase/hole)
- pm = place marker
- sm = slip marker
- st(s) = stitch(es)
- RS = right side
- WS = wrong side
Special Stitch – Berry Stitch (worked over 5 sts)
This is the signature texture of the booties, creating a bumpy, raspberry-like surface. It's easier than it looks:
- On RS: (k1, yo, k1, yo, k1) all into the same stitch—this increases 1 stitch into 5 stitches.
- Turn work (now on WS): p5 across those 5 stitches.
- Turn work (now on RS): k5 across those 5 stitches.
- Now, using your left needle, pass the 2nd, 3rd, 4th, and 5th stitches over the 1st stitch (one at a time, like binding off). This leaves you with 1 stitch—one berry made.
Pro tip: Work this stitch loosely to avoid puckering. If it feels tight, use a larger needle tip for just those stitches.
CUFF (make 2)
The cuff is worked flat from the top down, then seamed into a ring. The scalloped edge is created by the berry stitch pattern.
- Cast on 30 (34) stitches with Cloudberry color.
- Row 1 (RS): k2, *p2, k2; repeat from * to end. This establishes the ribbing.
- Row 2: p2, *k2, p2; repeat from * to end.
- Repeat Rows 1-2 for 6 (8) more rows, ending with a WS row. You should have a total of 8 (10) ribbing rows. This creates a snug, stretchy band that will hug the ankle.
- Next row (RS): k2, *berry st over next 5 sts, k1; repeat from * to end – you will have 5 (6) berries. Note: The initial k2 and final k1 create a balanced edge.
- Next row (WS): purl all stitches. This row separates the berry texture from the eyelet row.
- Next row (RS): k2, *k2tog, yo, k1; repeat from * to end. This is the eyelet row where the ribbon will thread through. The k2tog and yo balance each other, keeping the stitch count the same.
- Next row (WS): purl all stitches.
- Cut yarn, leaving a 6-inch tail. Place stitches on a holder or scrap yarn. Set aside.
FOOT (make 2)
The foot is worked flat in stockinette, then shaped at the instep to create a gentle taper toward the toe.
- With Cream color, cast on 24 (28) stitches.
- Work in stockinette (knit RS, purl WS) for 10 (12) rows, ending with a WS row. This forms the sole and sides of the foot.
- Shape instep: Place a marker in the center of the row to guide your decreases.
- Row 1 (RS): k14 (16), pm, k2tog, k to end – 23 (27) sts. You've decreased 1 stitch after the marker.
- Row 2: p to 2 sts before marker, p2tog, sm, p to end – 22 (26) sts. Now you're decreasing 1 stitch before the marker.
- Row 3: k to 2 sts before marker, k2tog, sm, k to end – 21 (25) sts.
- Row 4: p to 2 sts before marker, p2tog, sm, p to end – 20 (24) sts.
- Repeat Rows 3-4 until 12 (14) stitches remain, ending with a WS row. This creates a symmetrical, rounded toe shape.
- Cut yarn, leaving a long tail (at least 12 inches) for seaming the foot to the cuff.
ASSEMBLY
Now it's time to bring the pieces together. Take your time with this step—good seaming makes all the difference in the final look.
- Seam the cuff: With RS facing, place the cuff stitches from the holder onto your needle. Using the tail from the cast-on edge, use mattress stitch to sew the short edges of the cuff together, forming a ring. Weave in this end.
- Attach cuff to foot: With RS facing, align the cuff's cast-on edge with the foot's top edge (the instep shaping side). The cuff should sit on top of the foot, with the berry stitch pattern facing outward. Using the long tail from the foot, sew the cuff to the foot using a whip stitch or mattress stitch, easing any fullness. If the cuff is slightly wider than the foot, distribute the extra fabric evenly around the circumference.
- Finish the toe: Turn the bootie inside out. Use the remaining tail to sew the toe seam closed (the last 12 (14) stitches). Weave in all ends securely.
- Turn the bootie right side out. Repeat for the second bootie.
FINISHING
The final touches transform these from lovely to heirloom-worthy.
- Cut two 12-inch lengths of Cloudberry yarn. Thread one through the eyelet row of each bootie, starting at the front center and working around. The yarn should weave in and out of the eyelets easily.
- Tie a small, neat bow at the front of each bootie. Trim the ends at an angle to prevent fraying.
- Block gently: Wet block or steam block the booties to shape. This helps the berry stitch bloom and the seams lie flat. Lay them flat to dry, shaping the toe and cuff as they dry.
These booties are a joy to make and an even greater joy to give. The soft merino wool will keep tiny feet warm and cozy, while the delicate details make them a keepsake piece. Whether you're a seasoned knitter or a beginner ready for a new challenge, the Cloudberry Bloom booties are a rewarding project that will be cherished. Happy knitting!