The Terra Cotta Tile Bandana: A Free Knitting Pattern for a Textured, Geometric Neck Accessory
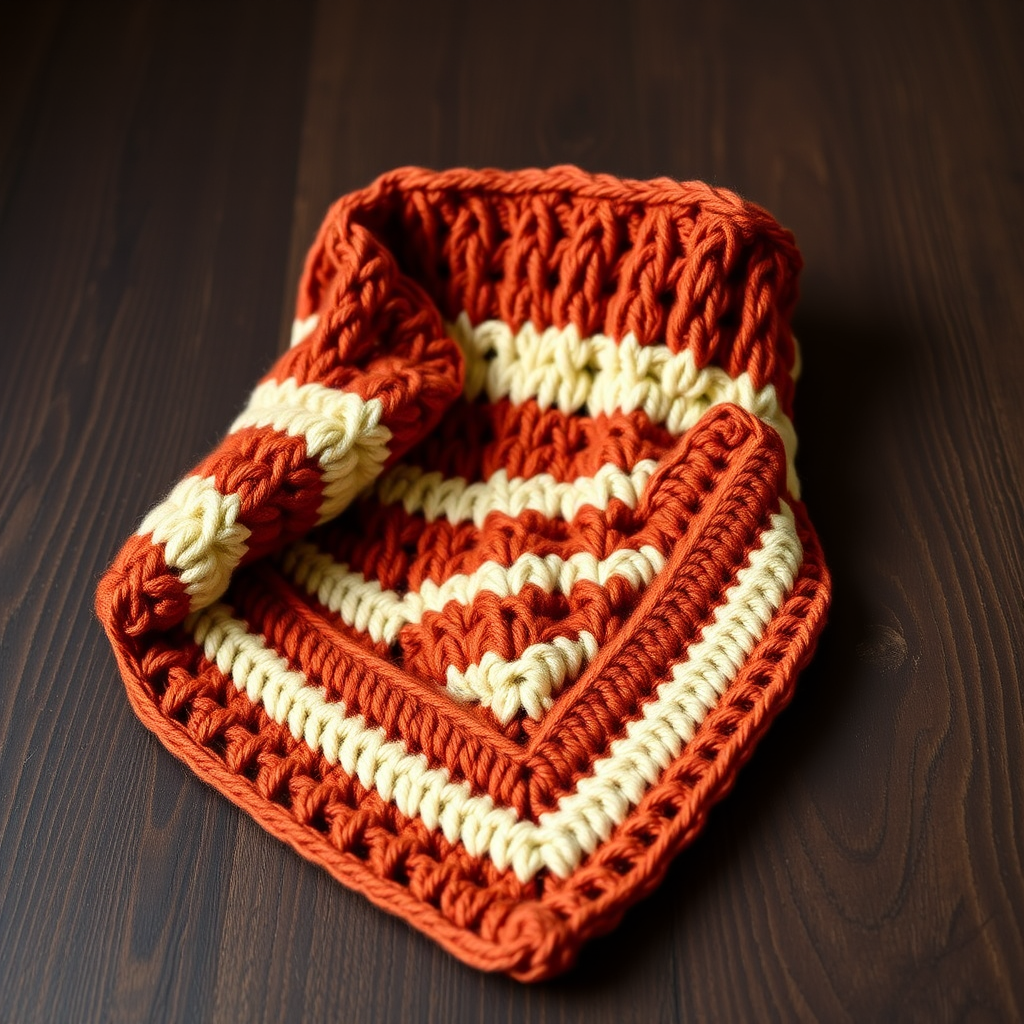
Introducing the Terra Cotta Tile Bandana
Elevate your accessory game with this modern, geometric bandana, knit in a rich terra cotta palette. The unique tile-like stitch pattern creates a stunning, textured fabric that's both cozy and chic. This pattern is perfect for adventurous beginners and intermediate knitters looking to add a stylish, architectural piece to their wardrobe. The bandana is worked flat from the top point down, making it a satisfying and portable project.
Materials Needed
To recreate this exact textured neck accessory, gather the following supplies:
- Yarn: Worsted weight (#4) yarn in three colors:
- Main Color (MC) - Terra Cotta (approx 120 yds)
- Contrast Color A (CA) - Cream (approx 60 yds)
- Contrast Color B (CB) - Deep Rust (approx 40 yds)
- Needles: US Size 7 (4.5 mm) knitting needles (straight or circular for working flat)
- Other: Tapestry needle for weaving in ends, scissors, blocking pins and mat (optional but recommended).
Gauge: 20 stitches x 28 rows = 4 inches in stockinette stitch, blocked. Achieving the correct gauge ensures your bandana will be the proper size and drape.
Step-by-Step Instructions
Notes: The bandana is worked flat from the top point down to the bottom edge. The stitch pattern is a simple 4-row repeat that creates a geometric tile effect. Slip the first stitch of every row purlwise with yarn in front for a neat edge. This creates a clean, chain-like edge that makes seaming or picking up stitches easier.
Abbreviations
- CO: Cast on
- K: Knit
- P: Purl
- Sl1 wyif: Slip 1 stitch purlwise with yarn in front
- M1: Make one stitch (increase) by lifting the bar between stitches and knitting it through the back loop
- MC: Main Color (Terra Cotta)
- CA: Contrast Color A (Cream)
- CB: Contrast Color B (Deep Rust)
- RS: Right Side
- WS: Wrong Side
Begin the Bandana
With MC, CO 3 stitches.
Row 1 (WS): Sl1 wyif, K2. (3 sts)
Row 2 (RS): Sl1 wyif, K1, M1 (make one by lifting the bar between stitches and knitting it through the back loop), K1. (4 sts)
Row 3: Sl1 wyif, P to last stitch, K1. (4 sts)
Row 4: Sl1 wyif, K1, M1, K to last 2 stitches, M1, K2. (6 sts)
Repeat Rows 3-4 until you have 30 stitches on your needle, ending with a WS row. This creates the top point of the bandana.
Begin Tile Pattern
Row 1 (RS): With MC, Sl1 wyif, K1, M1, *K2, P2; repeat from * to last 2 stitches, M1, K2. (32 sts)
Row 2 (WS): With MC, Sl1 wyif, *K2, P2; repeat from * to last stitch, K1. (32 sts)
Row 3: With CA, Sl1 wyif, K1, M1, *P2, K2; repeat from * to last 2 stitches, M1, K2. (34 sts)
Row 4: With CA, Sl1 wyif, *P2, K2; repeat from * to last stitch, K1. (34 sts)
Row 5: With MC, Sl1 wyif, K1, M1, *K2, P2; repeat from * to last 2 stitches, M1, K2. (36 sts)
Row 6: With MC, Sl1 wyif, *K2, P2; repeat from * to last stitch, K1. (36 sts)
Row 7: With CB, Sl1 wyif, K1, M1, *P2, K2; repeat from * to last 2 stitches, M1, K2. (38 sts)
Row 8: With CB, Sl1 wyif, *P2, K2; repeat from * to last stitch, K1. (38 sts)
Repeat Rows 1-8, continuing to increase 2 stitches every RS row (M1 after the first 2 stitches and before the last 2 stitches), until you have 70 stitches on your needle, ending with a WS row. The tile pattern will naturally shift with the increases, creating the geometric effect.
Final Section
Row 1 (RS): With MC, Sl1 wyif, K1, M1, K to last 2 stitches, M1, K2. (72 sts)
Row 2 (WS): Sl1 wyif, P to last stitch, K1. (72 sts)
Repeat Rows 1-2 two more times. (76 sts)
Bind off loosely: K2, *pass first stitch over, K1; repeat from * to end. Cut yarn and weave in ends.
Finishing
Weave in all ends using a tapestry needle. Block the bandana to shape: pin out the points on a blocking mat, lightly mist with water, and allow to dry completely. This will open up the stitch pattern and give the bandana its final, professional shape.


