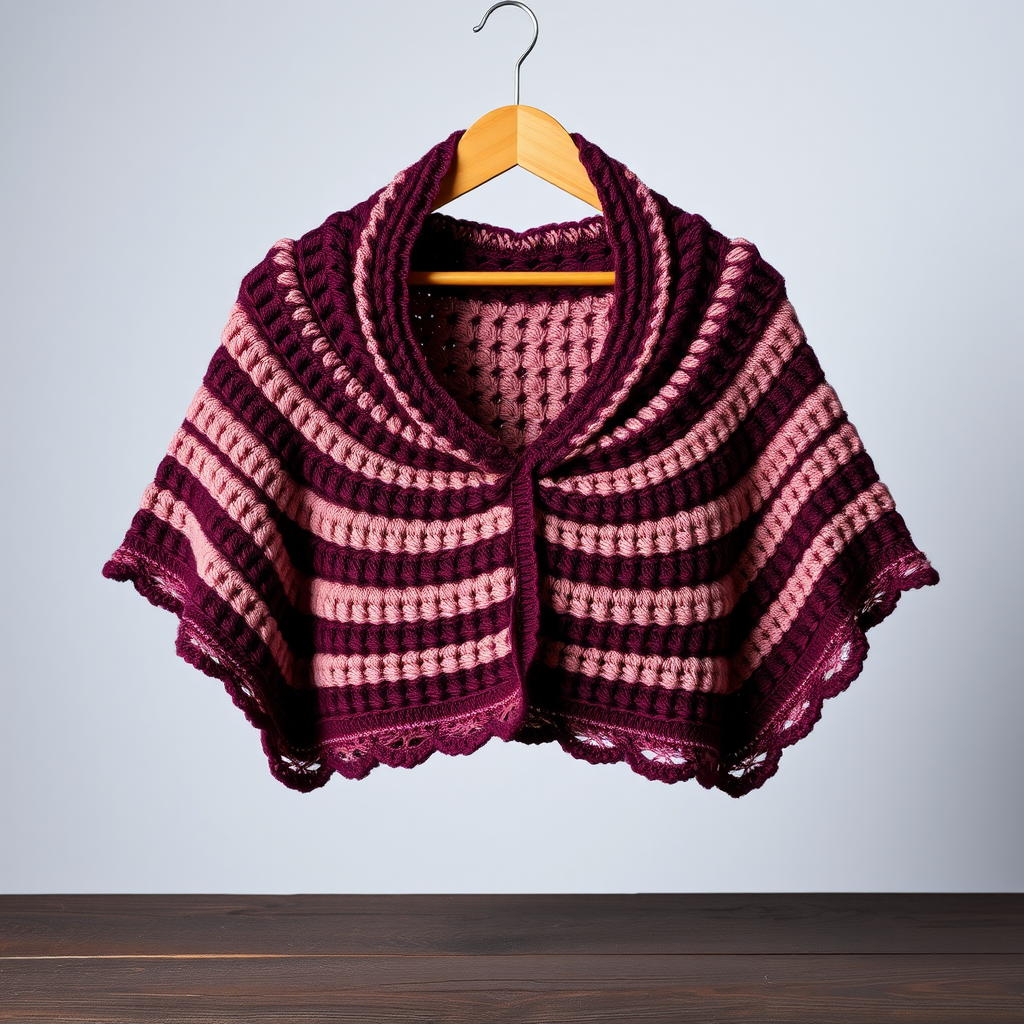
The Rosethorn Cascade Capelet Free Pattern – A Crocheted Symphony of Layered Petals

The Rosethorn Cascade Capelet Free Pattern – A Crocheted Symphony of Layered Petals
Wrap your little one in the delicate beauty of a blooming garden with this exquisite capelet, where cascading petals of soft rose and cream create a truly enchanting silhouette. This pattern offers a modern, romantic twist on a classic layer, perfect for special occasions or everyday whimsy. The Rosethorn Cascade Capelet is an heirloom-quality piece that works up surprisingly quickly, making it an ideal weekend project for crocheters ready to move beyond the basics.
This free crochet pattern is designed to be accessible for confident beginners while still offering a rewarding challenge. The top-down construction means you can easily try it on your little model as you go, and the stunning three-tiered petal ruffle at the bottom is pure magic to watch unfold. Let's dive into creating this floral masterpiece together!
Materials Needed
Before we begin our crochet journey, let's gather all the supplies you'll need to bring this beautiful capelet to life. The Rosethorn Cascade uses simple, readily available materials:
- Yarn: Red Heart Super Saver (100% acrylic, 7 oz/198 g, 364 yds/333 m) in the following colors:
- Color A: Petal Pink – 1 skein
- Color B: Aran (warm cream) – 1 skein
- Color C: Soft White – 1 skein
- Crochet Hook: US Size I/9 (5.5 mm) crochet hook, or size needed to obtain gauge
- Other Tools: Yarn needle for weaving in ends, scissors, and stitch markers (optional but helpful)
Gauge: 14 dc x 8 rows = 4 inches (10 cm) in dc pattern. Always check your gauge first to ensure the perfect fit!
Step-by-Step Instructions
This capelet is worked top-down in one piece, starting from the neckline and working our way down to the magnificent petal ruffle. Don't be intimidated by the length of the pattern – the construction is logical and repetitive, making it easy to memorize as you go.
Pattern Notes
- Worked top-down in one piece
- Ch 3 counts as dc throughout
- Join rounds with sl st unless otherwise stated
- Work in continuous rounds for the body, then join for the petal edge
Foundation & Neckline
Foundation: With color A (Petal Pink), ch 62, join with sl st to form ring (be careful not to twist your chain).
Round 1: Ch 3 (counts as first dc), dc in next 3 ch, *ch 1, skip 1 ch, dc in next 4 ch*; repeat from * to * around, ending with ch 1, skip 1 ch, sl st to top of ch-3. (48 dc, 12 ch-1 spaces)
Round 2: Ch 3, dc in each dc and in each ch-1 space around; sl st to top of ch-3. (60 dc)
You've just created the delicate neckline with its subtle eyelet detail. The capelet will now begin to flare outward as we increase in a beautiful, even pattern.
Shaping the Capelet Body
Now we'll work the main body of the capelet, increasing every other round to create the graceful A-line silhouette. The increases are evenly spaced to ensure a smooth, professional-looking flare.
Round 3: Ch 3, dc in next 2 dc, *2 dc in next dc, dc in next 3 dc*; repeat from * to * around, sl st to top of ch-3. (75 dc)
Round 4: Ch 3, dc in each dc around; sl st to top of ch-3. (75 dc)
Round 5: Ch 3, dc in next 3 dc, *2 dc in next dc, dc in next 4 dc*; repeat from * to * around, sl st to top of ch-3. (90 dc)
Round 6: Ch 3, dc in each dc around; sl st to top of ch-3. (90 dc)
Round 7: Ch 3, dc in next 4 dc, *2 dc in next dc, dc in next 5 dc*; repeat from * to * around, sl st to top of ch-3. (105 dc)
Round 8: Ch 3, dc in each dc around; sl st to top of ch-3. (105 dc)
Round 9: Ch 3, dc in next 5 dc, *2 dc in next dc, dc in next 6 dc*; repeat from * to * around, sl st to top of ch-3. (120 dc)
Round 10: Ch 3, dc in each dc around; sl st to top of ch-3. (120 dc)
Round 11: Ch 3, dc in next 6 dc, *2 dc in next dc, dc in next 7 dc*; repeat from * to * around, sl st to top of ch-3. (135 dc)
Round 12: Ch 3, dc in each dc around; sl st to top of ch-3. (135 dc)
Round 13: Ch 3, dc in next 7 dc, *2 dc in next dc, dc in next 8 dc*; repeat from * to * around, sl st to top of ch-3. (150 dc)
Rounds 14-16: Ch 3, dc in each dc around; sl st to top of ch-3. (150 dc each round)
Take a moment to admire your work! The capelet body is now complete, with a beautiful, smooth fabric that drapes elegantly. The even increases have created a gentle flare that will sit beautifully on little shoulders.
The Cascade Petal Edge
Now for the showstopper – the magnificent three-tiered petal ruffle! This is where the Rosethorn Cascade truly comes to life. Each tier is worked in a different color, creating a stunning ombre effect that mimics the layers of a blooming rose.
Round 17 (First Petal Tier – Petal Pink): Ch 1, sc in first dc, *skip 2 dc, 5 dc in next dc (petal made), skip 2 dc, sc in next dc*; repeat from * to * around, ending with sl st to first sc. Fasten off color A.
Pro tip: The "petal" is created by working 5 double crochets into a single stitch, which fans out to create that beautiful shell-like petal shape. The single crochets between petals create the valleys that give the ruffle its dimensional, layered look.
Round 18 (Second Petal Tier – Aran/Cream): Join color B with sl st in any sc between petals. Ch 3, 4 dc in same sc (half petal), *skip 2 dc, sc in next dc (center of petal), skip 2 dc, 5 dc in next sc (between petals)*; repeat from * to * around, ending with sl st to top of ch-3. Fasten off color B.
Note: This round is worked in the spaces between the previous tier's petals, creating a staggered effect. The half petal at the beginning (ch 3 + 4 dc) completes the final petal of the round when joined, ensuring a seamless look.
Round 19 (Third Petal Tier – Soft White): Join color C with sl st in any sc between petals. Ch 3, 4 dc in same sc (half petal), *skip 2 dc, sc in next dc (center of petal), skip 2 dc, 5 dc in next sc (between petals)*; repeat from * to * around, ending with sl st to top of ch-3. Fasten off color C.
Round 20 (Final Petal Tier – Petal Pink): Join color A with sl st in any sc between petals. Ch 3, 4 dc in same sc (half petal), *skip 2 dc, sc in next dc (center of petal), skip 2 dc, 5 dc in next sc (between petals)*; repeat from * to * around, ending with sl st to top of ch-3. Fasten off.
Finishing Touches
Your Rosethorn Cascade Capelet is nearly complete! Now for the final steps to make it truly heirloom-worthy:
- Weave in all ends carefully with your yarn needle. Take your time here – proper finishing makes all the difference in how professional your piece looks.
- Block gently to shape, if desired. This is especially helpful to open up the petal ruffle and ensure it lies flat and beautiful. Use a cool, damp cloth and pin to shape if needed, then allow to dry completely.
- Give it a final once-over – check that all your joins are secure and your petals are evenly spaced.
And there you have it – a stunning, one-of-a-kind capelet that looks like it came straight from a boutique! The Rosethorn Cascade Capelet is perfect for:
- Easter Sunday outfits
- Birthday celebrations
- Wedding guest attire
- Professional photoshoots
- Everyday whimsy and dress-up
The layered petal ruffle creates a truly magical effect as it moves and catches the light, and the soft pink-to-cream-to-white gradient is nothing short of romantic. This capelet is sure to become a treasured family heirloom, passed down through generations.
We'd love to see your Rosethorn Cascade Capelet! Share your finished project on social media with the hashtag #RosethornCascade and tag us so we can admire your beautiful work. Happy crocheting!