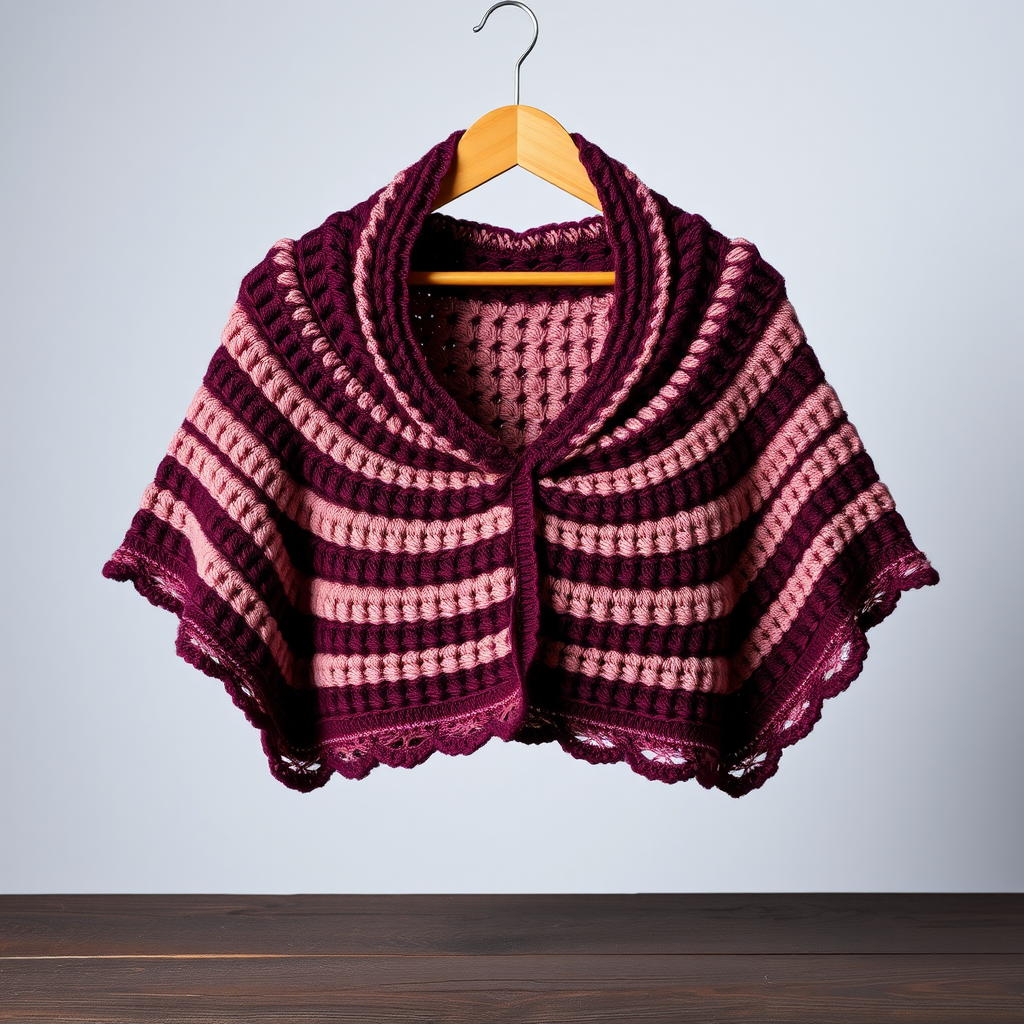
Fur Frenzy Crochet Capelet Free Pattern – A Cozy Faux Fur Wrap

Fur Frenzy Crochet Capelet: A Cozy Faux Fur Wrap You'll Love to Make
Imagine wrapping yourself in a cloud of plush, luxurious faux fur that looks like a vintage fur stole but feels like a warm hug. That's exactly what you'll create with this Fur Frenzy Crochet Capelet—a stunning, textured garment that's perfect for chilly evenings, holiday parties, or simply curling up with a good book. This free pattern combines the indulgent texture of faux fur yarn with a soft worsted weight accent, resulting in a piece that looks high-fashion yet feels incredibly inviting.
Whether you're a seasoned crocheter looking for a quick weekend project or a beginner ready to tackle something special, this capelet is designed to be approachable and rewarding. The top-down construction creates a flattering A-line silhouette that drapes gracefully over your shoulders, while the delicate scalloped edging adds a touch of elegance. Let's dive into this cozy creation!
Materials Needed
Before you begin, gather these supplies to ensure a smooth and enjoyable crochet experience:
Yarn
- Yarn A (Faux Fur): 2 skeins of Lion Brand Go For Faux in "Frost" (or any bulky weight faux fur yarn, approximately 120 yards each). This will be the star of your capelet, providing that dreamy, fluffy texture.
- Yarn B (Worsted Weight): 1 skein of Lion Brand Heartland in "Glacier Bay" (or any soft worsted weight yarn in a complementary neutral, approximately 250 yards). This is used for the elegant edging and tie closure.
Hooks and Tools
- US Size L/8.00mm crochet hook (or size needed to obtain gauge) – for the main body
- US Size J/6.00mm crochet hook – for the edging and tie
- Yarn needle – for weaving in ends
- Scissors – for cutting yarn
- Stitch markers – to keep track of your rounds
Gauge Information
With the larger hook and Yarn A (faux fur): 4 inches = 8 stitches and 6 rows in half double crochet.
With the larger hook and Yarn B (worsted): 4 inches = 12 stitches and 10 rows in half double crochet.
Note: Gauge is not critical for this project, but maintaining consistent tension is important for a uniform, professional-looking finish.
Step-by-Step Instructions
This capelet is worked top-down in the round, starting with a simple foundation chain and increasing to create that beautiful flared silhouette. The faux fur yarn forms the main body, while the worsted weight yarn adds the finishing touches. Let's get started!
Special Stitches You'll Need
- HDC (Half Double Crochet): Yarn over, insert hook into stitch, yarn over, pull through (3 loops on hook), yarn over, pull through all 3 loops.
- HDC2TOG (Half Double Crochet Decrease): Yarn over, insert hook into next stitch, yarn over, pull through (3 loops on hook), yarn over, insert hook into next stitch, yarn over, pull through (5 loops on hook), yarn over, pull through all 5 loops. This combines two stitches into one, creating a neat decrease.
Foundation and Body
Foundation Row: With the larger hook and Yarn A (faux fur), chain 60. Join with a slip stitch to form a ring, being very careful not to twist your chain. Place a stitch marker at the beginning of the round to track your progress.
Round 1: Chain 2 (this counts as your first HDC), then work 1 HDC in each chain around. Join with a slip stitch to the top of the beginning chain-2. You should have 60 HDC stitches.
Round 2 (Increase Round): Chain 2, work 2 HDC in the same stitch as the join (this creates your increase), then 1 HDC in each of the next 9 stitches. *Work 2 HDC in the next stitch (increase), then 1 HDC in each of the next 9 stitches*; repeat from * to * around. Join with a slip stitch. You'll now have 66 HDC stitches.
Round 3 (Increase Round): Chain 2, work 2 HDC in the same stitch as the join, then 1 HDC in each of the next 10 stitches. *Work 2 HDC in the next stitch, then 1 HDC in each of the next 10 stitches*; repeat from * to * around. Join with a slip stitch. You'll now have 72 HDC stitches.
Round 4 (Increase Round): Chain 2, work 2 HDC in the same stitch as the join, then 1 HDC in each of the next 11 stitches. *Work 2 HDC in the next stitch, then 1 HDC in each of the next 11 stitches*; repeat from * to * around. Join with a slip stitch. You'll now have 78 HDC stitches.
Round 5 (Increase Round): Chain 2, work 2 HDC in the same stitch as the join, then 1 HDC in each of the next 12 stitches. *Work 2 HDC in the next stitch, then 1 HDC in each of the next 12 stitches*; repeat from * to * around. Join with a slip stitch. You'll now have 84 HDC stitches.
Rounds 6-10 (Body Rounds): Chain 2, then work 1 HDC in each stitch around. Join with a slip stitch. Keep your stitch count at 84 HDC. Work these 5 rounds even to create the body of the capelet, allowing it to drape beautifully over your shoulders.
Shaping the Capelet
Now we'll add subtle shaping to create a more tailored fit around your shoulders and upper arms.
Round 11 (Decrease Round): Chain 2, work 1 HDC in the same stitch as the join, then 1 HDC in each of the next 12 stitches. *Work HDC2TOG (decrease), then 1 HDC in each of the next 12 stitches*; repeat from * to * around. Join with a slip stitch. You'll now have 78 HDC stitches.
Round 12: Chain 2, work 1 HDC in each stitch around. Join with a slip stitch. Maintain 78 HDC stitches.
Round 13 (Decrease Round): Chain 2, work 1 HDC in the same stitch as the join, then 1 HDC in each of the next 11 stitches. *Work HDC2TOG, then 1 HDC in each of the next 11 stitches*; repeat from * to * around. Join with a slip stitch. You'll now have 72 HDC stitches.
Round 14: Chain 2, work 1 HDC in each stitch around. Join with a slip stitch. Maintain 72 HDC stitches.
Round 15 (Decrease Round): Chain 2, work 1 HDC in the same stitch as the join, then 1 HDC in each of the next 10 stitches. *Work HDC2TOG, then 1 HDC in each of the next 10 stitches*; repeat from * to * around. Join with a slip stitch. You'll now have 66 HDC stitches.
Round 16: Chain 2, work 1 HDC in each stitch around. Join with a slip stitch. Maintain 66 HDC stitches.
Round 17 (Decrease Round): Chain 2, work 1 HDC in the same stitch as the join, then 1 HDC in each of the next 9 stitches. *Work HDC2TOG, then 1 HDC in each of the next 9 stitches*; repeat from * to * around. Join with a slip stitch. You'll now have 60 HDC stitches.
Round 18: Chain 2, work 1 HDC in each stitch around. Join with a slip stitch. Maintain 60 HDC stitches.
Fasten off Yarn A and weave in all loose ends with your yarn needle. Your capelet body is complete!
Adding the Elegant Edging
Now we'll switch to the worsted weight yarn to add a beautiful, delicate finish to the bottom edge.
Round 1: With the smaller hook (J/6.00mm) and Yarn B (worsted weight), join with a slip stitch to any stitch on the bottom edge of the capelet. Chain 1, then work 1 single crochet in the same stitch and in each stitch around. Join with a slip stitch to the first single crochet. You should have 60 single crochet stitches.
Round 2 (Scalloped Edge): Chain 1, work 1 single crochet in the same stitch, *chain 3, skip 1 stitch, work 1 single crochet in the next stitch*; repeat from * to * around, ending with a chain 3, skip 1 stitch, then slip stitch to the first single crochet. This creates a lovely scalloped, lacy border that contrasts beautifully with the fluffy fur. Fasten off and weave in all ends.
Creating the Tie Closure
The final touch is a simple tie that cinches the capelet at the top, allowing you to adjust the fit perfectly.
Tie: With the smaller hook and Yarn B, chain 100. Fasten off. Using your yarn needle, weave the chain through the top edge of the capelet (the foundation chain), starting and ending at the front opening. This creates a drawstring effect. Simply tie a bow to secure the capelet around your shoulders.
Your Cozy Capelet Awaits
Congratulations! You've just created a stunning, luxurious faux fur capelet that looks like it came straight from a high-end boutique. The combination of the plush, icy white fur and the cool glacier blue edging creates a piece that's both elegant and incredibly cozy. Whether you're dressing up for a special occasion or just want to add a touch of luxury to your everyday winter wardrobe, this capelet is sure to become a favorite.
Remember, the beauty of handmade items is in the details—and your consistent tension and careful finishing make this capelet uniquely yours. Wear it with pride, and enjoy the compliments that are sure to come your way!
Happy crocheting, and stay warm!