The Papiocreek Rib Stitch Fingerless Gloves Free Pattern – A Knitted Ode to Alpine Streams
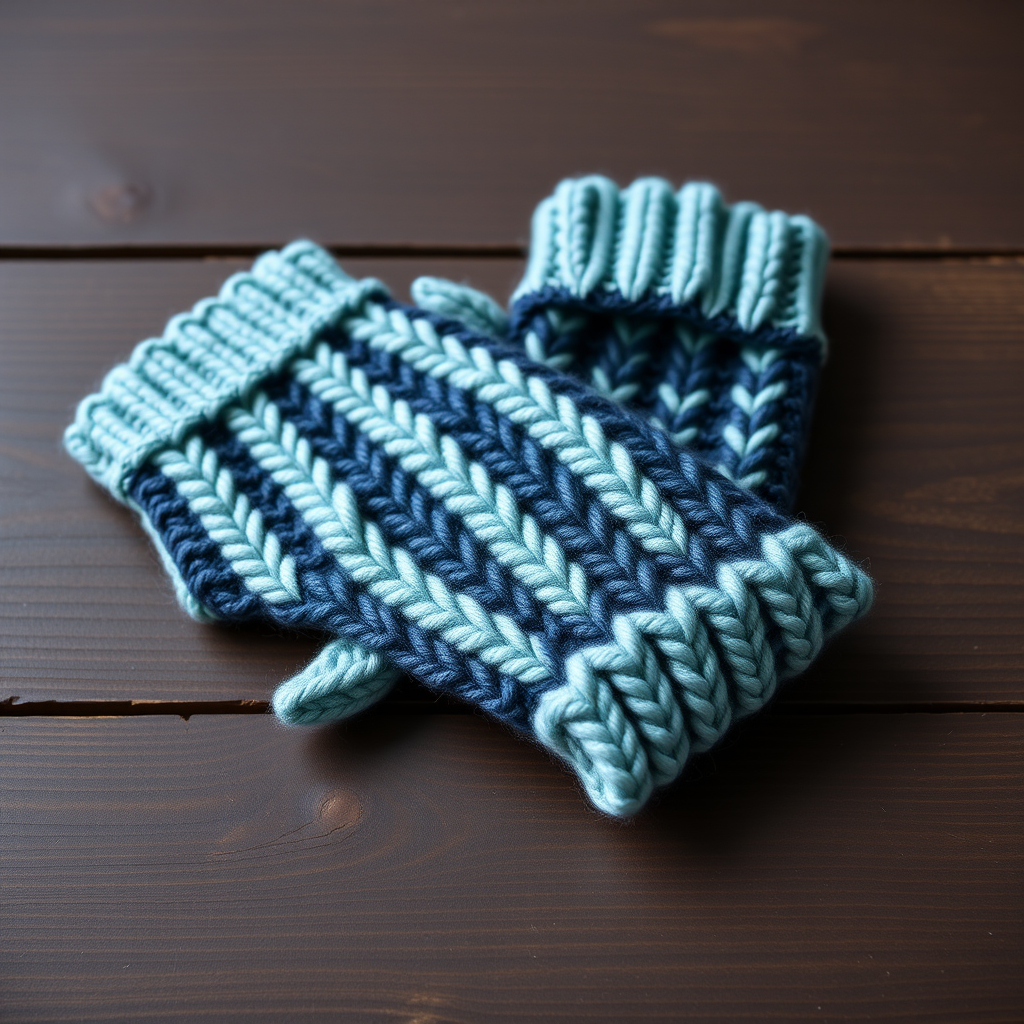
The Papiocreek Rib Stitch Fingerless Gloves Free Pattern – A Knitted Ode to Alpine Streams
Wrap your hands in the soothing rhythm of flowing water with these deeply textured ribbed fingerless gloves. The Papiocreek pattern creates a mesmerizing play of light and shadow, perfect for chilly mornings and cozy evenings. Whether you're sipping coffee on a crisp autumn porch or typing away at your desk in winter, these gloves offer warmth without sacrificing dexterity. The combination of slipped stitches and purl bumps mimics the gentle ripple of a mountain creek, making this project as meditative to knit as it is beautiful to wear.
This free pattern is designed with beginners in mind—if you can knit, purl, and slip stitches, you can create these stunning gloves. The two-tone striping adds visual interest while remaining simple to execute, and the thumb gusset is easier than it looks. Let's dive in and create something truly special.
Materials Needed
Before you begin, gather the following supplies:
- Yarn: Worsted weight yarn in two complementary shades (e.g., Misty Teal and Slate Blue) – approximately 200 yards (183 m) total. Choose a soft, slightly elastic yarn like alpaca or a wool blend for best stitch definition.
- Needles: US 7 (4.5 mm) knitting needles (or size needed to obtain gauge), plus a tapestry needle for finishing.
- Notions: Stitch markers (at least 4), a stitch holder or scrap yarn, and scissors.
Gauge: 20 stitches and 28 rows = 4 inches (10 cm) in Papiocreek Rib Stitch pattern. Always knit a swatch first to ensure your gloves fit perfectly. If your gauge is off, adjust your needle size accordingly.
Step-by-Step Instructions
Abbreviations
Familiarize yourself with these standard knitting abbreviations before starting:
- CO – cast on
- K – knit
- P – purl
- K2tog – knit two together
- P2tog – purl two together
- sl – slip
- wyif – with yarn in front
- wyib – with yarn in back
- st(s) – stitch(es)
- rep – repeat
- RS – right side
- WS – wrong side
Papiocreek Rib Stitch Pattern
This pattern is worked over a multiple of 4 stitches plus 2. Here's how it goes:
Row 1 (RS): *K2, P2; rep from * to last 2 sts, K2.
Row 2 (WS): *P2, K2; rep from * to last 2 sts, P2.
Row 3 (RS): *Sl 1 wyib, K1, P2; rep from * to last 2 sts, Sl 1 wyib, K1.
Row 4 (WS): *P1, Sl 1 wyif, K2; rep from * to last 2 sts, P1, Sl 1 wyif.
Repeat Rows 1-4 for the pattern. The slipped stitches create that beautiful, textured ripple effect reminiscent of water flowing over stones.
Glove (Make 2)
Follow these instructions carefully for each glove. They are identical, so once you master the first, the second will fly by.
Step 1: Cast On and Cuff
CO 40 sts with Misty Teal. Work in K1, P1 ribbing for 1.5 inches (4 cm). This creates a snug, elastic cuff that will keep the gloves in place.
Step 2: Begin Papiocreek Pattern
Switch to the Papiocreek Rib Stitch pattern, working in Misty Teal for 2 inches (5 cm). Keep your tension even and relaxed—this pattern looks best when the stitches are neither too tight nor too loose.
Step 3: Introduce the Second Color
Now, introduce Slate Blue as a second color. Work 2 rows in Slate Blue, then 2 rows in Misty Teal, alternating every 2 rows for a subtle striping effect. Continue the Papiocreek pattern throughout. Work until the piece measures 6 inches (15 cm) from the cast-on edge. The striping creates a serene, aquatic gradient that mimics light dancing on water.
Step 4: Thumb Gusset Increases
On the next RS row, you'll begin shaping the thumb gusset:
- Work 18 sts in pattern, place a marker.
- M1 (increase by picking up the bar between stitches and knitting it through the back loop), K1, M1.
- Place another marker, work remaining sts in pattern.
Continue in pattern, increasing 1 st before and after the marked center st every 4th row. Keep working the increases in pattern so they blend seamlessly. Repeat until you have 13 sts between the markers (total 50 sts on your needles). This creates a comfortable, anatomically correct thumb opening.
Step 5: Separate the Thumb
Work to the first marker, place the next 13 sts on a stitch holder (or scrap yarn), CO 1 st over the gap, then work to the end of the row. You'll now have 38 sts for the main glove body. Continue in pattern until the glove measures 9 inches (23 cm) from the cast-on edge, ending with a WS row. This length ensures the glove covers your palm and reaches just past your knuckles.
Step 6: Top Ribbing
Switch back to K1, P1 ribbing in Misty Teal, working 1 inch (2.5 cm). This neat, elastic edge will keep the gloves from slipping down. Bind off in rib pattern, keeping your bind-off loose so the edge remains stretchy.
Step 7: Knit the Thumb
Pick up the 13 sts from your holder, plus 2 sts from the gap (total 15 sts). Work in K1, P1 ribbing for 1 inch (2.5 cm). Bind off in rib. The thumb should be snug but not tight—if it feels restrictive, you can pick up an extra stitch from the gap on the second glove.
Step 8: Finishing
Weave in all ends with your tapestry needle, being careful to hide them on the wrong side of the work. Gently block the gloves if desired—this helps even out the stitches and enhances the textured pattern. Repeat the entire process for the second glove.
Tips for Success
- Keep a consistent tension when working the slipped stitches—this is key to achieving that beautiful, uniform texture.
- Use a lifeline if you're new to gusset increases. Thread a piece of scrap yarn through your stitches before starting the increases so you can easily rip back if needed.
- Try on the gloves as you go to ensure the thumb placement feels right. Everyone's hands are different, so don't be afraid to adjust the gusset length.
- Choose yarns with good stitch definition—a slightly twisted single or a wool blend will showcase the rib pattern beautifully.
These Papiocreek fingerless gloves are more than just a winter accessory—they're a meditation in yarn. The rhythmic repetition of knits, purls, and slipped stitches will lull you into a peaceful state, and the finished result is a pair of gloves that look like they were plucked straight from an alpine stream. Perfect for gifting or keeping for yourself, this pattern is sure to become a favorite in your knitting repertoire.
Happy knitting, and may your stitches flow as smoothly as mountain water!


