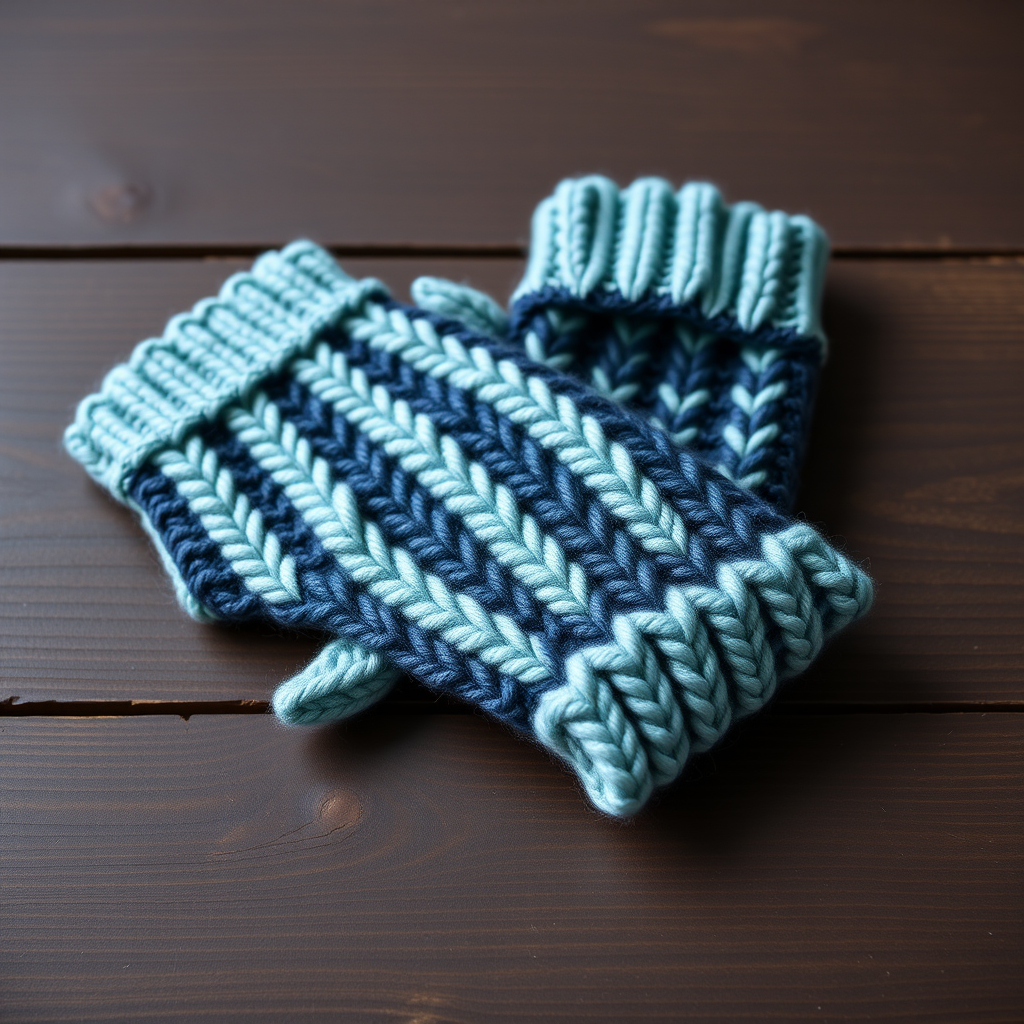
Highland Heather Tweed Fingerless Gloves Free Pattern – Knitted with Cable & Seed Stitch

Highland Heather Tweed Fingerless Gloves: A Free Knitting Pattern for Cozy, Cable-Knit Hands
Wrap your hands in the cozy charm of the Scottish Highlands with these textured tweed fingerless gloves. The combination of a central cable panel and delicate seed stitch borders creates a timeless, handcrafted look that's both rustic and refined. Whether you're curling up by the fire or heading out for a brisk autumn walk, these gloves will keep your fingers free while your palms stay toasty. This free knitting pattern is perfect for intermediate knitters ready to tackle their first cable project—and the results are absolutely stunning.
In this comprehensive guide, I'll walk you through every step, from casting on to weaving in those final ends. With detailed instructions, clear abbreviations, and expert tips, you'll have a beautiful pair of Highland Heather gloves in no time. Let's get those needles clicking!
Materials Needed
Before we dive into the pattern, let's gather your supplies. Here's everything you'll need to create your own pair of Highland Heather fingerless gloves:
- Yarn: Worsted weight tweed yarn (e.g., Cascade 220 Heathers) – approximately 150 yards. The tweed fibers give that beautiful, heathered look and soft halo that makes these gloves so special. Choose a deep heather purple, moss green, or warm oatmeal for that authentic Scottish feel.
- Knitting Needles: US 6 (4.0 mm) knitting needles, or size needed to achieve gauge. You can use double-pointed needles (DPNs) or a circular needle for magic loop—whichever you prefer for knitting in the round.
- Cable Needle: A small cable needle (or a spare DPN) for making those gorgeous cable crosses.
- Stitch Markers: At least 2 markers to keep track of your rounds and the thumb gusset.
- Stitch Holder: Or a scrap piece of yarn to hold the thumb stitches while you work the hand.
- Tapestry Needle: For weaving in ends and finishing.
- Measuring Tape: To check your gauge and measurements as you go.
Gauge: 20 stitches and 28 rows = 4 inches in stockinette stitch. Always take time to swatch! Getting the right gauge ensures your gloves fit perfectly.
Step-by-Step Instructions
Size and Abbreviations
Size: Women's medium (7.5-inch hand circumference). To adjust the size, add or subtract stitches in multiples of 4 for the seed stitch sections. This will maintain the pattern integrity while changing the overall width.
Abbreviations:
- CO: Cast on
- K: Knit
- P: Purl
- C4F: Slip 2 stitches to cable needle, hold to front, knit 2, knit 2 from cable needle
- C4B: Slip 2 stitches to cable needle, hold to back, knit 2, knit 2 from cable needle
- K2tog: Knit 2 together (right-leaning decrease)
- SSK: Slip slip knit (left-leaning decrease)
- M1L: Make one left (increase)
- M1R: Make one right (increase)
- St(s): Stitch(es)
Pattern Instructions (Make 2 Identical Gloves)
Step 1: The Cuff
CO 40 stitches. Join in the round, being careful not to twist your stitches. Place a marker for the beginning of the round.
Work in K2, P2 ribbing for 2 inches (approximately 12 rounds). This ribbed cuff will create a snug, comfortable fit around your wrist and provide a beautiful foundation for the cable pattern above.
Step 2: Setting Up the Main Body Pattern
Now we'll set up the beautiful stitch pattern that makes these gloves so special. The glove has 40 stitches total, which we'll divide as follows:
- 12 stitches: Seed stitch border (6 stitches on each side of the cable)
- 16 stitches: Cable panel (center of the back of the hand)
- 12 stitches: Palm in stockinette stitch
Setup Round: P1, K1, P1, K1, P1, K1, P1, K1, P1, K1, P1, K1 (that's 12 stitches of seed stitch), then P2, K12, P2 (that's the 16-stitch cable panel), then K12 (palm in stockinette). Total = 12 + 16 + 12 = 40 stitches.
Pro Tip: Place a marker between the seed stitch section and the cable panel, and another between the cable panel and the palm. This will help you keep track of where you are in the pattern.
Step 3: The Cable Panel Pattern
The cable panel is worked over 16 stitches. Here's the 12-row repeat:
Rows 1-5 (and all odd rows): P2, K12, P2
Row 6: P2, C4F, C4B, P2 (cable cross)
Rows 7-9: P2, K12, P2
Row 10: P2, C4B, C4F, P2 (alternate cable cross)
Rows 11-12: P2, K12, P2
Repeat rows 1-12 for the cable pattern. The alternating C4F and C4B crosses create that beautiful braided cable effect that's the hallmark of traditional Scottish knitwear.
Step 4: Working the Glove Body
Continue in the established pattern (seed stitch borders, cable panel, stockinette palm) until the piece measures 3 inches from the cuff. Remember to keep your seed stitch borders consistent: K1, P1 alternating across those 12 stitches on each side of the cable.
Seed Stitch Reminder: On the first round, you'll work K1, P1 across the border. On the next round, you'll work P1, K1 (knit the purls and purl the knits). This creates that lovely, pebbly texture.
Step 5: The Thumb Gusset
Now we'll create the thumb opening. The gusset is placed on the palm side of the glove, in the center of the 12 stockinette stitches.
Round 1: Work in pattern to the center of the palm (the 6th stitch of the stockinette section). Place a marker here. Work to end of round.
Round 2 (Increase Round): Work in pattern to the marker, M1R, K1, M1L, work to end of round. You've now added 2 stitches for the gusset.
Round 3: Work in pattern (no increase).
Round 4 (Increase Round): Work in pattern to the marker, M1R, K3, M1L, work to end of round.
Round 5: Work even.
Continue increasing every other round, adding 2 stitches between the M1R and M1L each time. You'll notice the gusset growing in a V-shape. Keep going until you have 13 stitches between the increases (total gusset stitches = 15).
Step 6: Separating the Thumb
Now it's time to set aside the thumb stitches and continue with the hand.
Next Round: Work in pattern to the marker, place the 15 gusset stitches on a stitch holder, CO 1 stitch (this is a bridge stitch), continue in pattern to end of round.
Let's do the math: You started with 40 stitches. The gusset added 15 stitches, bringing you to 55 total. After removing the 15 thumb stitches, you have 40 stitches. Then you cast on 1 bridge stitch, giving you 41 stitches. The bridge stitch will be incorporated into the palm stockinette section.
Step 7: The Hand Body
Continue in the established pattern (seed stitch, cable, stockinette) until the glove measures 2 inches from the thumb separation, or until it reaches your desired length to cover the knuckles. Try it on as you go—everyone's hands are different!
Step 8: Top Edging
Work in K2, P2 ribbing for 1 inch. This will create a neat, stretchy finish that keeps the gloves in place.
Bind off loosely in rib pattern. Pro tip: Use a larger needle to bind off, or bind off loosely, to ensure the edge isn't too tight.
Step 9: The Thumb
Now let's finish those thumbs!
Step 9a: Pick up the 15 gusset stitches from the holder, plus pick up 2 stitches from the bridge (one on each side) = 17 stitches. Distribute these evenly onto your needles.
Step 9b: Work in stockinette stitch (knit every round) for 1.5 inches.
Step 9c (Decrease Rounds):
- Next Round: K2tog, K to last 2 stitches, SSK (decrease 2 stitches).
- Next Round: Knit.
- Next Round: K2tog, K to last 2 stitches, SSK.
Step 9d: Bind off the remaining 13 stitches loosely. This creates a gently tapered thumb opening that fits comfortably.
Step 10: Finishing
Weave in all ends with your tapestry needle. Take your time with this step—neat ends make for professional-looking gloves.
Block gently to shape. For tweed yarn, a light steam blocking works beautifully. Lay the gloves flat, cover with a damp cloth, and gently press with a warm iron (don't slide the iron—just press). This will help the cable pattern relax and show off its beautiful texture.
Repeat the entire process for the second glove. Yes, you'll need to make two—but trust me, the second one goes much faster!
Final Thoughts
These Highland Heather fingerless gloves are more than just an accessory—they're a piece of wearable art. The combination of the braided cable, the pebbly seed stitch, and the soft, heathered tweed yarn creates a texture that's absolutely irresistible. Whether you're treating yourself or gifting to a loved one, these gloves are sure to become a treasured favorite.
I'd love to see your finished gloves! Share your photos on social media with the hashtag #HighlandHeatherGloves and tag me so I can admire your handiwork. Happy knitting, and may your hands stay warm and stylish all season long!