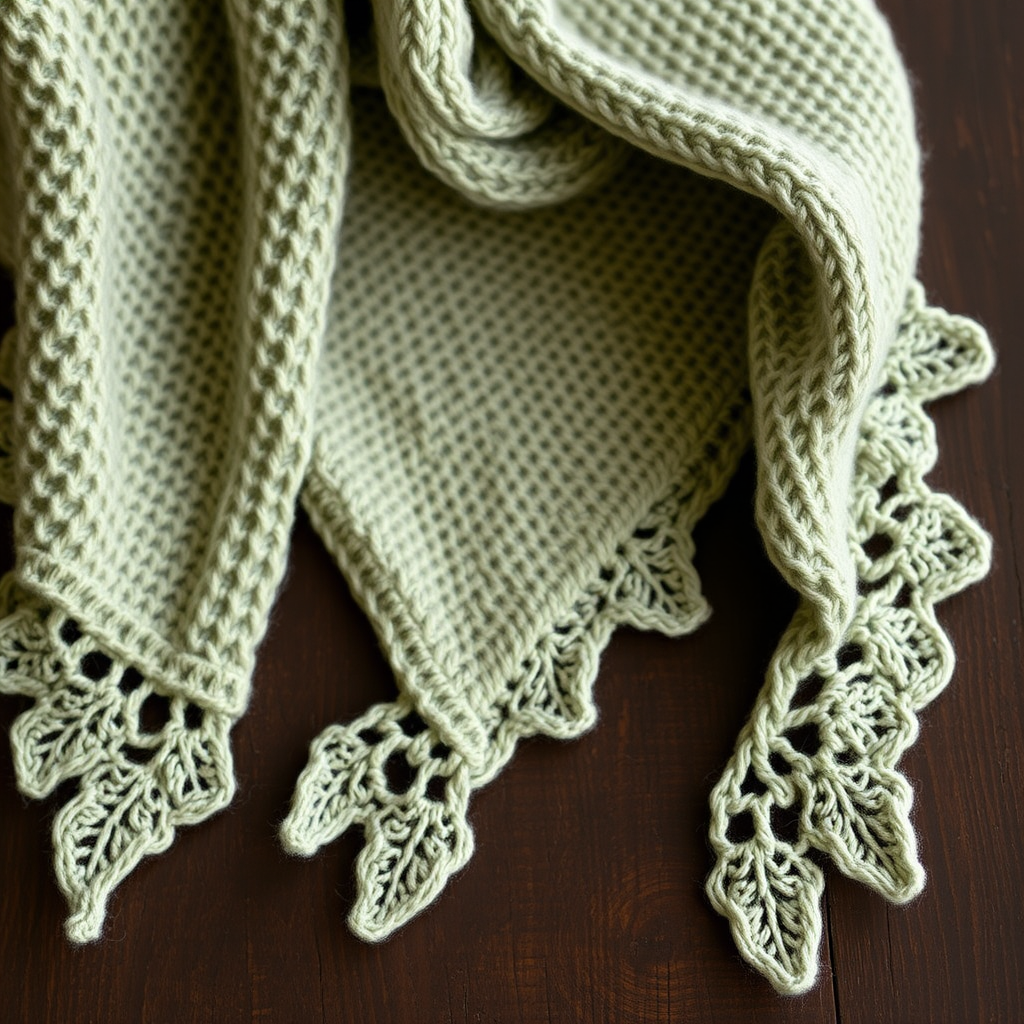
The Aurora Drift Sideways Shawl Free Pattern – A Knitted Ode to Polar Skies

The Aurora Drift Sideways Shawl: A Knitted Ode to Polar Skies
Imagine wrapping yourself in the shifting, ethereal hues of the northern lights—deep teal melting into soft lavender, then blooming into pale gold. That's the magic of the Aurora Drift Sideways Shawl, a free knitting pattern that transforms gradient yarns into a feather-light crescent of wearable art. Knit sideways from tip to tip, this modern heirloom features a delicate lace edge that dances along the top while a garter stitch base keeps it grounded and cozy. Whether you're a seasoned knitter seeking a meditative project or a confident beginner ready for a beautiful challenge, this shawl is your ticket to creating something truly extraordinary for chilly evenings.
This pattern is designed to be accessible, with clear instructions and a rhythmic repeat that becomes almost meditative. The asymmetric construction is not only visually striking but also incredibly flattering to wear, draping elegantly over the shoulders. Let's dive into the details and start crafting your own piece of the aurora.
Materials Needed
Before you begin your journey, gather these essentials. The quality of your materials will directly impact the final drape and beauty of your shawl.
- Yarn: Fingering weight yarn in 3 coordinating gradient skeins (e.g., deep teal, soft lavender, pale gold) – approx. 1200 yards total. Choose a soft, pliable yarn like merino or a merino-silk blend for the best drape.
- Needle: US 6 (4.0 mm) circular needle, 32-inch or longer. The long cable is crucial to accommodate the growing number of stitches.
- Gauge: 20 stitches and 28 rows = 4 inches in stockinette stitch (blocked). While exact gauge isn't critical for a shawl, consistency will ensure your yardage works out.
- Notions: Stitch markers (at least 2), a tapestry needle for weaving in ends, and blocking pins or wires for the finishing touch.
Step-by-Step Instructions
This shawl is knit sideways from the left tip to the right tip, increasing along one edge to form a crescent shape. Use a long circular needle to accommodate the growing stitch count. Take your time, and enjoy the process!
Abbreviations
- k = knit
- p = purl
- yo = yarn over
- k2tog = knit two together (right-leaning decrease)
- ssk = slip, slip, knit (left-leaning decrease)
- pm = place marker
- sm = slip marker
- RS = right side
- WS = wrong side
Setup: Creating the Starting Point
We'll begin by creating a sturdy, symmetrical base from which the shawl will grow.
- Cast on 3 stitches.
- Knit 6 rows (this creates a small garter stitch square).
- Now, rotate your work 90 degrees clockwise. Pick up and knit 3 stitches along the side edge of your square.
- Rotate again and pick up and knit 3 stitches from the cast-on edge. You should now have a total of 9 stitches on your needle. This forms the starting point of your shawl.
Section 1: The Garter Base (Increasing)
This section builds the main body of the shawl, creating the gentle crescent curve with simple increases along both edges.
- Row 1 (RS): k3, yo, k to last 3 stitches, yo, k3. (This increases your stitch count by 2).
- Row 2 (WS): k3, p to last 3 stitches, k3.
Repeat Rows 1 and 2 until you have 45 stitches on your needle, ending with a WS row. This creates the first section of the shawl. The garter stitch edges will form a beautiful, non-curling border.
Section 2: The Lace Edge
Now we introduce the delicate lace pattern along the top edge while continuing our increases. This is where the shawl truly comes alive.
- Row 1 (RS): k3, yo, k2, *yo, ssk, k4*; repeat from * to * until 5 stitches remain, yo, ssk, k3. (This increases your stitch count by 1).
- Row 2 (WS): k3, p to last 3 stitches, k3.
- Row 3 (RS): k3, yo, k1, *k2tog, yo, k1, yo, ssk, k1*; repeat from * to * until 4 stitches remain, k2tog, yo, k2. (This increases your stitch count by 1).
- Row 4 (WS): k3, p to last 3 stitches, k3.
Repeat these 4 rows until the shawl measures approximately 60 inches from the cast-on tip, or until you have used about 90% of your yarn. It's wise to weigh your yarn periodically to ensure you don't run out. End with a WS row.
Section 3: The Decrease Section (Shaping the Right Tip)
We will now mirror our increases to shape the right tip of the shawl, creating a symmetrical crescent.
- Row 1 (RS): k3, ssk, k to last 5 stitches, k2tog, k3. (This decreases your stitch count by 2).
- Row 2 (WS): k3, p to last 3 stitches, k3.
Repeat these 2 rows until 9 stitches remain, ending with a WS row.
Final Tip: The Pointed Finish
This final sequence shapes the very tip of the shawl, bringing it to a graceful point.
- Next row (RS): k3, ssk, k2, k2tog, k3. (7 stitches)
- Next row (WS): k3, p1, k3.
- Next row (RS): k2, ssk, k1, k2tog, k2. (5 stitches)
- Next row (WS): k2, p1, k2.
- Next row (RS): k1, ssk, k1, k2tog, k1. (3 stitches)
- Next row (WS): k3.
- Bind off all stitches loosely. A loose bind-off is essential to maintain the stretch and drape of the edge.
Finishing & Blocking: The Final Transformation
This is the most magical step—where your knitting transforms into a true work of art.
- Weave in all ends carefully with your tapestry needle, being sure not to pull too tightly.
- Soak the shawl in lukewarm water with a drop of gentle wool wash for 20 minutes. This allows the fibers to relax and open up.
- Gently squeeze out excess water. Do not wring or twist, as this can felt the wool.
- Lay flat on a clean towel and roll it up to remove more water.
- Pin to shape on a blocking mat or another dry towel. Gently stretch the shawl to its full dimensions, paying special attention to the lace edge. Use blocking wires for a perfectly straight edge if you have them, or use pins to create points along the lace scallops.
- Allow to dry completely before unpinning. This can take 24-48 hours. Blocking opens up the lace, defines the pattern, and creates the beautiful, fluid crescent drape.
Once dry, your Aurora Drift Shawl is ready to be worn. Drape it over your shoulders and let the gradient colors and delicate lace transport you to a quiet, starry night under the polar skies. This is more than just a shawl; it's a piece of wearable art, a testament to your skill, and a cozy companion for years to come. Happy knitting!