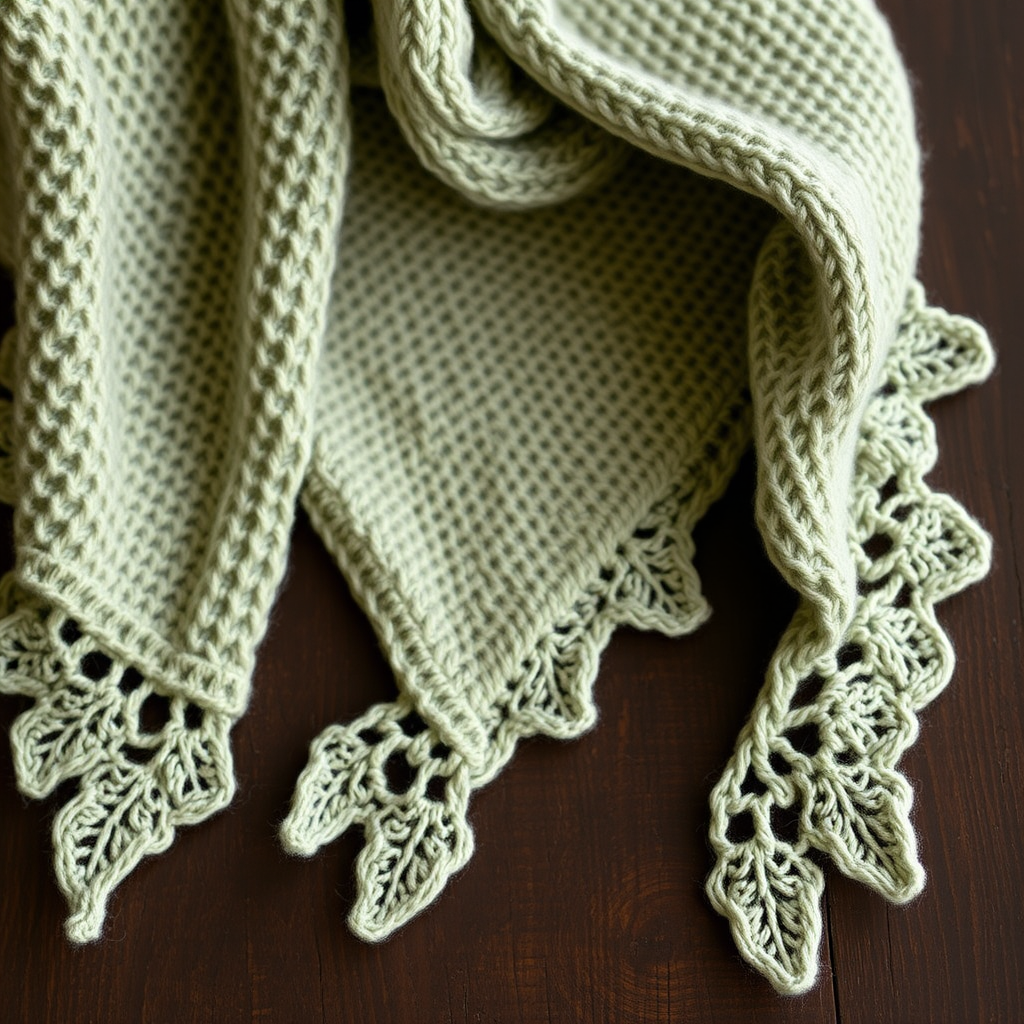
Gossamer Dune Shawl Free Pattern – Knit a Desert Mirage Wrap

Gossamer Dune Shawl Free Pattern – Knit a Desert Mirage Wrap
Imagine wrapping yourself in the warm, shifting hues of a desert sunset—terracotta melting into blush, then fading to cream. The Gossamer Dune Shawl is an ethereal, feather-light accessory that captures that exact magic. Knit from the top down with a delicate blend of garter stitch and airy lace, this triangular wrap drapes like a whisper of silk against your shoulders. Whether you're a seasoned knitter looking for a meditative project or a confident beginner ready for a beautiful challenge, this free pattern will guide you through every step to create a romantic, boho masterpiece.
This pattern is designed to be both inspiring and accessible. The rhythmic increases and soothing lace repeats make it a perfect travel project or a cozy evening knit. By the end, you'll have not just a shawl, but a wearable piece of art that evokes the serene beauty of rolling dunes.
Materials Needed
Before you begin your knitting journey, gather these supplies. The quality of your materials will directly impact the drape and feel of your finished shawl.
- Yarn: Fingering weight yarn in 3 colors (approx. 400g total):
- Color A (Terracotta): Approx. 150g
- Color B (Blush): Approx. 130g
- Color C (Cream): Approx. 120g
- Needles: US 6 (4.0 mm) circular needle, 32-inch (80 cm) or longer. The long cable is essential to hold the increasing number of stitches.
- Notions: Stitch markers (at least 2), tapestry needle for weaving in ends, blocking mats and pins.
- Gauge: 20 stitches x 28 rows = 4 inches in stockinette stitch (after blocking). Gauge is important for size, but drape is more critical—don't be afraid to go up a needle size if your fabric feels stiff.
Step-by-Step Instructions
This shawl is knit from the top center down, increasing at the edges and center to form a triangular shape. The construction is intuitive, and the pattern is broken down into clear sections. Take a deep breath, pour yourself a cup of tea, and let's begin.
Abbreviations
- k = knit
- p = purl
- yo = yarn over (creates an eyelet and an increase)
- k2tog = knit two stitches together (right-leaning decrease)
- ssk = slip slip knit (left-leaning decrease)
- pm = place marker
- sm = slip marker
Setup: Casting On and the First Rows
We'll start with just a few stitches and build outwards. This creates the top edge of your shawl.
- Cast on 3 stitches with Color A (Terracotta).
- Row 1 (Right Side): k1, yo, k1, yo, k1. (You now have 5 stitches).
- Row 2 (Wrong Side): k2, p1, k2. (Knit the first and last 2 stitches, purl the rest).
- Row 3 (RS): k2, yo, k1, yo, k2. (You now have 7 stitches).
- Row 4 (WS): k2, p3, k2.
- Row 5 (RS): k2, yo, k1, yo, pm, k1, pm, yo, k1, yo, k2. (You now have 11 stitches). The markers now define your center stitch.
- Row 6 (WS): k2, p7, k2.
Begin Body: The Garter Stitch Foundation
Now we establish the rhythm of the shawl. The edge stitches (first 2 and last 2) are always knit, creating a neat, rolled edge. All increases happen on Right Side rows.
- Continue with Color A for 10 more rows, working the increase pattern below on every RS row:
- RS Row: k2, yo, knit to marker, yo, sm, k1, sm, yo, knit to last 2 sts, yo, k2. (This adds 4 stitches each RS row).
- WS Row: k2, purl to last 2 sts, k2.
- After completing 10 rows of Color A, you'll have a solid terracotta base. The fabric will be a simple, squishy garter stitch.
Color Transition: Building the Gradient
This is where the desert mirage begins to take shape. We'll switch colors to create the beautiful ombre effect.
- Switch to Color B (Blush). Work 20 rows in Color B, continuing the exact same increase pattern (RS increase row, WS purl row).
- Switch to Color C (Cream). Work 30 rows in Color C, maintaining the same increase rhythm. Your shawl is now a beautiful, growing triangle of warm cream.
Lace Pattern: Adding the Airy Magic
Now we introduce the delicate lace that gives this shawl its "gossamer" name. The lace is worked between the edge stitches and the center marker, on both sides. The edge increases continue uninterrupted.
Important: The lace pattern is a 4-row repeat. You will work this repeat while continuing to increase on RS rows.
- Row 1 (RS): k2, yo, *k2tog, yo* repeat from * to * until 1 stitch before the marker, k1, yo, sm, k1, sm, yo, k1, *yo, ssk* repeat from * to * until 2 stitches remain, yo, k2.
- Row 2 (WS): k2, purl to last 2 sts, k2.
- Row 3 (RS): k2, yo, *yo, k2tog* repeat from * to * until marker, yo, sm, k1, sm, yo, *ssk, yo* repeat from * to * until 2 stitches remain, yo, k2.
- Row 4 (WS): k2, purl to last 2 sts, k2.
Color Sequence for Lace: Repeat these 4 rows 8 times total, switching colors every 10 rows in this order: Color C (Cream), then Color A (Terracotta), then Color B (Blush), then Color C (Cream). This creates a subtle, rhythmic shift in the lace section.
Final Garter Section: A Grounding Finish
After the airy lace, we return to the solid comfort of garter stitch to ground the design.
- Switch to Color A (Terracotta). Work 10 rows in garter stitch (knit every row), continuing the increases on RS rows as established (k2, yo, knit to marker, yo, sm, k1, sm, yo, knit to last 2 sts, yo, k2).
Bind Off (Picot Edge): The Perfect Scallop
This picot bind-off creates the beautiful, scalloped edge that mimics the ripples of sand. It's loose and stretchy, perfect for a shawl.
- With Color A, bind off as follows: k2, *yo, k2tog, pass the previous stitch over* repeat from * to * until all stitches are bound off. This creates a series of tiny, decorative loops.
- Cut yarn, leaving a 6-inch tail, and pull through the last loop.
Weaving in Ends
Use your tapestry needle to carefully weave in all loose ends along the edges or into the wrong side of the work. Take your time—this makes your shawl look professional and ensures it lasts for years.
Blocking: The Final Transformation
Blocking is non-negotiable for lace. It opens up the eyelets, evens out the stitches, and gives the shawl its final, dramatic drape.
- Fill a basin with lukewarm water and add a drop of gentle wool wash.
- Submerge the shawl and let it soak for 20 minutes. Do not agitate.
- Gently squeeze out the water (do not wring). Roll the shawl in a clean towel to remove excess moisture.
- Lay the shawl on blocking mats. Pin out the top edge, then gently stretch the sides and bottom, pulling out the lace points to their full potential. Pin the picot points to create the scalloped edge.
- Allow to dry completely, preferably overnight. Once dry, unpin and enjoy your stunning, one-of-a-kind Gossamer Dune Shawl.
You've just created a breathtaking accessory that blends the warmth of the earth with the delicacy of lace. Wear it draped over your shoulders on a cool evening, or gift it to someone special. This shawl is more than just a knit—it's a piece of wearable art, a desert mirage made real by your own hands. Happy knitting!