Lagoon Mesh Double Scrunchie Free Crochet Pattern
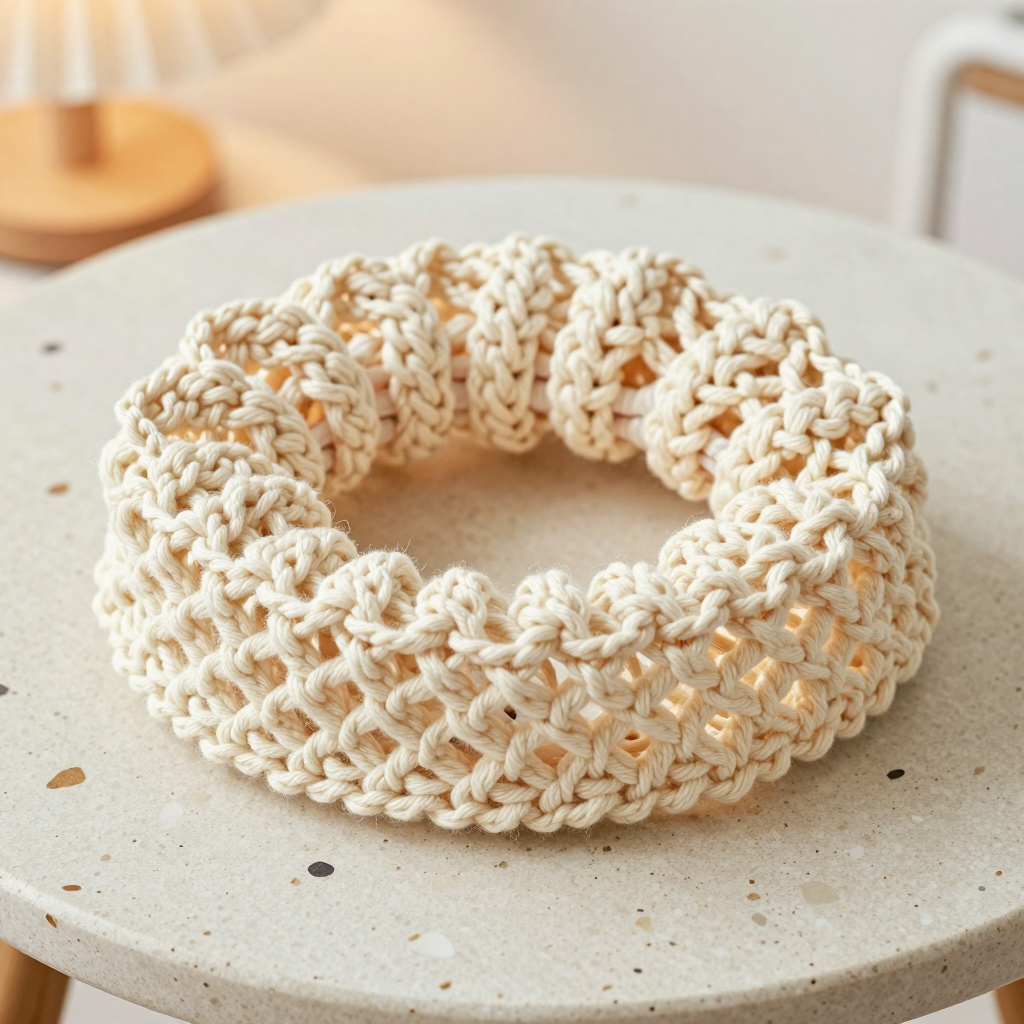
Lagoon Mesh Double Scrunchie Free Crochet Pattern
Introduction
If you have never held a crochet hook before, this is the perfect very first project to make with your own hands. The Lagoon Mesh Double Scrunchie is two soft, airy mesh tubes worked in undyed natural cotton and joined side by side around one hidden hair elastic, giving you a lightweight double-band accessory that looks like a little piece of the tropics. The open "lagoon net" texture is created with simple double crochet posts and chain spaces, so the fabric stays crisp, geometric, and breathable while holding your hair gently. Finished, it feels soft and slightly fuzzy against your fingers, measures about 4 inches (10 cm) across, and slips around a standard ponytail in seconds. Best of all, it uses only 30–40 yards of yarn and can be finished in a single cozy evening.
Materials Needed
- Yarn: Worsted weight (category 4) cotton yarn, undyed natural cream color — approximately 30–40 yards total (enough for both tubes).
- Hook: G/6 crochet hook — 4.0 mm.
- Hair elastic: One standard hair tie, about 2 inches (5 cm) in diameter.
- Stitch marker: One removable stitch marker (or a scrap of contrasting yarn) to mark the first stitch of each round.
- Tapestry needle: A blunt-tipped yarn needle for seaming and weaving in ends.
- Scissors: Any small sharp pair for cutting yarn.
- Finished size: Approximately 4 inches (10 cm) in diameter and 1.5 inches (4 cm) wide across the double band, fitting comfortably around a standard ponytail.
Abbreviations and Beginner Glossary
Every term below is explained as if you have never crocheted before. Read through this list once before you begin — you will refer back to it often, and that is completely normal.
- ch — chain: Make a loop of yarn on your hook (a "slip knot"), then wrap the yarn over the hook and pull it through the loop already on the hook. That is one chain. Chains look like tiny braided V's.
- sc — single crochet: Insert your hook into the stitch, wrap yarn over the hook, pull up a loop (you now have 2 loops on the hook), wrap yarn over again, and pull through both loops. One single crochet made.
- dc — double crochet: Wrap yarn over the hook first, insert the hook into the stitch, wrap yarn over and pull up a loop (3 loops on hook), wrap yarn over and pull through 2 loops (2 loops left), wrap yarn over and pull through the last 2 loops. One double crochet made.
- sl st — slip stitch: Insert your hook into the stitch, wrap yarn over, and pull that loop straight through both the stitch and the loop on your hook in one motion. It creates almost no height — used to join rounds.
- sp — space: The little gap or hole created by a chain. When a pattern says "dc in next ch-1 sp," you put your hook into the hole itself, not into a stitch.
- st / sts — stitch / stitches: A single completed crochet unit, or several of them.
- ch-1 sp / ch-2 sp / ch-3 sp: A space made by 1, 2, or 3 chains.
- Join with sl st: Finish a round by making a slip stitch into the very first stitch of that round, closing the circle.
- Fasten off: Cut the yarn a few inches from your work, then pull the tail all the way through the last loop to lock it.
- Whipstitch: A simple seaming stitch — pass the needle through a space on one piece, then the matching space on the other piece, over and over, like lacing shoes.
Gauge
Gauge: 4 mesh squares (ch-3 spaces) = 2 inches; 4 rounds = 1 inch in the mesh pattern.
Gauge simply means how big your stitches come out. It matters because it controls the final size of your scrunchie — if your stitches are much tighter or looser than the gauge above, your finished band will be smaller or larger than 4 inches across. Gauge is not critical for this project (a scrunchie is forgiving!), but a looser mesh gives a softer, more open look.
How to make a gauge swatch: Using your 4.0 mm hook and cotton yarn, chain 20. Work a few rows of the mesh pattern (dc, ch 1, skip a stitch, repeat). Lay the swatch flat and measure 2 inches across a row of chain spaces — you should count about 4 spaces. Measure 1 inch up the rows — you should count about 4 rounds. If you have many more spaces than 4, your tension is tight; try relaxing your grip or going up one hook size. If you have far fewer, try a smaller hook.
Beginner Tips Before You Start
- Use a stitch marker. Place it in the first stitch of each round. Because you are working in joined rounds, it is very easy to lose track of where a round began — the marker is your best friend.
- Do not pull the yarn too tight. The whole charm of this scrunchie is the open, airy mesh. Keep your chains relaxed and even; tight chains close up the "lagoon" holes.
- Count your stitches after Round 1. You need exactly 24 single crochets around the elastic. If you have 22 or 26, simply add or skip one as you go — the elastic is stretchy and forgiving.
- Work around the elastic, not into it. For Round 1, insert your hook under the elastic band and crochet around it, so the band ends up hidden inside the fabric.
- Keep your two tubes identical. Make the second tube right after the first while the rhythm is fresh in your hands — they will match more closely.
- Relax and go slowly. This is a small project with only 8 rounds per tube. There is no rush, and mistakes are easy to undo — just pull the yarn back out and try again.
Step-by-Step Instructions
Note on construction: You will make two identical mesh tubes. Each tube is worked in joined rounds around the hair elastic, then the two tubes are joined side by side with a simple crochet seam to create the double-band effect.
Tube (Make 2)
Round 1: Join yarn to the hair elastic with a sl st. Ch 1. Work 24 sc evenly around the elastic (about 1 sc per 1/4 inch of elastic circumference), inserting your hook under the elastic each time. Join with sl st to first sc. (24 sc)
Round 2: Ch 3 (counts as first dc), dc in same st. *Ch 1, skip next st, dc in next st. Repeat from * around, ending with ch 1, skip last st, join with sl st to top of beginning ch-3. (12 dc, 12 ch-1 sps)
Round 3: Ch 3 (counts as first dc), dc in first ch-1 sp. *Ch 1, dc in next ch-1 sp. Repeat from * around, ending with ch 1, join with sl st to top of beginning ch-3. (12 dc, 12 ch-1 sps)
Rounds 4–7: Repeat Round 3 four more times. (12 dc, 12 ch-1 sps per round; 6 rounds total of mesh)
Round 8 (final round): Ch 1, sc in same st. *Ch 2, sc in next ch-1 sp. Repeat from * around, ending with ch 2, join with sl st to first sc. Fasten off, leaving a 6-inch tail. (12 sc, 12 ch-2 sps)
Weave in the beginning tail. Do not weave in the final tail yet — you will use it to join the tubes.
Joining the Two Tubes
Step 1: Hold the two finished tubes side by side, aligning their final rounds. The tubes should sit parallel to each other, like two stacked rings.
Step 2: Thread the final tail of one tube onto the tapestry needle. Bring the two tubes together so their final rounds touch along one side.
Step 3: Whipstitch the two final rounds together along the touching edge, working through the ch-2 spaces of both tubes. Stitch through each pair of aligned ch-2 spaces to create a firm but flexible seam. Work from one side of the hair elastic around to the other, leaving the inner curve (the side that will sit against the head) unseamed so the tubes can flex.
Step 4: Repeat the whipstitch seam on the opposite side of the tubes if desired for a fully joined double band, or leave the second side open for a looser, more organic look. Fasten off and weave in all tails.
Assembly and Finishing
Seaming: If you chose to seam both sides, work the second whipstitch seam exactly as you did the first, matching each ch-2 space on one tube to its partner on the other. Keep your stitches loose and even so the seam stays flexible — you want the band to stretch gently over hair, not feel stiff.
Weaving in ends: Thread each remaining yarn tail onto the tapestry needle. Run the needle back and forth through the inside of the fabric (behind the stitches, not through the open mesh holes) for about 1 inch, then trim the yarn close to the work. Never knot your ends — weaving them in hides them securely and keeps the scrunchie smooth.
Blocking: This cotton scrunchie benefits from a gentle blocking. Lightly mist the finished piece with clean water (or dip it and gently squeeze out the excess in a towel — never wring it). Lay it flat on a towel and gently stretch and shape it with your fingers so the mesh spaces open evenly and the band forms a neat double ring. Let it air-dry completely, away from direct heat. Do not pin or stretch it aggressively — just coax it into shape.
Final check: Gently stretch and shape the scrunchie with your fingers to even out the mesh. The hair elastic should sit hidden inside the joined tubes. If any mesh spaces are tight, gently tug them open with the hook tip.
Pro Tips and Variations
- Play with color: Undyed cream is classic, but this pattern shines in any worsted cotton — try a soft aqua or seafoam for a true lagoon feel, or make one tube in each of two colors for a two-tone double band.
- Adjust the size: For a fuller, fluffier scrunchie, add 2–4 more mesh rounds before the final edging round (each extra round adds about 1/4 inch of width). For a slimmer band, work only Rounds 4–5 before the edging.
- Substitute yarn: Any worsted weight (category 4) cotton or cotton-blend works beautifully. Avoid fuzzy acrylics if you want the crisp geometric mesh to show — smooth cotton keeps the chain spaces sharp and defined.
- Change the mesh: For an even more open net, replace the ch-1 spaces with ch-2 spaces throughout (your stitch counts stay the same). Just remember to keep your tension relaxed so the holes stay airy.