Herb Haven Hanging Planter Free Pattern – Crochet a Boho Kitchen Garden
Herb Haven Hanging Planter Free Pattern – Crochet a Boho Kitchen Garden
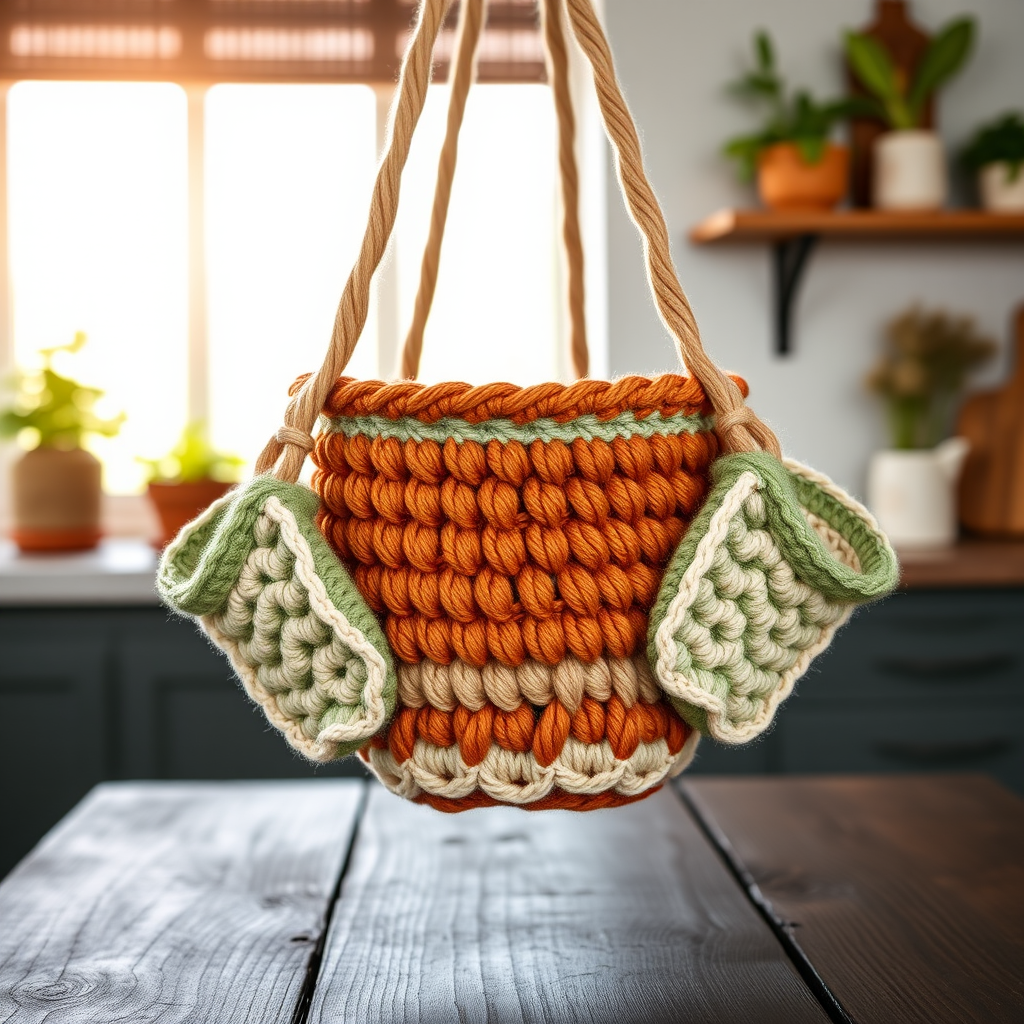
Elevate your kitchen windowsill with this charming crochet hanging herb holder, designed to cradle small pots in a cascade of textured, earthy stitches. This pattern is perfect for adding a touch of handmade boho style to your indoor garden while keeping your favorite herbs within easy reach. Whether you're a seasoned crocheter or a curious beginner, this project is a delightful way to combine functionality with cozy, handmade charm.
The Herb Haven Hanging Planter features a central basket with three side pouches, all connected by a braided rope in a macrame-inspired style. Using warm terracotta, sage green, and cream cotton yarn, this piece brings a natural, earthy aesthetic to any bright, sunlit space. Let's dive into the materials and step-by-step instructions to create your own hanging garden masterpiece.
Materials Needed
Before you begin, gather the following supplies to ensure a smooth crocheting experience:
- Yarn: Worsted weight cotton yarn (e.g., Lion Brand 24/7 Cotton) in three colors:
- Terracotta (Color A) – approx. 120 yds
- Sage Green (Color B) – approx. 120 yds
- Cream (Color C) – approx. 120 yds
- Hook: US Size G/6 (4.0 mm) crochet hook
- Gauge: 4" x 4" = 16 sc x 18 rows (not critical, but keep consistent tension)
- Other: Yarn needle for sewing, scissors, fiberfill for stuffing (optional), small pots (2-3 inch diameter)
Abbreviations
Familiarize yourself with these standard crochet abbreviations before starting:
- ch = chain
- sl st = slip stitch
- sc = single crochet
- hdc = half double crochet
- dc = double crochet
- inc = 2 sc in same stitch
- dec = sc 2 together
- rnd = round
- BLO = back loop only
Step-by-Step Instructions
This pattern creates a hanging holder with a central basket and three side pouches, all connected by a braided rope. Work in continuous rounds unless noted. Take your time and keep your tension consistent for the best results.
BASKET (Make 1 with Color A)
The central basket forms the main body of your planter. Follow these rounds carefully:
- Rnd 1: Magic ring, ch 1, 6 sc in ring. (6)
- Rnd 2: Inc in each st around. (12)
- Rnd 3: (Sc in next st, inc) around. (18)
- Rnd 4: (Sc in next 2 sts, inc) around. (24)
- Rnd 5: (Sc in next 3 sts, inc) around. (30)
- Rnd 6: (Sc in next 4 sts, inc) around. (36)
- Rnd 7: (Sc in next 5 sts, inc) around. (42)
- Rnd 8: Working in BLO, sc in each st around. (42) – This creates a neat ridge for the basket's rim.
- Rnds 9-14: Sc in each st around. (42) – This creates the basket wall. Keep your tension even to form a sturdy cylinder.
- Rnd 15: (Sc in next 5 sts, dec) around. (36)
- Rnd 16: (Sc in next 4 sts, dec) around. (30)
- Rnd 17: (Sc in next 3 sts, dec) around. (24)
- Rnd 18: (Sc in next 2 sts, dec) around. (18)
Fasten off, leaving a long tail for sewing. Stuff lightly with fiberfill to shape, but leave the center hollow to hold a small pot. The BLO round creates a beautiful, defined edge that adds texture to the design.
SIDE POUCH (Make 3 with Color B)
These smaller pouches will cradle your herbs around the central basket. Repeat this pattern three times:
- Rnd 1: Magic ring, ch 1, 6 sc in ring. (6)
- Rnd 2: Inc in each st around. (12)
- Rnd 3: (Sc in next st, inc) around. (18)
- Rnd 4: (Sc in next 2 sts, inc) around. (24)
- Rnd 5: Working in BLO, sc in each st around. (24) – This creates the scalloped edge detail.
- Rnds 6-8: Sc in each st around. (24) – Continue building the pouch walls.
- Rnd 9: (Sc in next 2 sts, dec) around. (18)
- Rnd 10: (Sc in next st, dec) around. (12)
Fasten off, leaving a long tail. Stuff lightly, leaving the center hollow for a small pot. The BLO round at the top gives each pouch a delicate, scalloped appearance that adds to the boho aesthetic.
HANGING STRAPS (Make 6 with Color C)
These straps connect the pouches to the main basket and form the cradle for your planter:
- Ch 30.
- Row 1: Sc in 2nd ch from hook and across. (29)
Fasten off. Make 6 straps total. These simple straps are strong and functional, providing the structure needed to hold everything together.
BRAIDED ROPE (Make 1 with all colors)
The braided rope is the main hanging element, giving your planter that macrame-style look:
- Cut 3 strands of yarn (one of each color) each 60 inches long.
- Tie a knot at one end, braid tightly, and tie another knot at the other end.
This thick, colorful rope will support the entire weight of your planter and herbs, so make sure your braid is tight and secure.
ASSEMBLY
Now it's time to bring all the pieces together. Follow these steps carefully:
- Attach the side pouches: Position the 3 side pouches evenly around the outside of the basket. Place them about 2 inches down from the top edge of the basket. Sew each pouch securely using the long tails. Make sure they are evenly spaced for a balanced look.
- Sew the straps: Sew 2 straps onto the top edge of the basket, opposite each other, for the main handle. Sew the remaining 4 straps onto the top edge of the basket, spacing them evenly between the first two, to create a cradle for the side pouches. Each strap should loop over the top of the pouch and attach to the basket rim. This creates a secure support system for all three pouches.
- Thread the braided rope: Thread the braided rope through the loops created by the straps at the top. Tie the ends of the braided rope together in a secure knot to form a hanging loop. This will be the main hanging point for your planter.
- Weave in all ends: Use your yarn needle to weave in any loose ends to keep your work neat and tidy.
- Add your pots: Place small pots (2-3 inch diameter) inside the basket and each pouch. Your herb holder is ready to hang!
Tips for Success
- Consistent tension: Keep your tension even throughout to ensure your basket and pouches hold their shape.
- Stitch markers: Use stitch markers to keep track of your rounds, especially when working in continuous spirals.
- Customization: Feel free to experiment with different color combinations to match your kitchen decor. You can also adjust the size by adding or removing rounds.
This Herb Haven Hanging Planter is a beautiful and functional addition to any home. The combination of textured stitches, earthy colors, and macrame-style rope creates a cozy, handmade aesthetic that will brighten your kitchen and keep your herbs within easy reach. Happy crocheting!


