Sweater Crochet Patterns
Free Pattern: The Enchanted Forest Balloon Sleeve Sweater
Anonymous
•
July 11, 2026
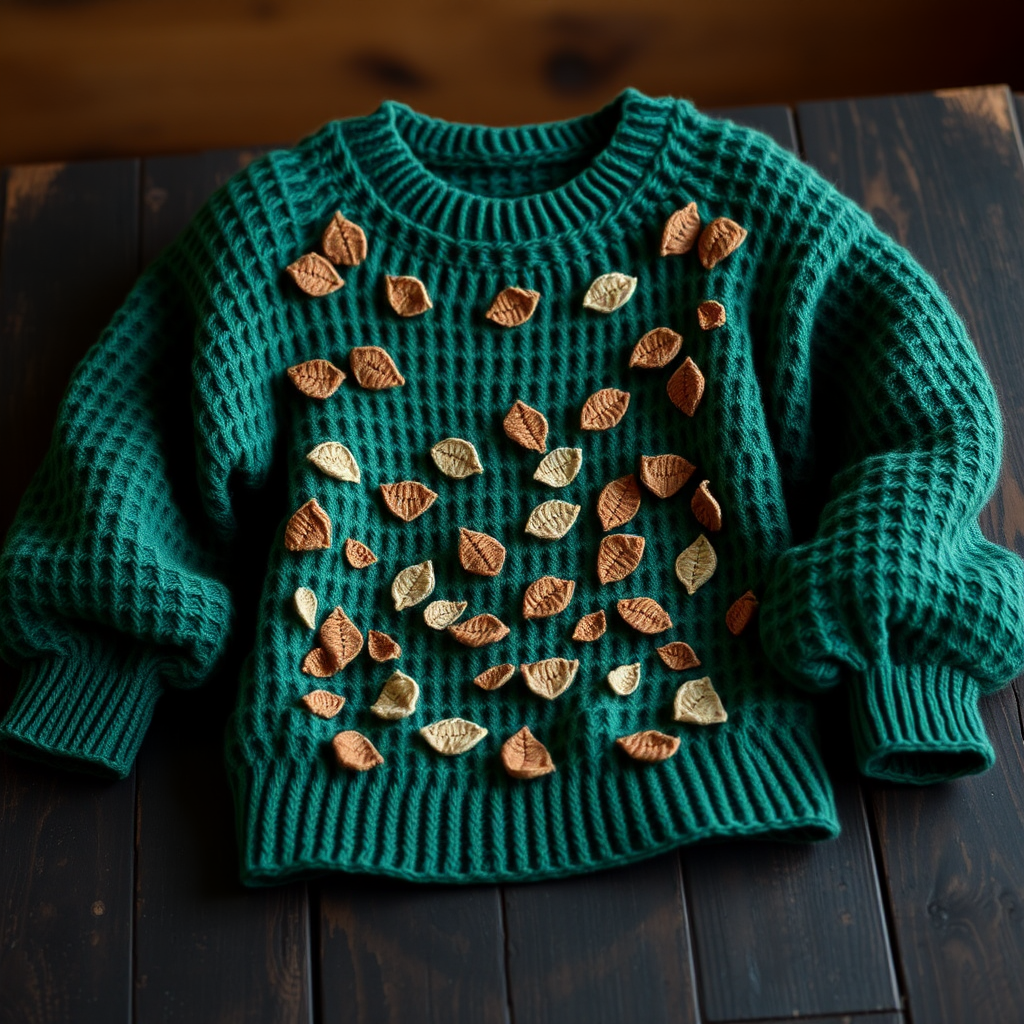
Free Pattern: The Enchanted Forest Balloon Sleeve Sweater
Introduction
Dive into the mystical allure of the forest with this enchanting balloon sleeve sweater. Featuring intricate leaf motifs and a rich, earthy color palette, this piece is perfect for those who wish to wear a touch of nature's magic. This sweater is designed for beginners and will guide you through each step, ensuring you can recreate this beautiful piece with ease.
Materials Needed
- Yarn: Worsted weight, 100% wool in forest green, moss, and bark brown
- Hook: 5.5mm crochet hook
- Gauge: 12 stitches and 14 rows = 4 inches in double crochet (dc)
Step-by-Step Instructions
Back Panel
- Begin by making a foundation chain of 70 stitches.
- Row 1: Double crochet (dc) in the 4th chain from the hook and in each chain across. You should have 68 dc at the end of this row.
- Rows 2-40: Chain 3 (this counts as your first dc), turn your work, and dc in each dc across. Repeat this for a total of 39 rows.
- Fasten off your yarn and set the back panel aside.
Front Panel
- Repeat the same steps as for the back panel to create the front panel. Chain 70, dc in the 4th chain from the hook, and continue for 40 rows. Fasten off.
Sleeves
- Chain 40 stitches for the first sleeve.
- Row 1: Dc in the 4th chain from the hook and in each chain across. You should have 38 dc.
- Rows 2-30: Chain 3, turn your work, and dc in each dc across for a total of 29 rows.
- Row 31: Chain 3, turn, 2 dc in the first stitch, dc in each stitch across to the last stitch, then 2 dc in the last stitch. You should now have 40 dc.
- Rows 32-40: Repeat Row 31 for 9 more rows. Fasten off.
- Repeat these steps to create the second sleeve.
Assembly
- Begin by sewing the shoulder seams of the back and front panels together, leaving space for the neckline.
- Next, sew the sleeves to the body of the sweater at the armholes.
- Sew the side seams of the body and the sleeve seams together to complete the structure of the sweater.
Neckline
- Attach your yarn to the neck edge of the sweater.
- Chain 1, then single crochet (sc) evenly around the neckline. Join with a slip stitch (sl st) to close the round.
- Fasten off and weave in any loose ends.
Leaf Motifs
- Using the moss green yarn, create small leaf motifs as desired. You can use a simple leaf pattern or your own design.
- Sew the leaf motifs onto the sweater in a scattered pattern, resembling a forest floor.
Congratulations! You have now completed your very own Enchanted Forest Balloon Sleeve Sweater. Enjoy wearing this beautiful piece that captures the essence of nature!


