Daisy Dot Soap Bag Free Crochet Pattern
Introduction
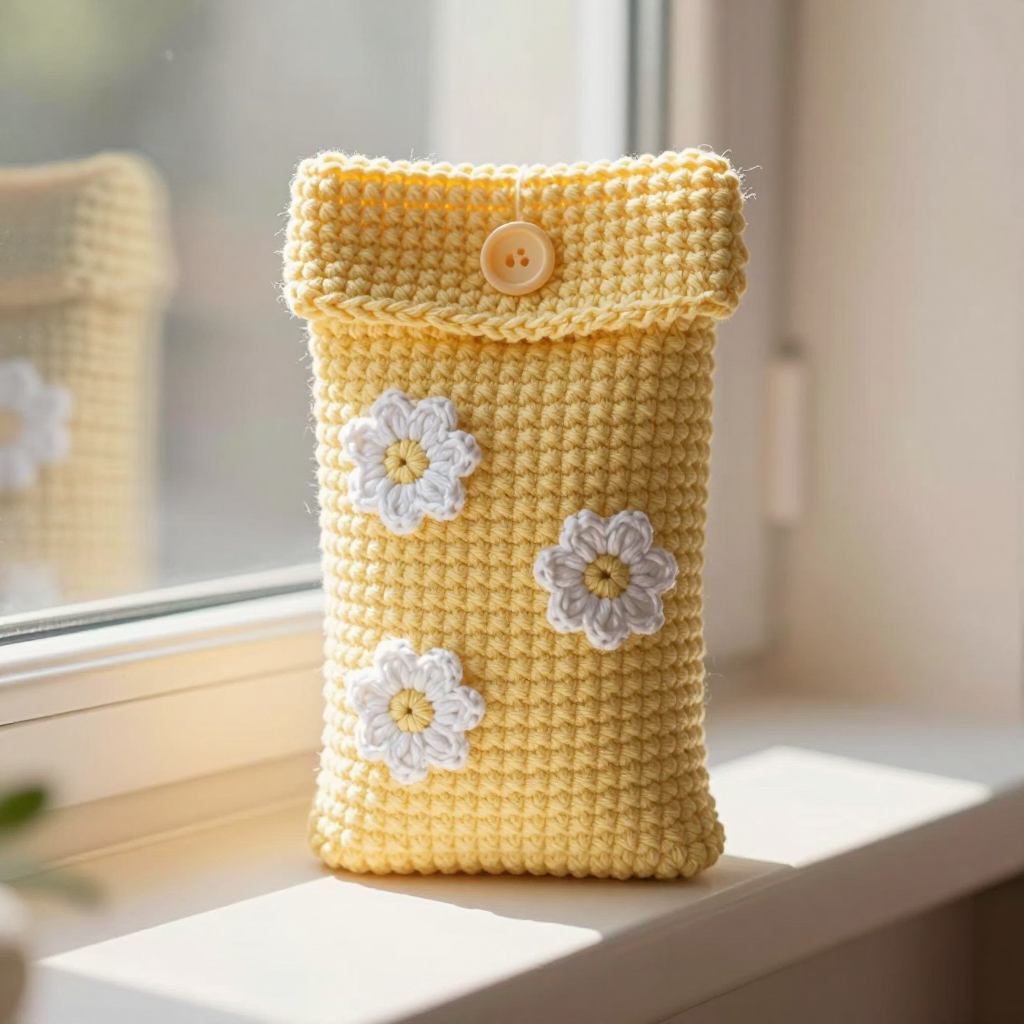
Welcome! If you have never held a crochet hook before, you are in exactly the right place. This Daisy Dot Soap Bag is one of the friendliest first projects you can make: it is a simple little tube of single crochet stitches, topped with a buttoned flap and decorated with three tiny white daisies. It is perfect for absolute beginners, for anyone who wants a quick handmade gift, and for anyone who loves that soft, cozy, hygge feeling. When finished, it measures about 3½ inches wide and 5 inches tall, fits a standard bar of soap, and feels dense, smooth, and slightly ridged in your hand. Best of all, it uses only about 70 yards of yarn and a handful of easy stitches, so you can finish it in an evening or two.
Materials Needed
- Yarn: Worsted weight (Category 4) cotton yarn — approximately 60 yards butter yellow and 10 yards white. Cotton is recommended because it handles water well and keeps its shape.
- Crochet hook: 5.0 mm (US H/8).
- Stitch marker: 1 (a safety pin or a scrap of contrasting yarn works too).
- Tapestry needle: a large-eyed, blunt needle for sewing in ends and attaching the daisies.
- Scissors.
- One button: ½ inch (12 mm) round button.
- Finished size: 3½ inches wide x 5 inches tall (flat), which fits a standard bar of soap.
Abbreviations and Beginner Glossary
- ch – chain. Make a loop of yarn on your hook, wrap the yarn over the hook, and pull it through the loop. That is one chain. A row of chains is your starting "foundation."
- sc – single crochet. Insert your hook into the stitch, wrap the yarn over the hook, pull up a loop (you now have 2 loops on the hook), wrap the yarn over again, and pull it through both loops. One single crochet made.
- sl st – slip stitch. Insert your hook into the stitch, wrap the yarn over, and pull it straight through both the stitch and the loop on your hook. It joins things without adding height.
- st / sts – stitch / stitches. One completed loop or "V" in your fabric.
- sc2tog – single crochet 2 together. A decrease: insert your hook into the first stitch, pull up a loop, insert into the next stitch, pull up a loop (3 loops on hook), yarn over, pull through all 3 loops. Two stitches become one. (Listed for reference — this pattern does not use it.)
- ch-1 sp – chain-1 space. The little gap made by a chain stitch; you work into the gap rather than into a stitch.
- magic ring – an adjustable loop of yarn you crochet into, then pull tight so no hole remains in the center.
- fasten off – cut the yarn a few inches from your work and pull the tail through the last loop to lock it.
- weave in ends – thread a yarn tail onto the tapestry needle and sew it back and forth through the fabric so it disappears.
- right side – the "good" outside face of your work that people will see.
Gauge
Gauge: 16 single crochet stitches x 18 rows = 4 inches (10 cm).
Gauge simply means how big your stitches come out. If your stitches are bigger than this, your bag will be too large for the soap; if smaller, it will be too snug. To check, crochet a small square about 4 inches wide, lay a ruler across the middle, and count the stitches in 4 inches. If you have more than 16, try a larger hook; if fewer, try a smaller hook. A quick swatch saves you from re-making the whole bag.
Beginner Tips Before You Start
- Use the stitch marker. Place it in the first stitch of each round. Because you work in a continuous spiral, the marker is the only way to know where a round begins.
- Do not pull the yarn too tight. Keep your tension relaxed and even; tight stitches are hard to insert your hook into.
- Count your stitches at the end of every round. The counts are given in parentheses — check them before moving on.
- Work into both loops of each stitch (the two little strands of the "V") unless told otherwise.
- Keep your starting chain loose. A tight chain makes the first round difficult.
- Cotton has little stretch. If your hands ache, take a break — this is a small project and there is no rush.
Step-by-Step Instructions
Bag Body (butter yellow, worked in the round)
Round 1: Ch 16. Sc in the 2nd ch from the hook and in each ch across (14 sc). Do not turn. Work 2 sc in the last ch (this turns the corner), then sc in each free loop along the opposite side of the foundation chain (14 sc), then 2 sc in the final ch. Place your marker in the first stitch. (32 sc)
Round 2: Sc in each st around. (32 sc)
Rounds 3–24: Repeat Round 2. (32 sc) The bag now measures about 5 inches tall.
Finishing the body: Sl st in the next st, fasten off, and weave in the ends.
Flap (butter yellow, worked flat)
Row 1: With the right side facing you, join the yarn at the top edge of the bag at the center-back. Ch 1, sc in the same st and in the next 13 sts. (14 sc) Turn.
Rows 2–6: Ch 1, sc in each st across. (14 sc) Turn.
Row 7 (buttonhole): Ch 1, sc in the first 6 sts, ch 2, skip 2 sts, sc in the last 6 sts. (12 sc, 1 ch-2 sp)
Row 8: Ch 1, sc in each st across and work 2 sc into the ch-2 space. (14 sc) Fasten off and weave in the ends.
Daisy Appliqué (make 3, white)
Round 1: Using white yarn, make a magic ring. Ch 1, work 10 sc into the ring, and join with a sl st to the first sc. (10 sc)
Round 2 (petals): *Ch 3, sl st in the next st; repeat from * around for 10 petals total. Fasten off, leaving a 6-inch tail for sewing.
Assembly and Finishing
Sewing on the daisies: Arrange the 3 daisies on the front of the bag in a scattered cluster, about 1 inch below the flap. Pin them in place. Thread a white tail onto the tapestry needle and sew each daisy down securely, catching only the back of the petals so the stitches stay hidden. Knot the tail on the inside and weave it in.
Attaching the button: Fold the flap down over the front of the bag and mark where the buttonhole sits. Sew the ½-inch button to the front of the bag, centered below the flap and aligned with the buttonhole, passing the needle through the button's holes several times.
Weaving in ends: Thread each remaining yarn tail onto the tapestry needle and run it back and forth through the inside of the fabric for about an inch, then trim close to the work.
Blocking: Lightly dampen the bag with water in a spray bottle, gently shape it into a neat tube, and let it dry flat. This smooths the stitches and evens out the fabric. Do not stretch it — just smooth it into shape.
Pro Tips and Variations
- Change the colors: Use any worsted cotton color for the bag and a contrasting color for the daisies — soft pink, sage green, or cream all look lovely.
- Make it bigger or smaller: Add or remove chains in Round 1 in multiples of 2 to change the width, and add or remove repeats of Round 2 to change the height. Check your gauge first so the soap still fits.
- Swap the yarn: Any worsted weight (Category 4) yarn works, but cotton or a cotton-blend is best because it handles moisture and keeps its shape.
- Skip the daisies: Leave the bag plain for a minimalist look, or replace the daisies with a simple embroidered heart or a few French knots.