Home Decor
Chunky Cable Crochet Cardigan
Anonymous
•
June 20, 2026
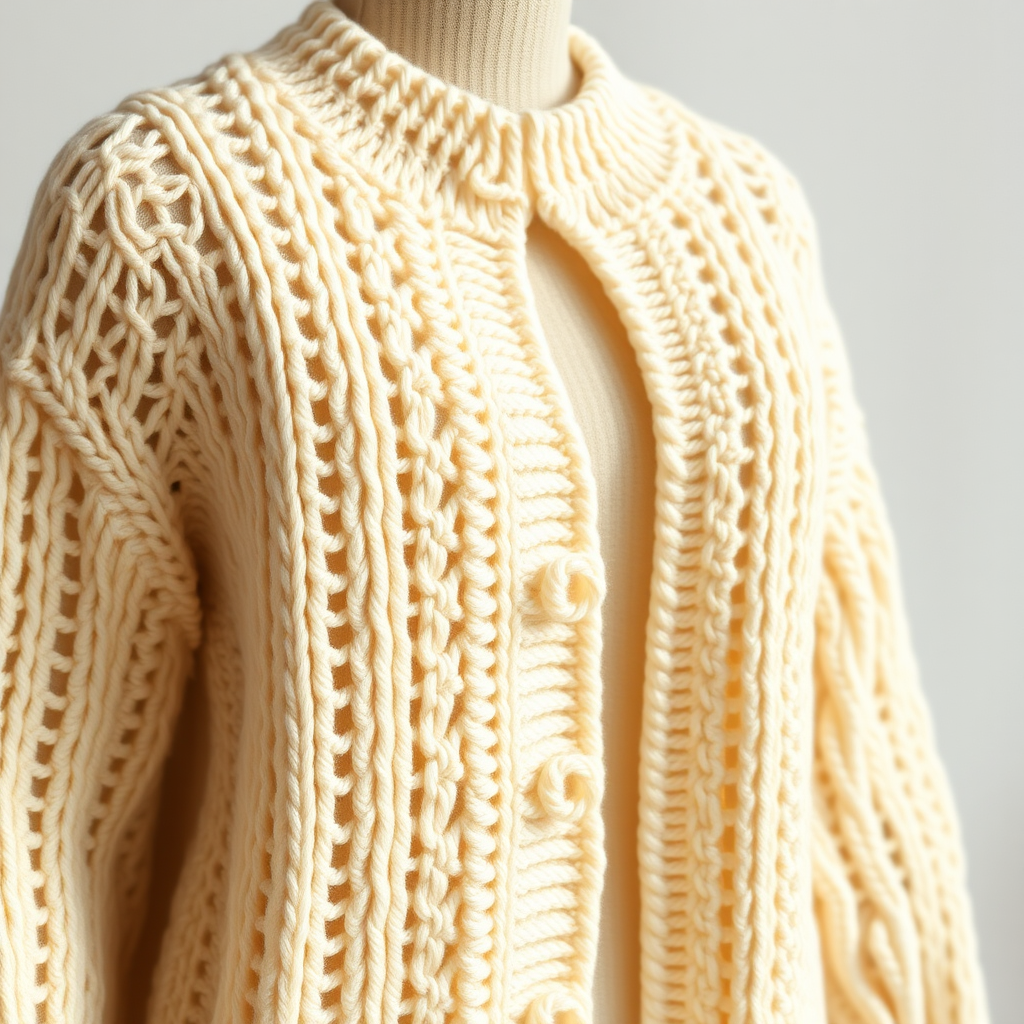
Chunky Cable Crochet Cardigan
Introduction
Welcome to your next favorite crochet project! This Chunky Cable Crochet Cardigan is not only stylish but also incredibly warm and cozy, making it perfect for chilly days. With its intricate cable patterns and plush texture, this cardigan will quickly become a staple in your wardrobe. Best of all, it's made with super bulky yarn, ensuring that you can whip it up in no time, even if you're a beginner!
Materials Needed
- Yarn: Super bulky weight yarn in cream
- Crochet Hook: Size N/P (10 mm) crochet hook
- Gauge: 4 stitches and 4 rows = 4 inches in double crochet
Step-by-Step Instructions
1. Back Panel
- Begin by chaining 50 stitches.
- Row 1: Double crochet (dc) in the third chain from the hook and continue to dc in each chain across the row. You should have 48 dc stitches at the end of this row.
- Row 2: Chain 2 (this counts as your first dc), turn your work, and dc in each stitch across the row.
- Repeat Row 2 until the piece measures 24 inches from the starting chain. This will form the back panel of your cardigan.
2. Front Panels (Make 2)
- Chain 25 stitches for each front panel.
- Row 1: Dc in the third chain from the hook and dc in each chain across. You should have 23 dc stitches at the end of this row.
- Row 2: Chain 2, turn your work, and dc in each stitch across.
- Repeat Row 2 until each front panel measures 24 inches. Set aside both panels for assembly.
3. Sleeves (Make 2)
- Chain 30 stitches for each sleeve.
- Row 1: Dc in the third chain from the hook and dc in each chain across. You should have 28 dc stitches at the end of this row.
- Row 2: Chain 2, turn your work, and dc in each stitch across.
- Every 4th row, increase by 1 stitch at each end of the row. Continue this pattern until you have 40 stitches.
- Continue working until the sleeve measures 18 inches from the starting chain. Set aside both sleeves for assembly.
4. Assembly
- Begin by sewing the shoulder seams of the back and front panels together.
- Attach the sleeves to the armholes by aligning the seams and sewing them securely.
- Sew the side seams of the cardigan, ensuring that the front and back panels are aligned properly.
- Sew the seams of the sleeves to complete the assembly of the cardigan.
5. Collar
- Attach your yarn to the neckline of the cardigan.
- Chain 2, then dc around the neckline evenly.
- Repeat this for a total of 3 rows to create a cozy collar.
6. Button Band
- Attach yarn to the front edge of the cardigan.
- Chain 2, then dc evenly along the edge for the button band.
- Repeat for 3 rows to create a sturdy button band.
- Attach buttons evenly spaced along the band, ensuring they align with the buttonholes created by your stitches.
Congratulations! You have successfully crocheted your very own Chunky Cable Cardigan. Wear it proudly and enjoy the warmth and style it brings to your wardrobe!
Also Check Out: We think you'd love this beautiful pattern on our sister site: Vintage Crocheted Floral Basket Bag
Also Check Out: We think you'd love this beautiful pattern on our sister site: Chunky Crochet Ribbed Scarf Pattern
Also Check Out: We think you'd love this beautiful pattern on our sister site: Bright Orange Knit Ribbed Beanie
Also Check Out: We think you'd love this beautiful pattern on our sister site: Colorful Crochet Granny Square Dishcloth


