Aurora Borealis Driftwood Shawl Free Pattern – Knit a Celestial Gradient Wrap

Aurora Borealis Driftwood Shawl Free Pattern – Knit a Celestial Gradient Wrap
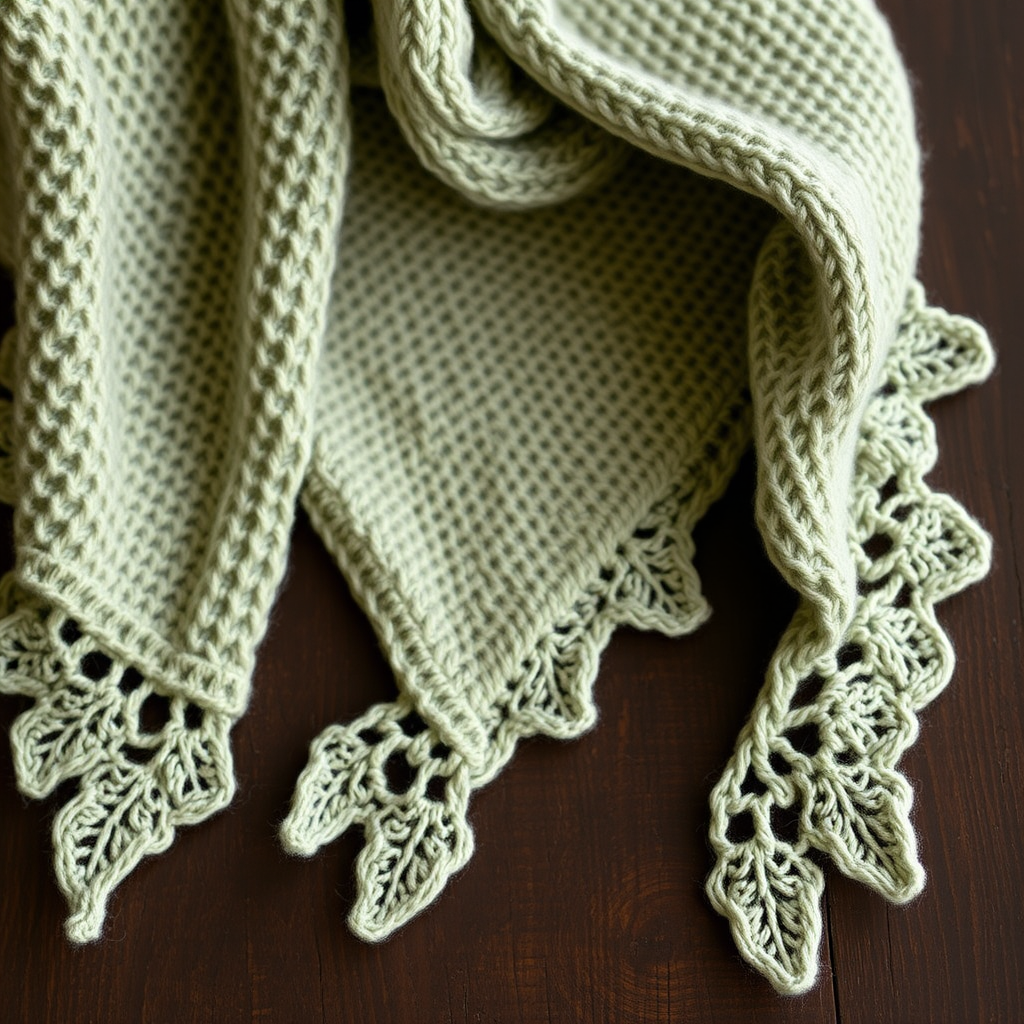
Wrap yourself in the mesmerizing hues of the northern lights with this gradient knit shawl, featuring a delicate lace edge that mimics the dancing aurora. The soft, flowing drape and earthy driftwood tones make it a versatile layering piece for any season. This free knitting pattern is perfect for intermediate knitters looking to expand their skills with color changes and lacework, while still being accessible to confident beginners ready for a rewarding project.
This shawl is knit from the top center down, increasing on both sides to create a beautiful triangular shape. The smooth stockinette body transitions through four gradient colors—deep teal, soft turquoise, pale mint, and cream—evoking a night sky illuminated by celestial lights with a driftwood-like earthy undertone. The scalloped lace border adds an airy, ethereal finish that truly captures the magic of the aurora borealis.
Materials Needed
Before you begin, gather the following supplies to ensure a smooth knitting experience:
- Yarn: Fingering weight yarn in 4 gradient colors (deep teal, soft turquoise, pale mint, cream) – approximately 400g total (about 100g per color)
- Needle: US 6 (4.0 mm) circular knitting needle, 32-inch or longer (to accommodate the growing number of stitches)
- For Bind Off: US 8 (5.0 mm) needle or larger for a stretchy edge
- Notions: Stitch markers (at least 2), tapestry needle for weaving in ends, blocking mats and pins
- Optional: Gentle wool wash for blocking
Gauge: 20 stitches and 28 rows = 4 inches in stockinette stitch (after blocking). Gauge is important for achieving the correct drape and size, but this shawl is forgiving—a slightly different gauge will simply alter the final dimensions.
Step-by-Step Instructions
Abbreviations
- k = knit
- p = purl
- yo = yarn over
- k2tog = knit two together (right-leaning decrease)
- ssk = slip, slip, knit (left-leaning decrease)
- pm = place marker
- sm = slip marker
Getting Started: The Setup Rows
This shawl begins at the top center point and grows outward. The first few rows establish the foundation and the center spine of your triangle.
Cast On: Using a long tail cast on, cast on 3 stitches.
Row 1 (Right Side): k1, yo, k1, yo, k1 — you now have 5 stitches on your needle.
Row 2 (Wrong Side): k2, p1, k2 — the knit stitches at the edges create a neat garter border.
Row 3 (Right Side): k1, yo, k1, yo, k1, yo, k1, yo, k1 — you now have 9 stitches on your needle.
Row 4 (Wrong Side): k2, p5, k2
You've now established the pattern: knit 2 stitches at each edge for a clean border, purl the center stitches on wrong-side rows, and increase with yarn overs on right-side rows.
The Increase Section: Building the Body
Now you'll work the main body of the shawl, which consists of a simple two-row repeat that increases 2 stitches every right-side row. This creates the triangular shape.
Row 5 (Right Side): k1, yo, knit to the last stitch, yo, k1 — this increases 2 stitches (one at each edge).
Row 6 (Wrong Side): k2, purl to the last 2 stitches, k2
Repeat Rows 5-6 until you have 200 stitches on your needle, ending with a wrong-side row (Row 6).
Color Changes: Creating the Gradient
To achieve the beautiful aurora gradient, change colors every 50 rows in this order:
- Deep Teal: Rows 1-50
- Soft Turquoise: Rows 51-100
- Pale Mint: Rows 101-150
- Cream: Rows 151-200
Pro Tip: When changing colors, do so at the beginning of a right-side row for the cleanest transition. Simply drop the old yarn and start knitting with the new color, leaving a tail to weave in later. Don't worry about carrying yarn up the side—you'll weave in all ends at the finish.
Continue the increase pattern through all color changes until you reach 200 stitches total. The shawl will naturally form a wide triangle with a smooth, drapey stockinette body.
The Lace Border: Adding the Aurora Magic
Once you've completed the body and have 200 stitches on your needle, it's time to add the delicate lace edge that mimics the dancing northern lights. This border consists of a 4-row repeat worked four times total.
Row 1 (Right Side): k1, yo, *k2tog, yo* repeat from * to * until 1 stitch remains, k1
Row 2 (Wrong Side): k2, purl to the last 2 stitches, k2
Row 3 (Right Side): k1, yo, *ssk, yo* repeat from * to * until 1 stitch remains, k1
Row 4 (Wrong Side): k2, purl to the last 2 stitches, k2
Repeat Rows 1-4 three more times (for a total of 4 lace repeats, or 16 rows of lace).
Note: The yarn overs in these rows increase your stitch count slightly with each repeat, which is intentional—it creates the scalloped, flared edge that gives the shawl its airy, ethereal quality. Don't worry if your stitch count grows; this is part of the design.
Binding Off: A Stretchy Finish
A loose bind-off is essential for this shawl to ensure the lace edge can fully open and drape beautifully.
Switch to your larger needle (US 8 or bigger) and bind off all stitches knitwise, very loosely. To ensure maximum stretch, you can also use a lace bind-off: knit 2 stitches, then pass the first stitch over the second, knit 1 more, pass the previous stitch over, and continue in this manner. This creates an especially elastic edge that complements the lace pattern.
Finishing: Weaving and Blocking
Your shawl is nearly complete! Follow these final steps to transform your knitting into a stunning, professional-looking piece.
Weave in All Ends: Using your tapestry needle, carefully weave in all loose yarn ends along the wrong side of the shawl, following the path of the stitches to keep them invisible. Take care to weave in the color-change ends securely so they don't pop out during wear.
Blocking (Essential for Lace): Blocking is crucial for this pattern—it opens up the lace stitches and smooths the fabric to its full, beautiful potential.
- Fill a basin or sink with lukewarm water and add a gentle wool wash according to the product instructions.
- Submerge the shawl and let it soak for 20-30 minutes. Do not agitate or wring—this can felt the wool.
- Carefully remove the shawl and gently squeeze out excess water (or roll it in a clean towel to absorb moisture).
- Lay the shawl flat on blocking mats or a clean, dry towel.
- Shape it into a triangle, gently stretching the edges to open up the lace pattern. Use blocking pins to secure the points and edges, especially along the scalloped lace border.
- Pay special attention to the lace edge—stretch it slightly so the yarn overs and decreases create a visible, airy pattern.
- Allow the shawl to dry completely, which may take 24-48 hours depending on humidity.
Once dry, remove the pins and admire your handiwork! The Aurora Borealis Driftwood Shawl is now ready to wear, gift, or display as a stunning piece of wearable art.
Tips for Success
- Use stitch markers at the edges (after the first 2 stitches and before the last 2 stitches) to help you remember where the border begins and ends.
- Count your stitches periodically during the increase section to ensure you're on track—it's much easier to fix a mistake early than to rip back hundreds of rows.
- Choose your yarn wisely: A soft, drapey fingering weight yarn (like merino, silk blends, or alpaca) will enhance the flowing quality of the shawl. The gradient effect works best with yarns that have subtle tonal variations.
- Blocking is non-negotiable for lace—it transforms the fabric from a crumpled mass into a beautiful, open, and defined piece.
This pattern is a wonderful way to practice color changes, increase techniques, and lace knitting all in one project. The result is a breathtaking, versatile wrap that evokes the magic of the northern lights and the grounding warmth of driftwood. Happy knitting!