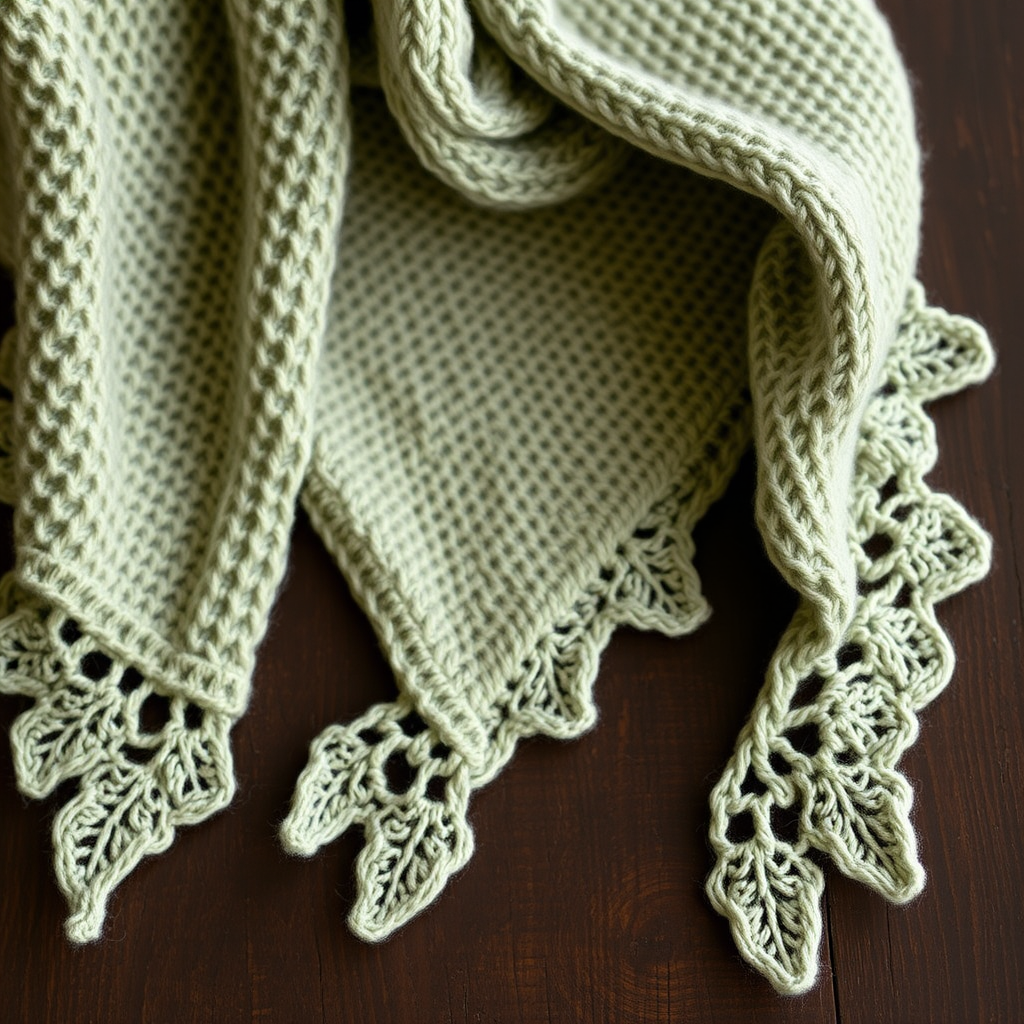
Aurora Bloom Shawl Free Pattern – Knit a Luminous Gradient Petal Wrap

Aurora Bloom Shawl Free Pattern – Knit a Luminous Gradient Petal Wrap
Wrap yourself in the soft glow of the northern lights with this stunning gradient shawl, featuring delicate petal-like lace and a gentle crescent shape. Knitted from the top down, this pattern is a meditative journey through color that drapes beautifully over any outfit. Whether you're a seasoned knitter looking for a mindful project or a confident beginner ready to tackle lace, the Aurora Bloom Shawl offers a rewarding experience with breathtaking results.
This free knitting pattern guides you through creating a wearable work of art. The crescent shape is achieved through strategic increases, while a simple 4-row lace repeat forms a fan of overlapping petals. The gradient effect—from deep teal through soft lavender to pale pink—creates a luminous, aurora-inspired finish that catches the light with every movement.
Materials Needed
Before you begin, gather the following supplies. The quality of your yarn will significantly impact the drape and sheen of your finished shawl, so choose a fingering weight yarn with good stitch definition.
Yarn
- Fingering weight yarn in 3 colors (approximately 400g total):
- Color A: Deep teal (approximately 133g)
- Color B: Soft lavender (approximately 133g)
- Color C: Pale pink (approximately 133g)
- Suggested yarn: Malabrigo Sock or similar single-ply fingering weight yarn for optimal drape and color absorption.
Needles & Notions
- US 6 (4.0 mm) circular knitting needle, 32-inch (80 cm) or longer—the long cable is essential to accommodate the growing number of stitches.
- Stitch markers (at least 2, plus spares)
- Yarn needle for weaving in ends
- Blocking mats, rust-proof pins, and a towel for finishing
Gauge
20 stitches and 28 rows = 4 inches in stockinette stitch (blocked). While gauge is not critical for a shawl, matching it ensures your finished piece will have the intended size and drape. Always knit a swatch and block it before measuring.
Step-by-Step Instructions
This shawl is knitted from the top center down, increasing at the edges and center to create a crescent shape. The lace pattern is a simple 4-row repeat that forms delicate petals. Follow the instructions carefully, and you'll be amazed at how quickly the pattern emerges.
Abbreviations
- k = knit
- p = purl
- yo = yarn over (bring yarn to front, then over needle to back, creating a new stitch)
- k2tog = knit two together (decrease slanting right)
- ssk = slip, slip, knit (slip two stitches knitwise one at a time, then knit them together through back loops—decrease slanting left)
- pm = place marker
- sm = slip marker
- RS = right side (the side that will face outward)
- WS = wrong side (the inside of the shawl)
Setup Section
Using the long-tail cast on method, cast on 5 stitches.
Row 1 (RS): k2, yo, k1, yo, k2 — you now have 7 stitches.
Row 2 (WS): k2, p3, k2 — the first and last 2 stitches of every row are knit to create a garter stitch edge that prevents curling.
Row 3 (RS): k2, yo, k1, yo, k1, yo, k1, yo, k2 — you now have 11 stitches.
Row 4 (WS): k2, p7, k2.
Row 5 (RS): k2, yo, k3, yo, k1, yo, k3, yo, k2 — you now have 15 stitches.
Row 6 (WS): k2, p11, k2.
Your setup is complete. The center stitch (the single knit stitch in the middle of the row) will be the focal point for increases throughout the pattern.
Body of the Shawl
Now you'll begin the main pattern. Place markers as follows: k2, pm, work to last 2 stitches, pm, k2. The center stitch is the middle stitch of the row—you'll be increasing on either side of it.
Row 1 (RS): k2, sm, *yo, k1, yo, k2tog, yo, k1, yo, ssk, yo, k1, yo* repeat from * to * until 2 stitches before marker, yo, k1, yo, sm, k2. (Increase 4 stitches per repeat)
Detailed explanation: After slipping the first marker, you'll work the lace repeat. Each repeat adds 4 stitches. The sequence creates a petal shape: the yarn overs open up the fabric, while the k2tog and ssk decreases pull it back together, forming a scalloped edge. When you reach the second marker, you'll work the center increase (yo, k1, yo) before slipping the marker and knitting the final 2 edge stitches.
Row 2 (WS): k2, sm, purl to last 2 stitches, sm, k2.
Detailed explanation: This is a plain purl row. Simply purl every stitch between the markers, keeping the garter edge (k2 at each end) intact. The yarn overs from the previous row are purled as regular stitches.
Row 3 (RS): k2, sm, *k1, yo, k3, yo, k2tog, yo, k3, yo, k1* repeat from * to * until 2 stitches before marker, k1, yo, k3, yo, sm, k2.
Detailed explanation: This row shifts the lace pattern slightly, creating the overlapping petal effect. The k1 at the beginning and end of each repeat acts as a bridge between petals. The center increase (k1, yo, k3, yo) before the marker continues to shape the crescent.
Row 4 (WS): k2, sm, purl to last 2 stitches, sm, k2.
Repeat these 4 rows, working the increases at the edges and center. As the shawl grows, the pattern will naturally form a fan of petals. Continue until the shawl measures approximately 24 inches from the center top to the bottom edge, ending with a WS row.
Pro tip: Count your stitches at the end of each RS row to ensure you haven't missed any increases. The stitch count should increase by 8 stitches on every RS row (4 from the lace repeats and 4 from the edge/center increases).
Color Transitions
To create the gradient effect, switch colors at the beginning of a RS row. Here's the color schedule:
- Color A (deep teal): Work 8 inches from the setup rows.
- Color B (soft lavender): Work the next 8 inches.
- Color C (pale pink): Work the final 8 inches.
For a softer blend between colors, alternate rows for the last 2 inches of each color section. This means you'll knit 1 row in the new color, then 1 row in the old color, alternating until the transition is complete. This technique creates a subtle, hand-dyed effect that mimics the natural blending of aurora colors.
How to join a new color: At the beginning of a RS row, simply drop the old yarn and start knitting with the new color, leaving a 6-inch tail to weave in later. For a neater join, you can twist the old and new yarns together on the first stitch.
Edging
Work the edging in the current color (Color C). This simple lace border adds a delicate finish that echoes the petal motif.
Row 1 (RS): k2, sm, *yo, k2tog* repeat from * to * until 2 stitches before marker, yo, k2tog, sm, k2.
Detailed explanation: This row creates a series of eyelets. The yo adds a stitch, and the k2tog removes one, keeping the stitch count stable while creating a decorative openwork pattern.
Row 2 (WS): k2, sm, purl to last 2 stitches, sm, k2.
Row 3 (RS): k2, sm, *k1, yo, k2tog, yo, k1* repeat from * to * until 2 stitches before marker, k1, yo, k2tog, yo, sm, k2.
Detailed explanation: This row adds a bit more structure to the edging. The k1 stitches at the beginning and end of each repeat create small bumps that will become the base of the picot edge.
Row 4 (WS): k2, sm, purl to last 2 stitches, sm, k2.
Bind Off (Picot Edge)
On the RS, bind off loosely as follows: k2, *slip both stitches back to left needle, k2tog through back loops, k1, repeat from * until all stitches are bound off.
Step-by-step picot bind off:
- Knit 2 stitches.
- Slip both stitches back to the left needle (they will be twisted).
- Knit these 2 stitches together through the back loops (k2tog tbl). This creates a small loop.
- Knit 1 more stitch (this is the next stitch on the left needle).
- Repeat steps 2-4 until all stitches are bound off.
This bind off creates a series of tiny loops along the edge, giving the shawl a romantic, airy finish. Be sure to bind off loosely—if it feels tight, use a larger needle or bind off with a looser tension.
Finishing
Weave in all ends using a yarn needle. Take care to weave the color transition ends securely, as they will be visible if not properly hidden.
Blocking instructions:
- Soak the shawl in lukewarm water with a drop of wool wash for 20 minutes. Do not agitate—gently press the shawl underwater to ensure it's fully saturated.
- Carefully remove the shawl and gently squeeze out excess water. Do not wring or twist—this will felt the wool and ruin the lace.
- Lay the shawl flat on a clean towel and roll it up to remove additional moisture.
- Place the shawl on blocking mats and gently stretch it to shape. Pin the points of the petals to accentuate the lace pattern. The crescent shape should be visible, with the top edge slightly curved and the bottom edge forming gentle scallops.
- Allow to dry completely—this may take 24-48 hours depending on humidity. Do not remove pins until fully dry.
Once dry, your Aurora Bloom Shawl is ready to wear. The blocking process transforms the fabric, opening up the lace and creating the beautiful drape that makes this shawl so special.
This pattern is perfect for gifting or treating yourself to a piece of wearable art. The gradient effect means no two shawls will ever look exactly alike—your color choices and tension make it uniquely yours. Happy knitting!