Whispering Willow Wisp Free Pattern – Crochet a Glowing Forest Spirit
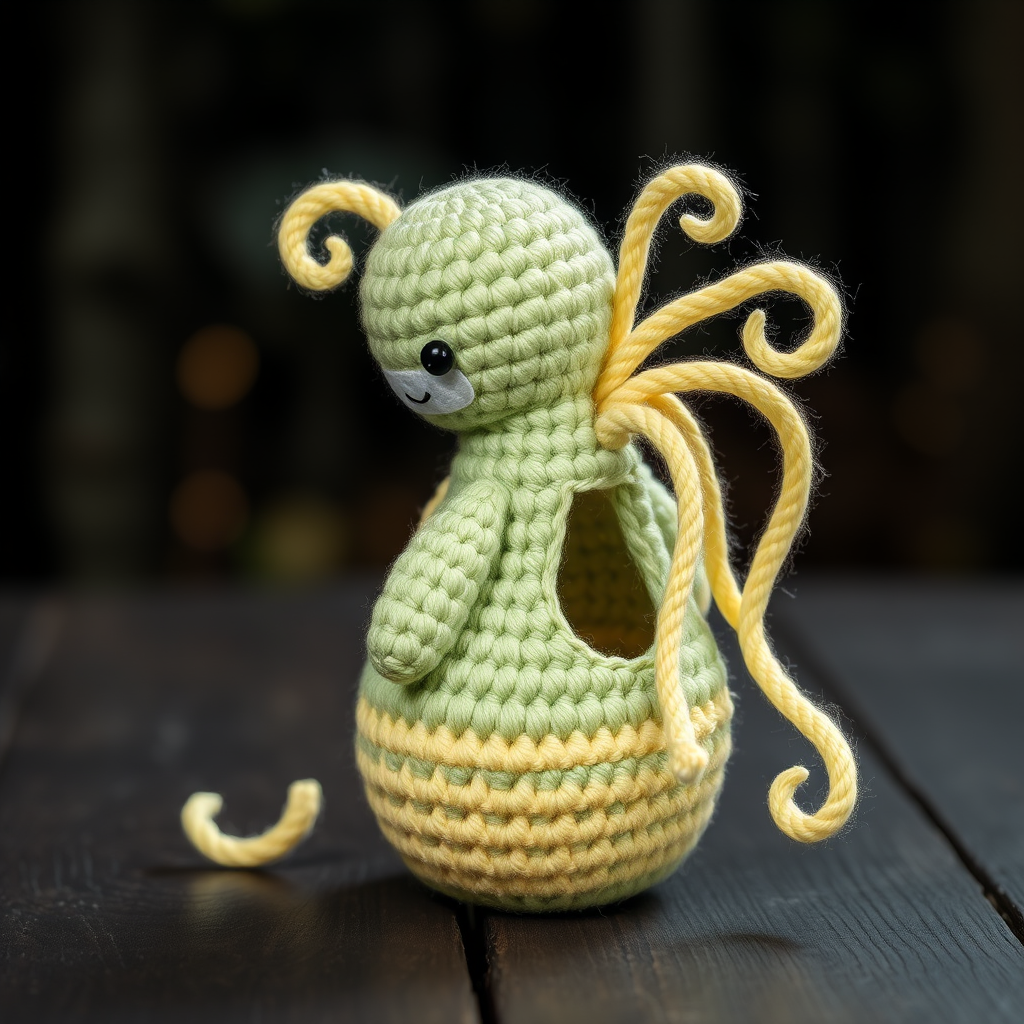
Whispering Willow Wisp Free Pattern – Crochet a Glowing Forest Spirit
Capture the ethereal glow of a moonlit forest with this enchanting crochet wisp. This adorable amigurumi forest spirit features soft gradient yarns and delicate trailing vines, making it the perfect addition to any shelf, nursery, or fantasy-themed décor. Whether you're a seasoned crocheter or a curious beginner, this pattern is designed to be accessible, detailed, and incredibly rewarding. Let's bring a little woodland magic to life, one stitch at a time.
Materials Needed
Before we begin our magical creation, gather the following supplies. All materials are standard and easily found at your local craft store.
- Yarn: Worsted weight yarn in three colors:
- Sage Green (for the body base and vines)
- Pale Yellow (for the upper body and head)
- Soft White (for the top of the head and highlights)
- Small amount of Black (for embroidering the eyes)
- Hook: 3.5mm crochet hook (E-4 US size)
- Other: Yarn needle, stitch marker, polyester fiberfill stuffing, scissors
Note on Gauge: 4 sc x 4 rows = 1 inch. Gauge is not critical for amigurumi, but keeping your tension consistent will ensure a neat, firm fabric that holds its shape.
Step-by-Step Instructions
This pattern is worked in continuous spirals unless otherwise noted. Always use a stitch marker to track the beginning of each round. Do not join rounds unless specified.
Head
Start with your Pale Yellow yarn.
- R1: Magic ring, 6 sc (6)
- R2: Inc in each st around (12)
- R3: (Sc in next st, inc) around (18)
- R4: (Sc in next 2 sts, inc) around (24)
- R5: (Sc in next 3 sts, inc) around (30)
- R6-10: Sc in each st around (30) — 5 rounds straight
- R11: (Sc in next 3 sts, dec) around (24)
- R12: (Sc in next 2 sts, dec) around (18)
- R13: (Sc in next st, dec) around (12)
Stuff the head firmly with fiberfill. You want it to be solid but not stretched.
- R14: Dec around (6)
- Fasten off, leaving a tail. Weave the tail through the front loops of the remaining 6 stitches and pull tight to close. Weave in the end securely.
Body
Start with Sage Green yarn. We will change to Pale Yellow halfway up for the gradient effect.
- R1: Magic ring, 6 sc (6)
- R2: Inc in each st around (12)
- R3: (Sc in next st, inc) around (18)
- R4: (Sc in next 2 sts, inc) around (24)
- R5-8: Sc in each st around (24) — 4 rounds straight
Color change: In the last stitch of R8, pull through with Pale Yellow yarn to complete the final sc. Cut the Sage Green, leaving a small tail to weave in later.
- R9: (Sc in next 2 sts, dec) around (18)
- R10: (Sc in next st, dec) around (12)
Stuff the body firmly.
- R11: Dec around (6)
- Fasten off, leaving a long tail for sewing. Do not close the hole completely; you will attach the head over this area.
Arms (Make 2)
Use Pale Yellow yarn.
- R1: Magic ring, 5 sc (5)
- R2: Inc in each st around (10)
- R3-5: Sc in each st around (10) — 3 rounds straight
- R6: (Sc in next 3 sts, dec) around (8)
Stuff lightly — just enough to give shape, keeping them flexible.
- R7: (Sc in next 2 sts, dec) around (6)
- Fasten off, leaving a long tail. Flatten the opening and sew it closed. Set aside.
Legs (Make 2)
Use Sage Green yarn.
- R1: Magic ring, 6 sc (6)
- R2: Inc in each st around (12)
- R3-4: Sc in each st around (12) — 2 rounds straight
- R5: (Sc in next 2 sts, dec) around (9)
Stuff lightly.
- R6: (Sc in next st, dec) around (6)
- Fasten off, leaving a long tail. Flatten and sew the opening closed. Set aside.
Trailing Vines (Make 3)
Use Sage Green yarn. These vines give the wisp its signature ethereal look.
- Chain 20.
- Sc in the 2nd ch from the hook and in each ch across. (19 sc)
- Fasten off, leaving a long tail for sewing.
Pro Tip: To make the vines curl naturally, gently twist them around your finger before sewing. This will set the curl and make them look like they're floating.
Assembly
Now we bring our forest spirit to life!
- Attach Head to Body: Using the long tail from the body, whipstitch the head to the top of the body. Ensure it is centered and secure. Weave in the end.
- Attach Arms: Using the tails, sew the arms to the sides of the body, approximately at R7-R8 level. Position them so they point slightly downward.
- Attach Legs: Sew the legs to the bottom of the body, spacing them evenly so the wisp can sit or stand.
- Attach Vines: Sew the three vines to the back of the body, just below the head. Space them evenly and let them drape naturally.
Face and Finishing Touches
- Embroider Eyes: Using the black yarn and a yarn needle, embroider two small French knots or satin stitches for the eyes. Place them on R9 of the head, about 4 stitches apart. No mouth is needed — the minimalist face adds to the serene, magical vibe.
- Optional Glow Effect: For an extra touch of magic, you can:
- Use a strand of glow-in-the-dark yarn held together with the Sage Green when making the vines.
- Sew a few tiny seed beads onto the vines to mimic dewdrops.
- Weave in All Ends: Use your yarn needle to hide any remaining tails inside the body or head.
- Shape the Vines: Gently curl the vines around the body and arms. If they don't hold their shape, you can lightly spray them with water and let them dry in the desired position.
Your Whispering Willow Wisp is complete! Place it on a shelf, in a nursery, or gift it to a fellow fantasy lover. The soft gradient and delicate vines make it a truly unique piece that captures the quiet magic of the forest. Happy crocheting!



