Whimsical Woven Willow Brooch Free Pattern
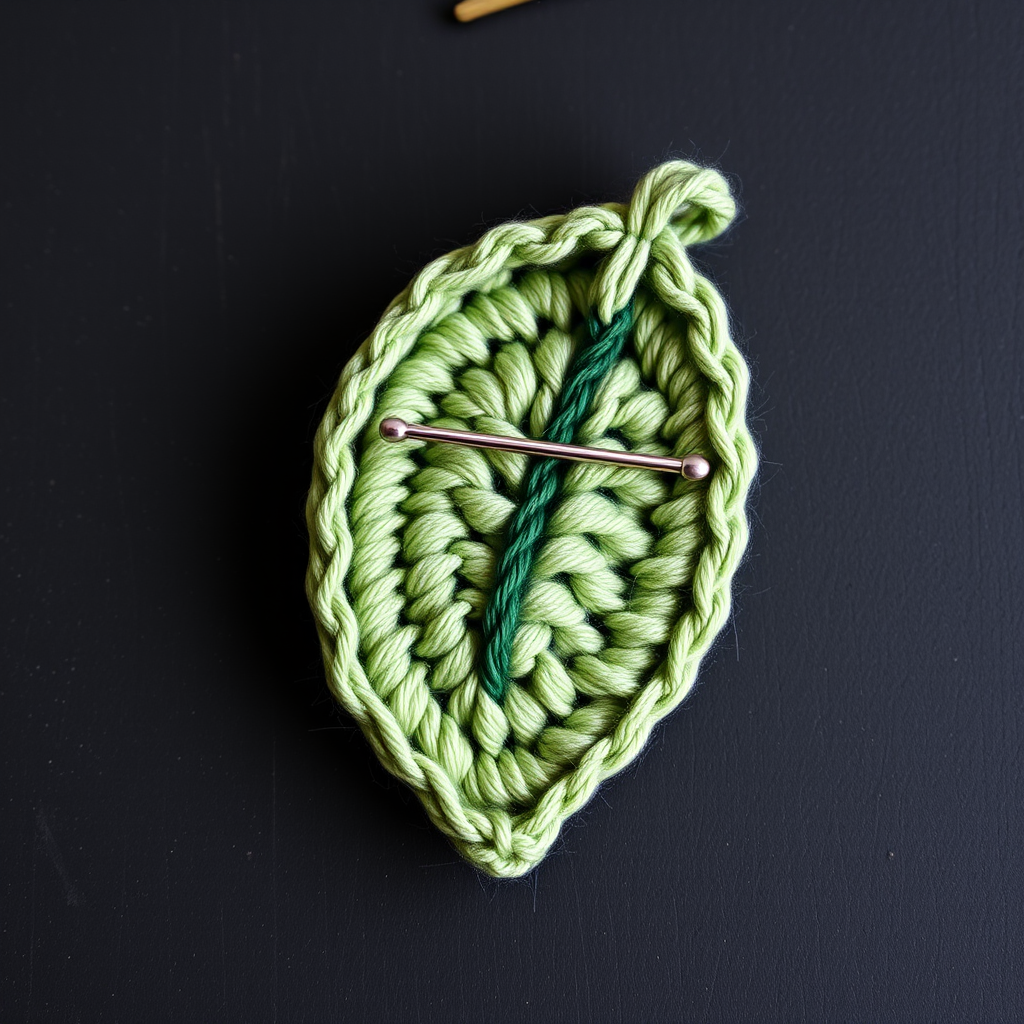
Whimsical Woven Willow Brooch: A Free Crochet Pattern for a Touch of Woodland Elegance
Are you looking for a quick, charming, and nature-inspired crochet project? This Whimsical Woven Willow Brooch is the perfect accessory to add a touch of woodland elegance to a coat, scarf, or bag. Crafted with simple single crochet stitches, this textured leaf-shaped brooch works up quickly and is an ideal project for beginners looking to create something beautiful and functional. Whether you're making it for yourself or as a heartfelt handmade gift, this pattern is sure to bring a smile. Let's dive in and create this lovely piece of nature-inspired flair!
Materials Needed
Before you begin, gather the following materials to ensure a smooth and enjoyable crochet session:
- Yarn: Worsted weight cotton or acrylic yarn in two shades of green (e.g., sage and forest) and a small amount of brown for the stem. Cotton is excellent for structure, while acrylic offers a softer feel.
- Crochet Hook: 5.0 mm (H/8) crochet hook.
- Yarn Needle: For weaving in ends and sewing the pieces together.
- Pin Back: A brooch pin back (approx. 1 inch) for the final assembly.
- Scissors: For cutting yarn.
- Optional: Strong craft glue or matching thread and needle to attach the pin back.
Gauge Note: Gauge is not critical for this project, but aim for a firm fabric to help the leaf hold its shape. Approximately 4 single crochet (sc) stitches = 1 inch.
Step-by-Step Instructions
This brooch is crocheted in two parts: a textured leaf and a simple stem. They are then sewn together and attached to a pin back. Follow these detailed instructions carefully, and you'll have a gorgeous brooch in no time.
Part 1: The Leaf (Make 1)
We'll start with the main body of the leaf, working in continuous rounds to create a flat, textured circle that tapers to a point.
- Round 1: With sage green yarn, make a magic ring. Work 6 single crochet (sc) into the ring. Pull the tail tight to close the circle. (6 stitches)
- Round 2: Work 2 sc in each stitch around. (12 stitches)
- Round 3: *Sc in the next stitch, 2 sc in the next stitch* repeat from * to * around. (18 stitches)
- Round 4: *Sc in the next 2 stitches, 2 sc in the next stitch* repeat from * to * around. (24 stitches)
- Round 5: *Sc in the next 3 stitches, 2 sc in the next stitch* repeat from * to * around. (30 stitches)
- Round 6: *Sc in the next 4 stitches, 2 sc in the next stitch* repeat from * to * around. (36 stitches)
- Round 7: Work even, sc in each stitch around. (36 stitches)
- Round 8: *Sc in the next 5 stitches, 2 sc in the next stitch* repeat from * to * around. (42 stitches)
- Round 9: Work even, sc in each stitch around. (42 stitches)
- Round 10: *Sc in the next 6 stitches, 2 sc in the next stitch* repeat from * to * around. (48 stitches)
- Round 11: Work even, sc in each stitch around. (48 stitches)
- Round 12: *Sc in the next 7 stitches, 2 sc in the next stitch* repeat from * to * around. (54 stitches)
- Round 13: Work even, sc in each stitch around. (54 stitches)
- Round 14: *Sc in the next 8 stitches, 2 sc in the next stitch* repeat from * to * around. (60 stitches)
- Round 15: Work even, sc in each stitch around. (60 stitches)
Now, we will shape the leaf into a point by decreasing.
- Round 16: *Sc in the next 9 stitches, sc2tog (single crochet decrease)* repeat from * to * around. (54 stitches)
- Round 17: *Sc in the next 8 stitches, sc2tog* repeat from * to * around. (48 stitches)
- Round 18: *Sc in the next 7 stitches, sc2tog* repeat from * to * around. (42 stitches)
- Round 19: *Sc in the next 6 stitches, sc2tog* repeat from * to * around. (36 stitches)
- Round 20: *Sc in the next 5 stitches, sc2tog* repeat from * to * around. (30 stitches)
- Round 21: *Sc in the next 4 stitches, sc2tog* repeat from * to * around. (24 stitches)
- Round 22: *Sc in the next 3 stitches, sc2tog* repeat from * to * around. (18 stitches)
- Round 23: *Sc in the next 2 stitches, sc2tog* repeat from * to * around. (12 stitches)
- Round 24: *Sc in the next stitch, sc2tog* repeat from * to * around. (6 stitches)
Finishing the Leaf: Fasten off, leaving a long tail (about 12 inches). Thread the tail through a yarn needle, then weave it through the remaining 6 stitches. Pull tight to close the point of the leaf securely. Weave in the end on the inside of the leaf to hide it.
Part 2: The Stem (Make 1)
This simple strip will add a beautiful contrasting detail to your leaf.
- With brown yarn, chain 8.
- Row 1: Sc in the second chain from the hook and in each chain across. (7 stitches)
- Row 2: Chain 1, turn, sc in each stitch across. (7 stitches)
- Repeat Row 2 until the stem measures about 2 inches long. This will create a sturdy, textured strip.
Finishing the Stem: Fasten off, leaving a long tail for sewing.
Part 3: Assembly
Now, let's bring the pieces together to create your beautiful brooch.
- Position the Stem: Lay the leaf flat. Position the stem diagonally across the center of the leaf, starting from the base (the wider end) and pointing towards the tip. This diagonal placement mimics a real leaf's central vein and adds visual interest.
- Sew the Stem: Using the brown yarn tail and a yarn needle, carefully sew the stem onto the leaf. Use small, neat stitches along both long edges of the stem to secure it firmly. Weave in all remaining ends securely.
- Attach the Pin Back: Turn the brooch over to the back side. Attach the pin back to the center of the leaf's back. You can do this by sewing it on with matching thread for a very secure hold, or by using a strong craft glue. If using glue, apply it evenly and press the pin back firmly. Allow it to dry completely before wearing.
And there you have it—a stunning Whimsical Woven Willow Brooch! This project is perfect for using up small amounts of yarn and makes a wonderful, thoughtful gift. Wear it on a lapel, a hat, or a scarf to add a touch of handmade charm to your everyday style. Happy crocheting!


