Whimsical Woolly Cloud Sheep Free Pattern – A Knitted Fluffy Companion
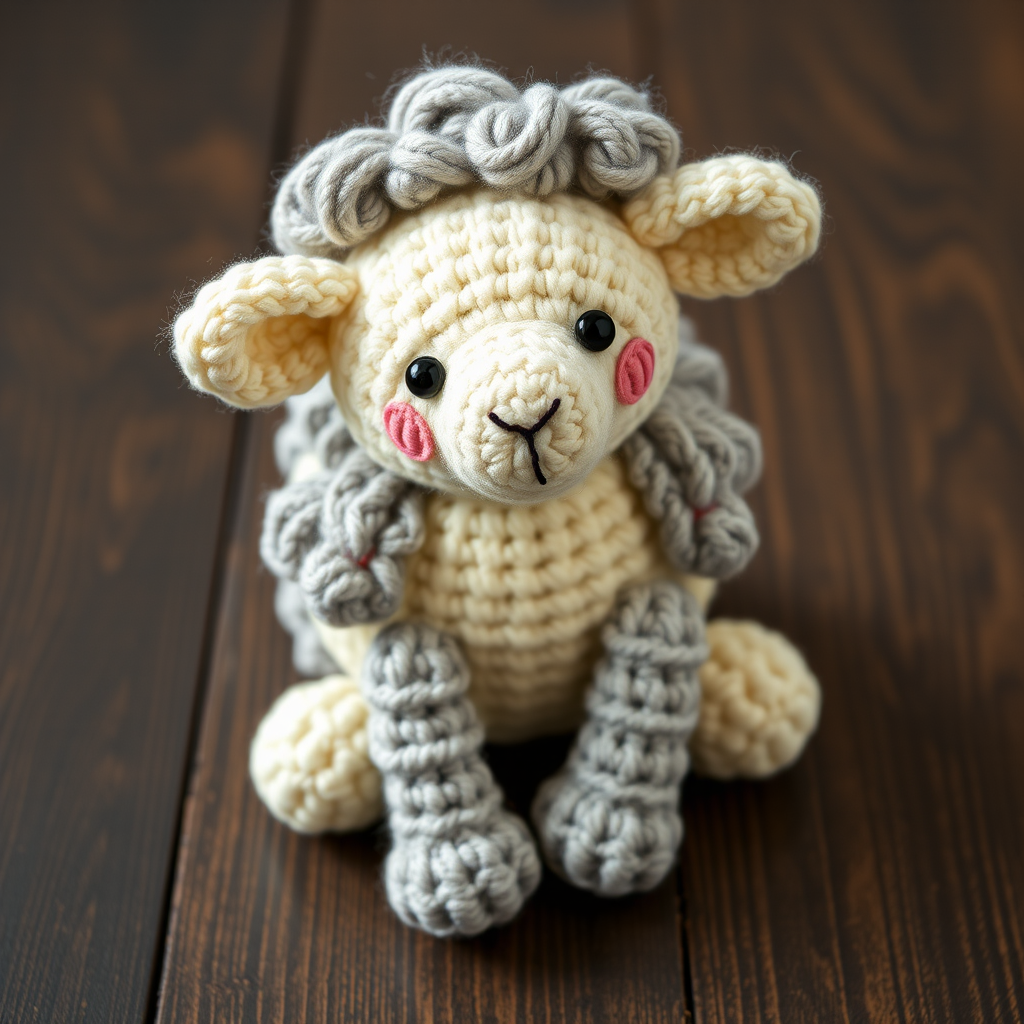
Whimsical Woolly Cloud Sheep – A Knitted Fluffy Companion
Imagine a cloud-soft companion that feels like a gentle hug—that's exactly what you'll create with this charming Whimsical Woolly Cloud Sheep pattern. This adorable amigurumi combines the cozy texture of knitted fabric with unique crocheted fleece curls, resulting in a dreamy, dimensional plush that's perfect for nurseries, shelf decor, or as a heartfelt handmade gift. Designed with beginners in mind, this project uses simple knit and purl stitches, basic shaping, and easy crochet techniques to create a truly magical finished piece. The sheep sits upright with a plump body, stubby legs, and a sweet embroidered face that will melt hearts. Let's dive into creating your very own fluffy friend!
Materials Needed
Before you begin, gather these supplies to ensure a smooth crafting experience:
- Yarn: Worsted weight yarn in three colors:
- MC (Main Color): Cream – for the body, head, and ears
- CC1 (Contrast Color 1): Light gray – for the legs and fleece curls
- CC2 (Contrast Color 2): Blush pink – for cheeks and optional flower
- Knitting Needles: US 5 (3.75 mm) – for all knitted pieces
- Crochet Hook: US G/6 (4.0 mm) – for fleece curls and optional flower
- Fiberfill: Polyester stuffing for a firm, plush body
- Tapestry Needle: For seaming and embroidery details
- Black Embroidery Floss or Yarn: For eyes and mouth
- Stitch Markers (optional): To track rows
- Scissors
Gauge: 20 stitches and 28 rows = 4 inches in stockinette stitch (knitted). Gauge is important for achieving the correct size, but since this is a soft toy, slight variations are acceptable.
Step-by-Step Instructions
Knitted Sheep Body (Worked Flat, Then Seamed)
Head
- Cast on 10 stitches with MC (cream).
- Row 1 (RS): Knit all stitches.
- Row 2: Purl all stitches.
- Repeat Rows 1–2 until the piece measures 3 inches from the cast-on edge. This creates a rectangular piece that will form the head.
- Shape top of head:
- Next row (RS): K2tog (knit 2 together), k6, K2tog – you now have 8 stitches.
- Next row: Purl all stitches.
- Next row: K2tog, k4, K2tog – you now have 6 stitches.
- Next row: Purl all stitches.
- Next row: K2tog, k2, K2tog – you now have 4 stitches.
- Cut the yarn, leaving a 12-inch tail. Thread the tail through a tapestry needle, then pass it through the remaining 4 stitches on the needle. Pull tight to gather the top of the head closed.
- Seam the back of the head using the mattress stitch or whip stitch, working from the gathered top down to the cast-on edge. Leave the bottom open for stuffing later.
Body (Oval Shape)
- Cast on 16 stitches with MC (cream).
- Work in stockinette stitch (knit on RS, purl on WS) for 4 inches. This creates the main body tube.
- Shape bottom:
- Row 1 (RS): K2tog, k12, K2tog – you now have 14 stitches.
- Row 2: Purl all stitches.
- Row 3: K2tog, k10, K2tog – you now have 12 stitches.
- Row 4: Purl all stitches.
- Row 5: K2tog, k8, K2tog – you now have 10 stitches.
- Row 6: Purl all stitches.
- Row 7: K2tog, k6, K2tog – you now have 8 stitches.
- Row 8: Purl all stitches.
- Cut the yarn, leaving a 15-inch tail. Thread through the remaining 8 stitches and pull tight to gather the bottom.
- Seam the side of the body using mattress stitch, creating a rounded oval shape. Important: Leave a 2-inch opening in the seam for stuffing.
- Stuff the body firmly with fiberfill through the opening, ensuring it's plump and evenly filled. Then close the opening with a ladder stitch.
Legs (Make 4)
- Cast on 6 stitches with CC1 (light gray).
- Work in stockinette stitch for 2 inches.
- Cut the yarn, leaving a 10-inch tail. Thread through the stitches and pull tight to gather one end.
- Seam the leg into a tube by folding it in half lengthwise and whip stitching the edges together.
- Stuff the leg lightly with fiberfill—just enough to give it shape without being stiff. Leave the top open.
- Repeat to make 4 legs total.
Ears (Make 2)
- Cast on 4 stitches with MC (cream).
- Work in stockinette stitch for 1 inch.
- Cut the yarn, leaving an 8-inch tail. Thread through the stitches and pull tight to gather one end.
- Fold the piece in half to form a small ear shape, with the gathered end at the top. Whip stitch the edges together to secure the shape.
- Repeat to make the second ear.
Assembly
- Attach the head: Position the head on the top front of the body, slightly overlapping the body's top edge. Sew it securely in place using the tail from the head, making sure it's centered and sits upright.
- Attach the legs: Position the four legs evenly spaced on the bottom of the body—two in front, two in back. Sew each leg securely using the tail from each leg, stitching through the body to ensure they're firmly attached.
- Attach the ears: Sew the ears to the sides of the head, positioning them slightly toward the back of the head for a natural look. Use the tails from the ears and weave in all ends.
Crocheted Fleece Curls (Attached to Body and Head)
These curls create the signature cloud-like fleece texture. You'll make 12–15 curls total.
- Using the crochet hook and CC1 (light gray), make a slip knot and chain 10.
- In the second chain from the hook, work 3 double crochet (dc) in each chain across. This will create a ruffled, curly strip.
- Fasten off, leaving a long tail (about 8 inches) for sewing.
- Repeat to make 12–15 curls total.
- Attach the curls: Starting at the top of the head, sew the curls onto the knitted surface in a spiral pattern. Work your way down the head and over the body, covering the entire surface except for the face area (the front of the head where the eyes and cheeks will be). Overlap the curls slightly for a full, fluffy look. Use the tails to secure each curl firmly, then weave in the ends.
Face Details
- Blush cheeks: Using CC2 (blush pink) and a tapestry needle, embroider two small circles on the cheeks using satin stitch. Position them on either side of the face, about 1 inch below the eyes.
- Eyes: With black embroidery floss or yarn, create two small French knots for the eyes. Position them about 1 inch apart, centered on the face, slightly above the cheeks.
- Mouth: Using the same black yarn, embroider a tiny vertical line for the mouth, positioned just below the eyes and between the cheeks. Make it about ¼ inch long.
- Optional flower: With CC2 (blush pink), crochet a small flower:
- Chain 4, join with a slip stitch to form a ring.
- Work 5 single crochet (sc) into the ring, join with a slip stitch.
- For each petal: *chain 2, 3 dc into the next sc, chain 2, slip stitch into the same sc.* Repeat from * to * around.
- Fasten off and sew the flower onto one ear for extra charm.
Finishing Touches
- Weave in all remaining yarn tails using a tapestry needle.
- Gently fluff the fleece curls with your fingers to give them extra volume.
- Check that all parts are securely attached and the sheep sits upright. If it tips over, add a bit more stuffing to the bottom of the body.
Your Whimsical Woolly Cloud Sheep is now complete! This plush companion is perfect for cuddling, decorating a nursery shelf, or gifting to someone special. The combination of soft knitted fabric and fluffy crocheted curls creates a texture that's irresistible to touch. Enjoy your new handmade friend—and don't be surprised if you find yourself making a whole flock!



