Whimsical Woodland Gnome Home Free Pattern – Crochet a Cozy Mushroom Cottage
Whimsical Woodland Gnome Home Free Pattern – Crochet a Cozy Mushroom Cottage
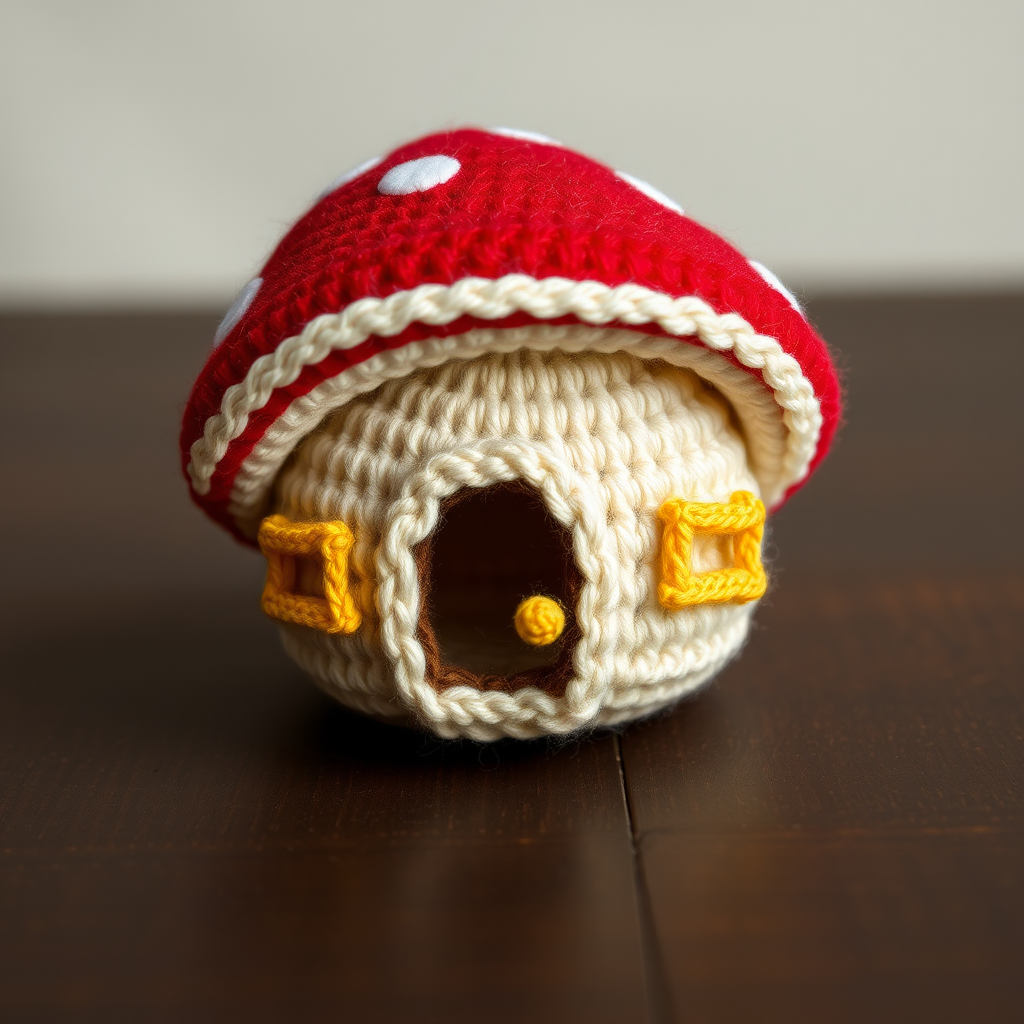
Bring a touch of enchanted forest charm to your shelf with this adorable crochet mushroom cottage, complete with a tiny door and windows. Perfect for whimsical decor or a handmade gift that sparks imagination. This beginner-friendly amigurumi project uses basic crochet stitches to create a sturdy, storybook-worthy cottage that will delight children and adults alike.
Materials Needed
Before you begin, gather the following supplies to ensure a smooth crafting experience:
- Yarn: Worsted weight yarn in red (mushroom cap), cream (stem/cottage body), brown (door), and yellow (windows). A small amount of green for optional leaf details.
- Crochet Hook: 3.5mm (E/4) crochet hook
- Stitch Marker: To track your rounds
- Fiberfill: Polyester stuffing for a firm, plush finish
- Yarn Needle: For sewing pieces together and weaving in ends
- Scissors: For cutting yarn
Gauge: 4 sc x 4 rows = 1 inch (not critical, but consistent tension helps achieve the right size)
Step-by-Step Instructions
This pattern is worked in continuous rounds unless otherwise stated. Use a stitch marker to keep track of rounds. The entire project uses only single crochet (sc) and single crochet decreases (sc2tog), making it perfect for beginners.
Mushroom Cap (Red Yarn)
The cap forms the iconic red mushroom top with a gentle dome shape. Work in continuous rounds, stuffing firmly as you go.
- Round 1: Make a magic ring, 6 sc in ring. (6)
- Round 2: 2 sc in each st around. (12)
- Round 3: (Sc in next st, 2 sc in next st) around. (18)
- Round 4: (Sc in next 2 sts, 2 sc in next st) around. (24)
- Round 5: (Sc in next 3 sts, 2 sc in next st) around. (30)
- Round 6: (Sc in next 4 sts, 2 sc in next st) around. (36)
- Round 7: (Sc in next 5 sts, 2 sc in next st) around. (42)
- Round 8: (Sc in next 6 sts, 2 sc in next st) around. (48)
- Round 9: (Sc in next 7 sts, 2 sc in next st) around. (54)
- Round 10: (Sc in next 8 sts, 2 sc in next st) around. (60)
- Rounds 11-14: Sc in each st around. (60) – This creates the straight sides of the cap.
- Round 15: (Sc in next 8 sts, sc2tog) around. (54) – Begin decreasing to shape the dome.
- Round 16: (Sc in next 7 sts, sc2tog) around. (48)
- Round 17: (Sc in next 6 sts, sc2tog) around. (42)
- Round 18: (Sc in next 5 sts, sc2tog) around. (36)
- Round 19: (Sc in next 4 sts, sc2tog) around. (30)
- Round 20: (Sc in next 3 sts, sc2tog) around. (24)
- Round 21: (Sc in next 2 sts, sc2tog) around. (18)
- Round 22: (Sc in next st, sc2tog) around. (12)
- Round 23: Sc2tog around. (6)
Finishing: Fasten off, leaving a long tail. Stuff the cap firmly with fiberfill before closing. Weave the tail through the remaining stitches and pull tight to close. Set aside.
Mushroom Stem / Cottage Body (Cream Yarn)
This cylindrical piece forms the cottage walls. It's worked from the bottom up, leaving the bottom open for a flat base.
- Round 1: Make a magic ring, 6 sc in ring. (6)
- Round 2: 2 sc in each st around. (12)
- Round 3: (Sc in next st, 2 sc in next st) around. (18)
- Round 4: (Sc in next 2 sts, 2 sc in next st) around. (24)
- Round 5: (Sc in next 3 sts, 2 sc in next st) around. (30)
- Round 6: (Sc in next 4 sts, 2 sc in next st) around. (36)
- Rounds 7-18: Sc in each st around. (36) – Work 12 rounds straight to create the tall cylinder.
- Round 19: (Sc in next 4 sts, sc2tog) around. (30) – Begin shaping the top.
- Round 20: (Sc in next 3 sts, sc2tog) around. (24)
- Round 21: (Sc in next 2 sts, sc2tog) around. (18)
Finishing: Fasten off, leaving a long tail. Stuff the stem firmly with fiberfill. Do not close the bottom – this flat opening will be the cottage's base.
Door (Brown Yarn)
A simple rectangular door with a rounded top adds charm. Worked in rows, not rounds.
- Row 1: Ch 6. Sc in 2nd ch from hook and across. (5)
- Rows 2-5: Ch 1, turn, sc in each st. (5)
Finishing: Fasten off, leaving a tail for sewing. Sew the door onto the front of the stem, centered between the bottom edge and the top curve.
Windows (Yellow Yarn)
Make two small square windows to flank the door.
- Row 1: Ch 4. Sc in 2nd ch from hook and across. (3)
- Rows 2-3: Ch 1, turn, sc in each st. (3)
Finishing: Fasten off, leaving a tail. Sew windows on either side of the door, about halfway up the stem.
Assembly
Now it's time to bring your cottage to life:
- Position the mushroom cap on top of the stem, slightly overlapping the edge. The cap should sit like a roof, with the red dome covering the top opening of the cream stem.
- Using the long tail from the cap, sew the cap securely to the stem. Work through both layers, going around the entire circumference for a sturdy attachment.
- Weave in all ends with your yarn needle, hiding them inside the cottage.
Optional Details & Customization
Make your gnome home uniquely yours with these charming additions:
- White spots: Embroider small white spots on the red cap using white yarn and a yarn needle for a classic toadstool look.
- Leaf decoration: Crochet a small green leaf and attach it to the top of the cap for a woodland touch.
- Tiny chimney: Create a small brown cylinder and sew it to the cap at an angle for a chimney.
- Heart on door: Embroider a small heart on the door using red or pink yarn for extra whimsy.
- Grass base: Add a crocheted green circle underneath the cottage to simulate a grassy mound.
Your whimsical woodland gnome home is complete! Display it on a shelf, use it as a paperweight, or gift it to someone who loves fairy tales. The sturdy construction and soft texture make it perfect for imaginative play or as a charming decorative piece. Happy crocheting!



