Whimsical Berry Bonnet Free Pattern
Whimsical Berry Bonnet: A Free Crochet Hat Pattern for Kids
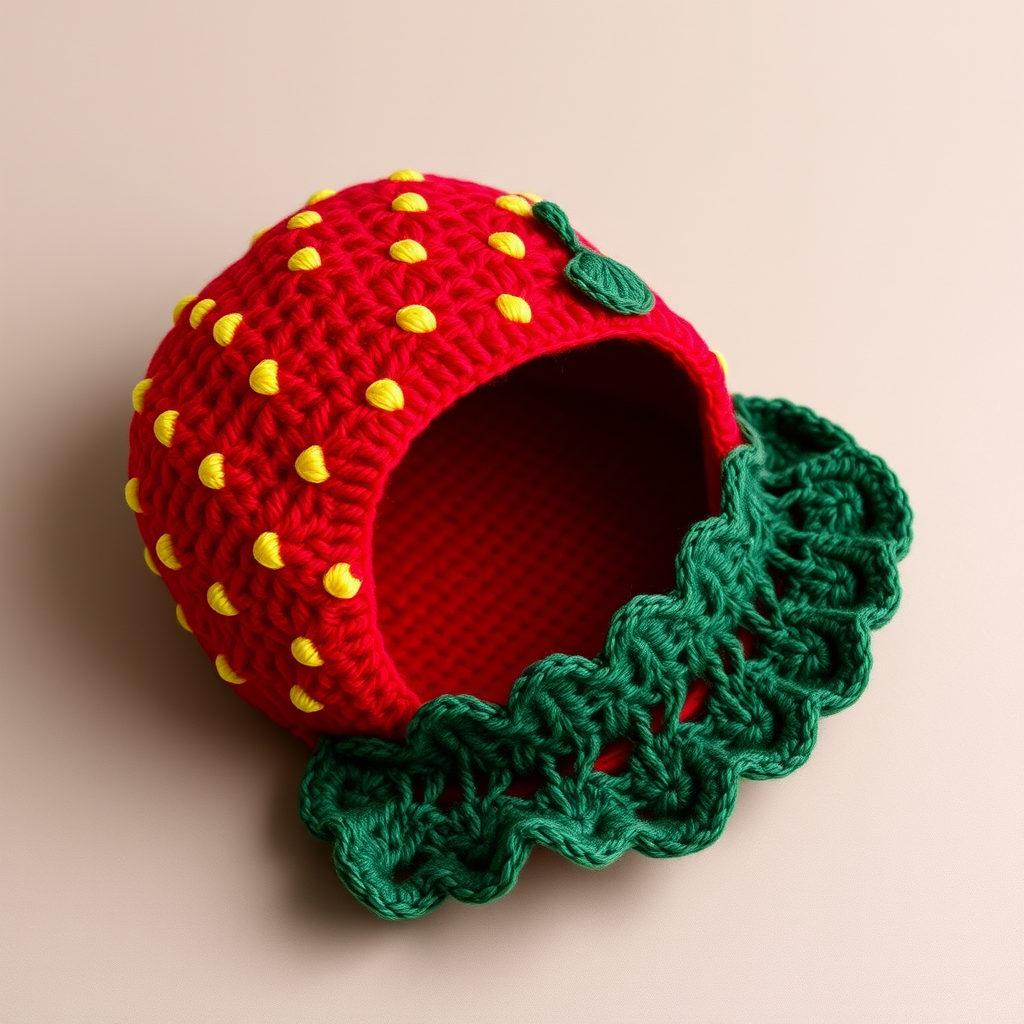
Looking for a fun, fast, and absolutely adorable crochet project? This Whimsical Berry Bonnet is the perfect choice! Designed to mimic a luscious, ripe strawberry, this hat features a textured, seed-speckled crown and a soft, leafy brim that will bring a smile to anyone's face. It is a cozy, eye-catching accessory for kids and the young at heart. Best of all, this pattern is rated for beginners, uses simple single crochet stitches, and works up quickly with bulky yarn. Let's grab your hook and get started on this deliciously cute project!
Materials Needed
Before we dive into the stitches, let's gather your supplies. This project uses simple materials that are easy to find at any craft store.
- Yarn: Worsted weight yarn in three colors:
- Red: For the main hat body (approx. 150-200 yards).
- Green: For the leafy brim (approx. 30-40 yards).
- Yellow: For the embroidered seeds (small amount).
- Crochet Hook: Size K/10.5 (6.5 mm). This larger hook creates a soft, drapey fabric that is perfect for a hat.
- Yarn Needle: For weaving in ends and embroidering the seeds.
- Scissors: For cutting yarn.
Gauge: 14 single crochet (sc) and 16 rows = 4 inches. Always check your gauge to ensure the hat fits correctly!
Step-by-Step Instructions
This pattern is worked in continuous rounds (spiral) for the main body, which creates a seamless, smooth finish. We will use a "magic ring" to start, which gives a tight, neat circle at the top of the hat. Let's begin!
Hat Body (Worked in Rounds, Right Side Out)
Note: Do not join rounds unless specified. Use a stitch marker to keep track of the beginning of each round.
- Round 1: With red yarn, make a magic ring. Chain 1 (this does not count as a stitch), then work 6 single crochet (sc) into the ring. Pull the tail tight to close the ring. (6 stitches)
- Round 2: Work 2 sc in each stitch around. (12 stitches)
- Round 3: *Sc in the next stitch, 2 sc in the next stitch*; repeat from * to * around. (18 stitches)
- Round 4: *Sc in the next 2 stitches, 2 sc in the next stitch*; repeat from * to * around. (24 stitches)
- Round 5: *Sc in the next 3 stitches, 2 sc in the next stitch*; repeat from * to * around. (30 stitches)
- Round 6: *Sc in the next 4 stitches, 2 sc in the next stitch*; repeat from * to * around. (36 stitches)
- Round 7: *Sc in the next 5 stitches, 2 sc in the next stitch*; repeat from * to * around. (42 stitches)
- Round 8: *Sc in the next 6 stitches, 2 sc in the next stitch*; repeat from * to * around. (48 stitches)
- Rounds 9-18: Sc in each stitch around. (48 stitches) – This creates the depth of the hat. For a larger size (adult), add 2-4 more rounds here before moving to the brim.
- Round 19: Sc in each stitch around, but on the very last stitch, switch to green yarn for the final yarn over. Cut the red yarn, leaving a tail to weave in later. (48 stitches)
Leafy Brim
Now we will create the flared, leafy edge that makes this hat so special. We will be working with the green yarn.
- Round 20: With green yarn, chain 3 (this counts as your first double crochet). Work 1 double crochet (dc) in the same stitch. Then, work 2 dc in each stitch around. Join with a slip stitch to the top of the beginning chain-3. (96 stitches)
- Round 21: Chain 1, single crochet in the same stitch. *Chain 3, skip 2 stitches, single crochet in the next stitch*; repeat from * to * around. End the round by chaining 3, skipping the last 2 stitches, and joining with a slip stitch to the first single crochet. Fasten off and weave in the green ends.
Seeds (Embroidered)
This step brings the strawberry to life! We will add the signature seeds using simple embroidery.
- Thread your yarn needle with a length of yellow yarn.
- Looking at the red hat body, you will see the natural spiral of the rounds. You will be adding seeds between Round 3 and Round 18.
- To make a seed, push the needle from the inside of the hat out to the front. Then, take a small "straight stitch" (about ¼ inch long) across the surface of the red yarn. Push the needle back through to the inside.
- Alternatively, you can create a "French knot" for a more dimensional seed. To do this, bring the needle up through the fabric, wrap the yarn around the needle 2-3 times, and push the needle back down close to where it came up.
- Space the seeds randomly across the red surface, about 1 inch apart. Try to stagger them so they don't line up in straight rows. Add as many or as few as you like for your desired look.
Finishing
- Weave in all remaining ends securely using your yarn needle. Make sure to weave them into the inside of the hat so they are hidden.
- Fold the leafy brim upward slightly for a playful, realistic look, or leave it flared out as is. Both styles look fantastic!
And there you have it—a beautiful, handmade Whimsical Berry Bonnet! This pattern is a joy to make and an even bigger joy to gift. The combination of the smooth red body, the textured green leaves, and the bright yellow seeds creates a stunning visual effect that is sure to be a hit. Happy crocheting!