Tropical Sunset Market Bag Free Pattern – Crochet a Vibrant Beach Carryall

Tropical Sunset Market Bag Free Pattern – Crochet a Vibrant Beach Carryall
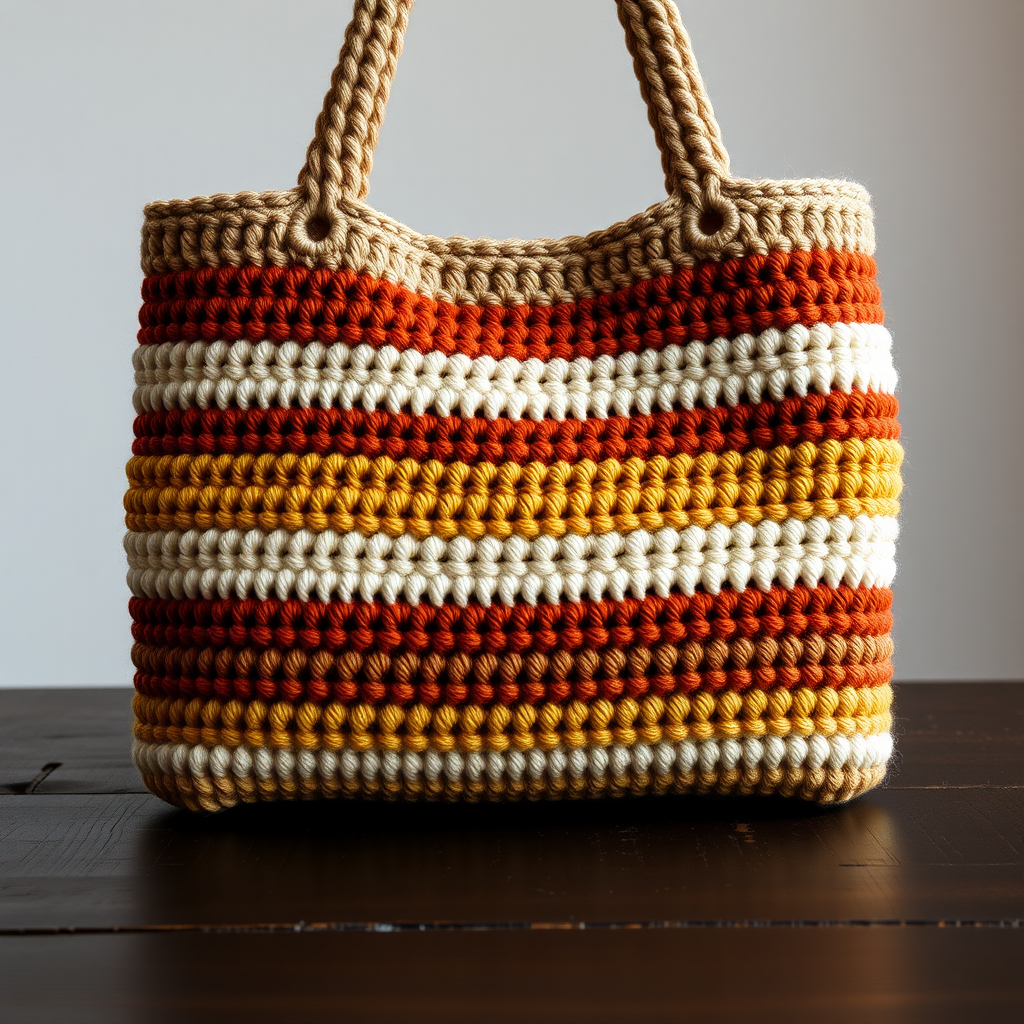
Carry a piece of paradise with this eye-catching crochet market bag, featuring bold tropical stripes in sunset hues. The sturdy mesh stitch and comfortable straps make it perfect for farmers' markets, beach days, or everyday errands. This free pattern is designed with beginners in mind, using simple double crochet stitches and a repeating mesh pattern that works up quickly. The vibrant color palette—coral, golden yellow, turquoise, and white—evokes a stunning sunset over the ocean, making this bag as beautiful as it is functional.
Whether you're a seasoned crocheter looking for a quick weekend project or a beginner ready to tackle your first bag, this pattern offers clear, step-by-step instructions that will guide you from a simple magic ring to a roomy, stylish tote. The mesh stitch creates a breathable, stretchy fabric that's perfect for holding produce, beach towels, or your latest library haul. Let's dive in and create something beautiful!
Materials Needed
Before you begin, gather the following materials. All items are readily available at craft stores or online. The total yarn weight is approximately 250g, making this a great stash-busting project if you have leftover cotton yarn in similar colors.
Yarn
- Worsted weight cotton yarn in 4 colors:
- Coral (#1) – approximately 70g
- Golden Yellow (#2) – approximately 60g
- Turquoise (#3) – approximately 60g
- White (#4) – approximately 60g
Note: Cotton yarn is recommended for its durability and stitch definition. You can substitute any worsted weight yarn, but cotton will give the bag structure and hold its shape best.
Hook and Notions
- 5.0 mm (H-8) crochet hook
- Stitch marker (to keep track of rounds)
- Yarn needle (for weaving in ends and sewing straps)
- Scissors
Gauge
14 dc x 8 rows = 4 x 4 inches (10 x 10 cm)
Gauge is important for achieving the correct size. If your gauge is off, adjust your hook size accordingly. A tighter gauge will make a sturdier bag; a looser gauge will make it more drapey.
Step-by-Step Instructions
This bag is worked in continuous rounds from the bottom up. Use a stitch marker to keep track of rounds—place it in the first stitch of each round and move it up as you work. The pattern uses US crochet terminology.
Base (Worked in Coral)
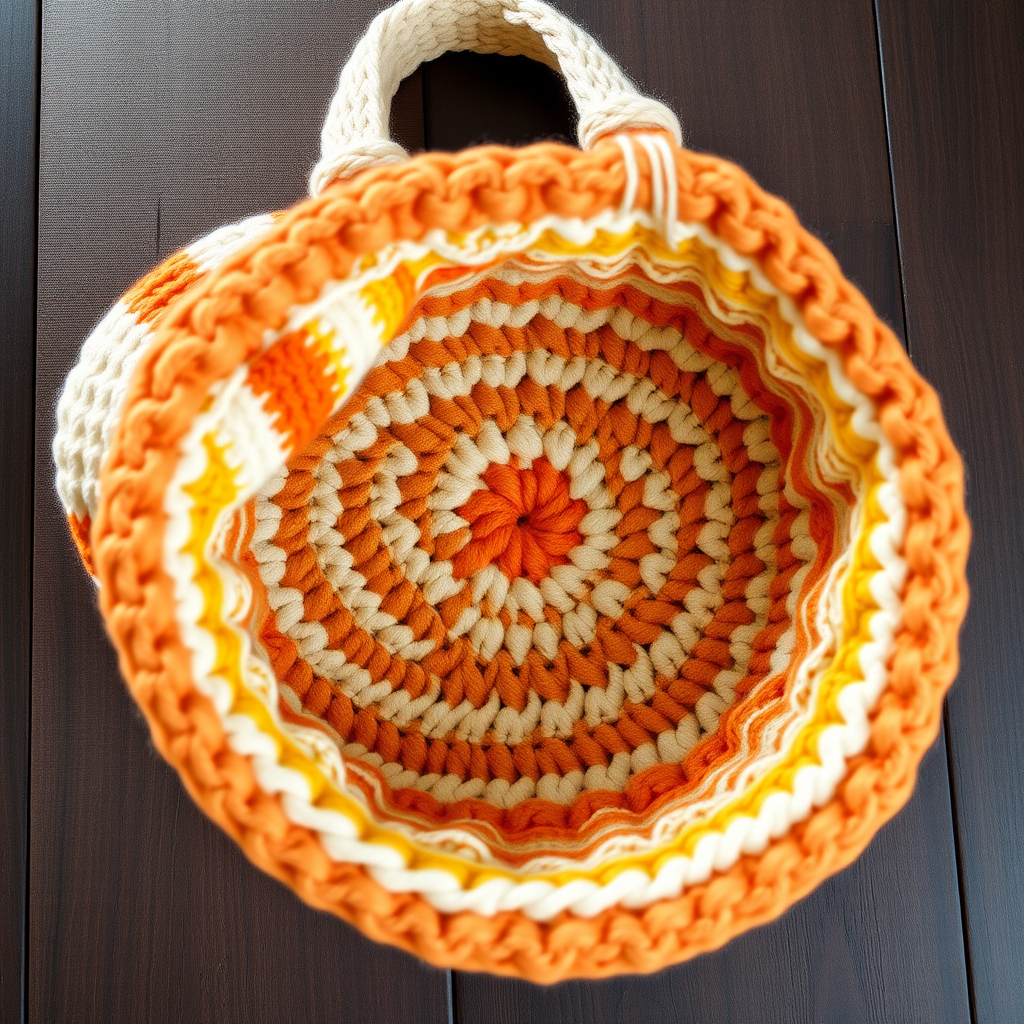
Round 1: Make a magic ring. Ch 3 (counts as first dc), work 11 dc into the ring. Pull the tail to close the ring tightly. Join with a sl st to the top of the ch-3. (12 dc total)
Round 2: Ch 3 (counts as dc), dc in the same stitch (this creates an increase). Work 2 dc in each stitch around. Join with a sl st to the top of the ch-3. (24 dc total)
Round 3: Ch 3, dc in the same stitch. Dc in the next stitch. *2 dc in the next stitch, dc in the next stitch* — repeat from * to * around. Join with a sl st. (36 dc total)
Round 4: Ch 3, dc in the same stitch. Dc in the next 2 stitches. *2 dc in the next stitch, dc in the next 2 stitches* — repeat from * to * around. Join with a sl st. (48 dc total)
Round 5: Ch 3, dc in the same stitch. Dc in the next 3 stitches. *2 dc in the next stitch, dc in the next 3 stitches* — repeat from * to * around. Join with a sl st. (60 dc total)
Your base should now be a flat circle measuring approximately 6 inches (15 cm) in diameter. If it's curling, your tension is too tight; if it's ruffling, it's too loose.
Body (Mesh Pattern)
Now we'll begin the mesh pattern that creates the bag's body. This pattern is a simple repeat of double crochet and chain stitches, creating open spaces that give the bag its breathable, market-bag feel.
Round 6: Ch 4 (counts as dc + ch 1). Skip the next stitch. Dc in the next stitch. *Ch 1, skip the next stitch, dc in the next stitch* — repeat from * to * around. End with ch 1, sl st to the 3rd ch of the ch-4. (30 dc, 30 ch-1 spaces)
Round 7: Sl st into the first ch-1 space. Ch 4 (counts as dc + ch 1). Dc in the same space. *Ch 1, dc in the next ch-1 space* — repeat from * to * around. End with ch 1, sl st to the 3rd ch of the ch-4.
Rounds 8-9: Repeat Round 7 with Coral.
Rounds 10-12: Switch to Golden Yellow. Repeat Round 7 for three rounds.
Rounds 13-15: Switch to Turquoise. Repeat Round 7 for three rounds.
Rounds 16-18: Switch to White. Repeat Round 7 for three rounds.
Rounds 19-21: Switch to Coral. Repeat Round 7 for three rounds.
Rounds 22-24: Switch to Golden Yellow. Repeat Round 7 for three rounds.
Rounds 25-27: Switch to Turquoise. Repeat Round 7 for three rounds.
Rounds 28-30: Switch to White. Repeat Round 7 for three rounds.
When changing colors, do so in the last yarn-over of the final stitch of the previous round. This creates a clean color transition. Fasten off the old color and weave in the end, or carry it up the inside of the bag if you prefer.
After Round 30, your bag body should measure approximately 12 inches (30 cm) tall from the base. The mesh pattern should be even and consistent, with each color band creating a beautiful stripe.
Straps (Make 2)
The straps are worked flat in rows, then folded and sewn for extra strength. This creates a comfortable, sturdy strap that won't stretch out of shape.
Row 1: With Coral, ch 100. Dc in the 4th ch from the hook (the skipped chains count as the first dc). Dc in each ch across. (98 dc total)
Row 2: Ch 3 (counts as dc), turn. Dc in each dc across. Fasten off, leaving a long tail for sewing.
Each strap should measure approximately 30 inches (76 cm) long and 3 inches (7.5 cm) wide before folding.
Assembly
Now it's time to assemble your bag. This step is crucial for creating a durable, functional tote.
Step 1: Fold each strap in half lengthwise, bringing the long edges together. The right side of the crochet work should be on the outside.
Step 2: Using a yarn needle and the long tail from Row 2, whip stitch the long edges together. This creates a double-thick strap that's comfortable to carry and won't stretch.
Step 3: Position one strap on each side of the bag. The ends of the strap should align with the top edge of the bag. Place them so they're evenly spaced—about 2-3 inches (5-7.5 cm) from the center front and back of the bag.
Step 4: Sew each strap end securely to the bag using a yarn needle and matching yarn. Use a strong, repeated whip stitch or figure-eight stitch to ensure the straps are firmly attached. Sew through both layers of the folded strap and through the bag's top edge stitches.
Step 5: Reinforce the attachment by sewing a small square or X pattern over each strap end. This distributes the weight and prevents the straps from pulling loose.
Finishing
Your Tropical Sunset Market Bag is almost complete! Finish it off with these final touches:
Weave in all loose ends using a yarn needle. Be sure to weave them in securely, going back and forth through the stitches to prevent unraveling.
Optional: Add a fabric lining. If you plan to carry small items that might fall through the mesh, consider sewing a simple fabric lining. Cut a piece of cotton fabric to fit the inside of the bag, sew the sides and bottom, and hand-stitch it to the top edge of the bag. This adds durability and privacy.
Block your bag. To help the bag hold its shape, you can gently wet-block it. Soak the bag in lukewarm water with a mild detergent, gently squeeze out excess water (don't wring), and lay it flat to dry, shaping it as it dries.
Your vibrant, tropical market bag is now ready for adventure! Whether you're heading to the beach, the farmers' market, or just running errands, this bag will add a splash of sunset color to your day. The sturdy mesh construction and comfortable straps make it a practical choice, while the beautiful color transitions make it a true statement piece.
Happy crocheting! We'd love to see your finished bags—share your photos and tag us on social media. This pattern is free for personal use, so feel free to make one for yourself and one for a friend!