Amigurumi Patterns
The Woodland Owl Amigurumi Free Pattern
Anonymous
•
July 03, 2026
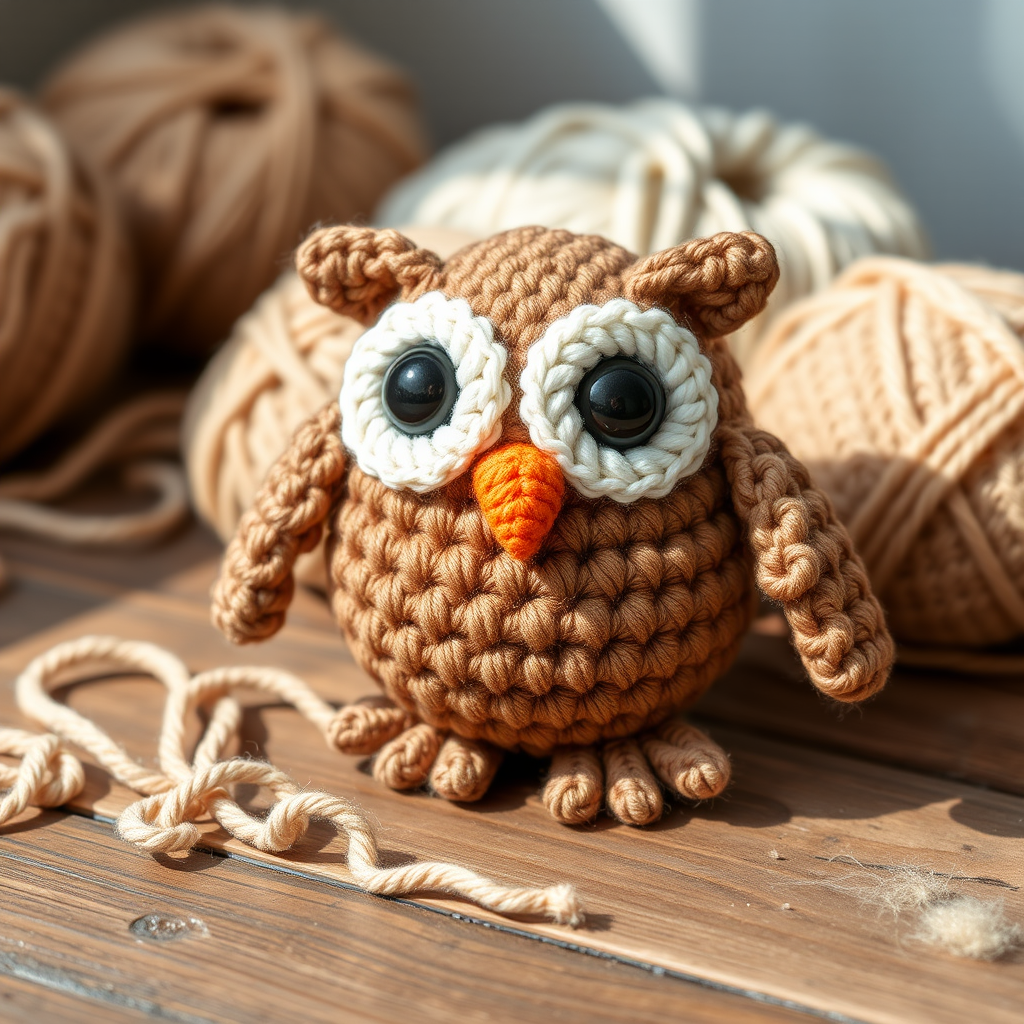
The Woodland Owl Amigurumi Free Pattern
Introduction
Welcome to the delightful world of amigurumi! In this tutorial, you will learn how to create a charming woodland owl that will make a perfect companion for nature lovers and a beautiful addition to your home decor. This pattern is designed for beginners, so grab your yarn and crochet hook, and let's bring this adorable creature to life!
Materials Needed
- Yarn: Worsted weight yarn in brown, cream, and orange
- Hook: 3.5 mm crochet hook
- Stuffing: Fiberfill or any stuffing material
- Scissors: For cutting yarn
- Tapestry needle: For sewing pieces together
Step-by-Step Instructions
Body
- Start with a magic ring using the brown yarn.
- Round 1: Work 6 single crochets (sc) into the magic ring. (Total: 6 stitches)
- Round 2: Increase in each stitch around. (Total: 12 stitches)
- Round 3: *Single crochet in the next stitch, then increase* around. (Total: 18 stitches)
- Round 4: *Single crochet in the next 2 stitches, then increase* around. (Total: 24 stitches)
- Continue this increasing pattern until you reach a total of 42 stitches.
- Work evenly for 10 rounds without increasing or decreasing.
- Begin decreasing: *Single crochet in the next 5 stitches, then decrease* around. (Total: 36 stitches)
- Continue decreasing until you have 6 stitches left. Fasten off and stuff the body firmly with fiberfill.
Wings (Make 2)
- With brown yarn, chain (ch) 6.
- Row 1: Single crochet in the 2nd chain from the hook and across. (Total: 5 stitches)
- Row 2: Chain 1, turn, decrease, single crochet in the next stitch, decrease. (Total: 3 stitches)
- Row 3: Chain 1, turn, decrease, single crochet. (Total: 2 stitches)
- Row 4: Chain 1, turn, decrease. Fasten off.
Eyes (Make 2)
- With cream yarn, make a magic ring.
- Round 1: Work 6 single crochets into the ring. (Total: 6 stitches)
- Round 2: Increase in each stitch around. (Total: 12 stitches)
- Fasten off, leaving a long tail for sewing.
Beak
- With orange yarn, chain 3.
- Row 1: Single crochet in the 2nd chain from the hook and in the next stitch. (Total: 2 stitches)
- Row 2: Chain 1, turn, decrease. Fasten off.
Assembly
- Sew the wings to the sides of the body, positioning them slightly below the top.
- Attach the eyes to the front of the body, slightly above the center for a cute expression.
- Sew the beak between the eyes, ensuring it is centered.
- Embroider small details with black yarn for pupils and any additional features you desire.
Congratulations! You have successfully created your own Woodland Owl Amigurumi. This charming little creature is not only a fun project but also a wonderful gift for friends and family or a lovely addition to your home decor. Happy crocheting!



