The Nutcracker Prince Amigurumi Free Pattern – A Knitted Royal Guard Doll with Braided Epaulettes and Velvet Cape
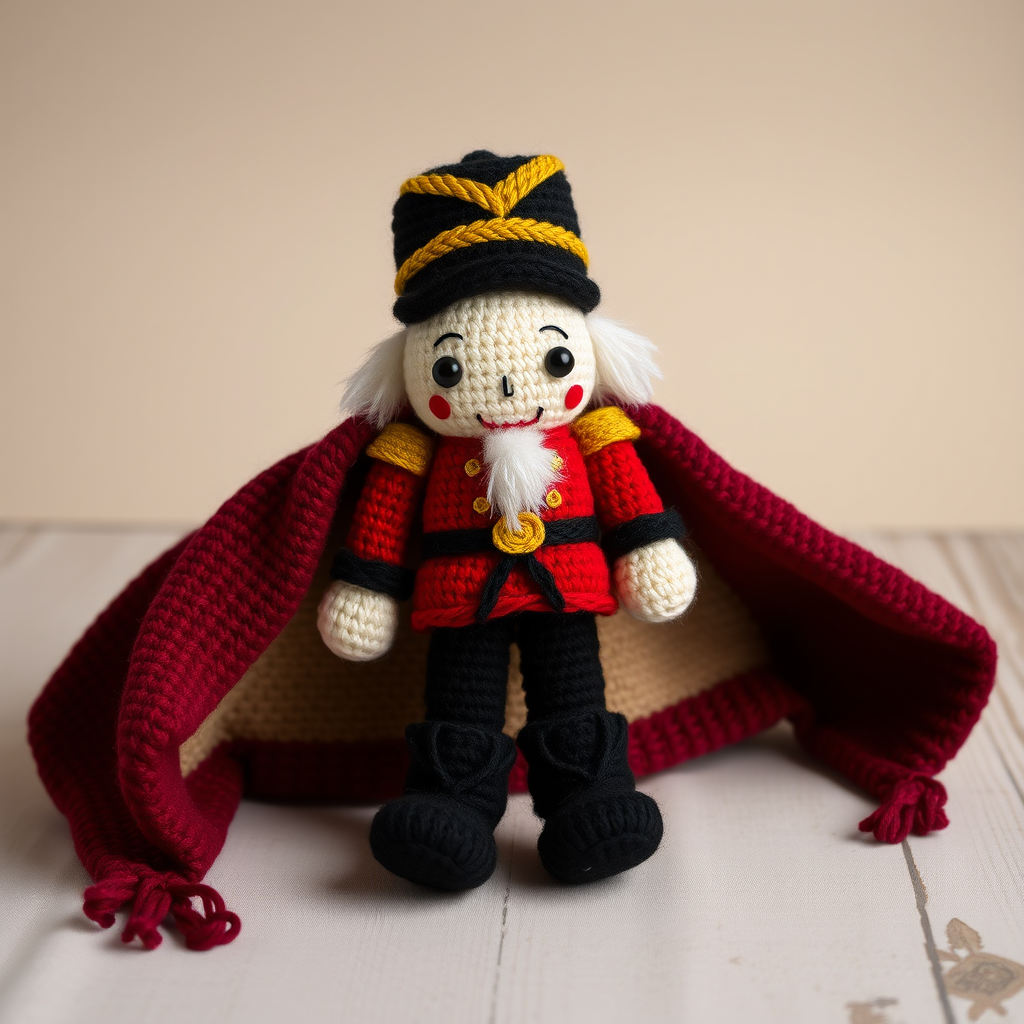
The Nutcracker Prince Amigurumi: A Royal Heirloom Doll to Knit & Crochet
Bring the enchantment of the ballet right into your living room this holiday season with this regal Nutcracker Prince amigurumi. This isn't just a toy; it's a statement piece—a handcrafted royal guard complete with a braided shako hat, gold-trimmed tunic, and a sumptuous velvet cape. Whether you're an experienced maker or a confident beginner looking for a rewarding project, this pattern yields an heirloom-quality doll that will be treasured for generations. Let's get started on crafting your very own prince!
Materials Needed
Before you begin your royal commission, gather these supplies. The gauge is not critical for this project, but maintaining consistent tension throughout will ensure your prince stands tall and proud.
- Yarn: Worsted weight yarn in the following colors:
- Red (tunic)
- Cream (face)
- Gold (epaulettes, belt, hat band)
- Brown (hair, optional)
- Black (hat, boots)
- Skin tone (head, hands)
- Velvet yarn (burgundy or deep red for the cape)
- Hook: US C/2 (2.75 mm) or D/3 (3.25 mm) crochet hook. The smaller hook creates a tighter fabric, which is perfect for amigurumi to prevent stuffing from showing.
- Yarn needle: For sewing pieces together and weaving in ends.
- Stitch marker: To track your rounds (a scrap of contrasting yarn works too).
- Polyester fiberfill: For stuffing the doll firmly.
- Optional: Wooden skewer and extra gold yarn for a tiny sword.
Step-by-Step Instructions
This pattern is worked in continuous spiral rounds using single crochet (sc). Do not join at the end of rounds unless specified. Place a stitch marker in the first stitch of each round and move it up as you go. All parts are crocheted separately and sewn together at the end.
Head (Skin Tone Yarn)
Start with a magic ring. If you're not familiar with this technique, you can chain 2 and work your first round into the second chain from the hook, then pull the tail tight to close the hole.
- R1: Magic ring, 6 sc (6)
- R2: Inc in each st around (12)
- R3: (sc, inc) around (18)
- R4: (2 sc, inc) around (24)
- R5: (3 sc, inc) around (30)
- R6-10: sc in each st around (30) — 5 rounds straight
- R11: (3 sc, dec) around (24)
- R12: (2 sc, dec) around (18)
Stuff the head firmly with fiberfill, shaping it into a smooth sphere. Fasten off, leaving a long tail (about 12 inches) for sewing to the body.
Body (Red Yarn)
This forms the tunic. Keep your tension even to create a nice, uniform fabric.
- R1: Magic ring, 6 sc (6)
- R2: Inc in each st around (12)
- R3: (sc, inc) around (18)
- R4: (2 sc, inc) around (24)
- R5: (3 sc, inc) around (30)
- R6-12: sc in each st around (30) — 7 rounds straight
- R13: (3 sc, dec) around (24)
- R14: (2 sc, dec) around (18)
Stuff the body firmly. Fasten off, leaving a long tail for sewing.
Legs (Make 2, Black Yarn)
These form the boots. They are simple tubes that will be attached to the bottom of the body.
- R1: Magic ring, 6 sc (6)
- R2: Inc in each st around (12)
- R3-5: sc in each st around (12) — 3 rounds straight
Stuff lightly—just enough to give them shape, but not so much that they become stiff. Fasten off, leaving a tail for sewing.
Arms (Make 2 — Skin Tone & Red Yarn)
You'll start with the hands in skin tone, then switch to red for the sleeves.
- R1: Magic ring, 6 sc (6) — skin tone
- R2: (sc, inc) around (9)
- R3-4: sc in each st around (9) — 2 rounds straight
- Switch to red yarn:
- R5-8: sc in each st around (9) — 4 rounds straight
Stuff lightly. Fasten off, leaving a tail for sewing. When you switch colors, leave a small tail of the skin tone yarn inside the arm to avoid a visible gap.
Shako Hat (Black Yarn)
This is the iconic tall hat. It's worked from the top down.
- R1: Magic ring, 6 sc (6)
- R2: Inc in each st around (12)
- R3: (sc, inc) around (18)
- R4: (2 sc, inc) around (24)
- R5-7: sc in each st around (24) — 3 rounds straight
- R8: (2 sc, dec) around (18)
Fasten off. Using gold yarn, embroider a decorative band around the base of the hat. You can do this by weaving the gold yarn in and out of the stitches in a straight line, or by surface crocheting a chain around the hat.
Braided Epaulettes (Gold Yarn)
These add a touch of military regalia to the shoulders.
- Cut 3 strands of gold yarn, each 12 inches long.
- Hold them together and braid them tightly.
- Tie a knot at each end to secure the braid.
- Make a second braid for the other shoulder.
Cape (Velvet Yarn)
This is a simple rectangle that drapes beautifully over the shoulders.
- Chain 20.
- Row 1: sc in 2nd ch from hook and across (19)
- Rows 2-6: ch 1, turn, sc across (19) — 5 more rows
Fasten off. The velvet yarn can be slippery, so work slowly and keep your tension even.
Assembly & Finishing Touches
Now for the magic moment—bringing all the pieces together!
- Sew the head to the body: Position the head on top of the body and whipstitch around the neck opening using the long tail from the head. Make sure it's centered and secure.
- Sew the legs: Attach the legs to the bottom of the body, spacing them evenly so the prince can stand. Sew them on firmly with the tails from the legs.
- Sew the arms: Attach the arms to the sides of the body, just below the neck. Position them slightly forward for a natural look.
- Sew the hat: Place the hat on top of the head, slightly tilted for character. Sew it in place around the base.
- Embroider the face: Using black yarn, embroider two small eyes and a tiny mouth. For the eyes, make a small cross-stitch or French knot. For the mouth, make a small straight stitch or a tiny "v" shape.
- Add the belt: Using gold yarn, create a belt by wrapping the yarn around the waist of the body. Secure it with a few stitches. Add a small square of gold yarn as a buckle.
- Attach the epaulettes: Sew one braid to each shoulder of the body, draping them slightly over the top of the arm.
- Drape the cape: Sew the cape to the back of the body, just below the neck. Let it drape naturally over the shoulders and down the back.
- Optional sword: Wrap a wooden skewer with gold yarn, securing the ends with glue or stitches. Sew or tie it to the prince's side.
Your Nutcracker Prince is complete! Display him on a mantelpiece, bookshelf, or under the Christmas tree. He's sure to become a beloved part of your holiday traditions for years to come. Happy crafting!



