The Mossy Gnome Home Free Pattern – Knit a Whimsical Mushroom Cottage Amigurumi
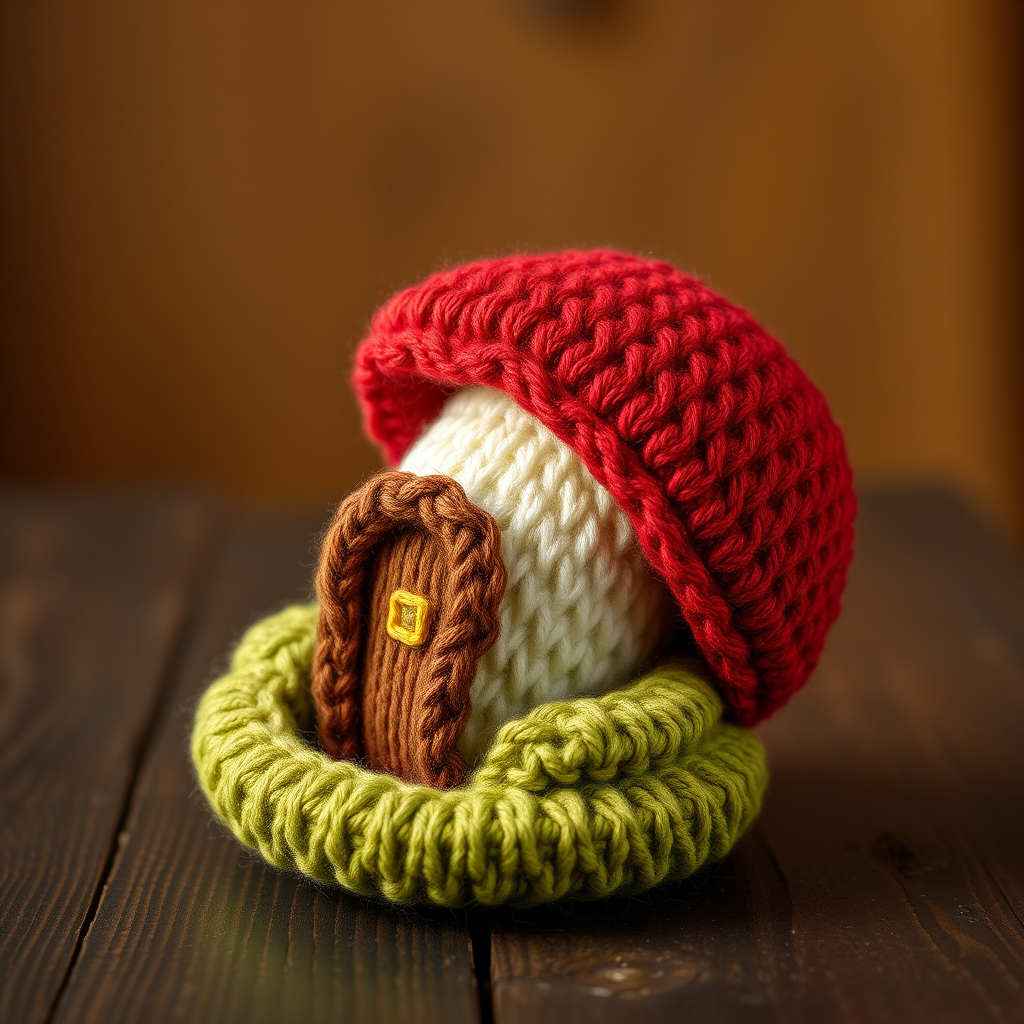
The Mossy Gnome Home: A Whimsical Knitted Mushroom Cottage Amigurumi
Bring a touch of woodland magic to your shelf with this enchanting knitted mushroom cottage. Complete with a tiny arched door, a glowing yellow window, and a bumpy mossy base, this amigurumi project is the perfect escape into a miniature forest world. Whether you're looking for cozy seasonal decor or a handmade gift that feels straight out of a fairy tale, this pattern is your ticket to crafting a tiny home for your favorite gnome. Let’s pick up our needles and build this little cottage from the ground up!
Materials Needed
Before we dive into the magic, gather your supplies. This project uses simple, worsted-weight yarns and basic knitting techniques, making it accessible for confident beginners.
- Yarn: Worsted weight yarn in the following colors:
- Red (for the mushroom cap)
- Cream (for the stem)
- Brown (for the door)
- Green (for the moss base)
- Yellow (for the window)
- Needles: US 5 (3.75 mm) knitting needles
- Notions: Tapestry needle for seaming, scissors, and a small amount of fiberfill for stuffing.
- Gauge: 5 stitches and 7 rows = 1 inch in stockinette stitch. (Gauge is important for the right size, but since this is a soft toy, it's forgiving if you're slightly off.)
Step-by-Step Instructions
This cottage is knitted flat in pieces and then seamed together. We'll start with the most iconic part—the red cap—and work our way down to the mossy base. Take your time, and enjoy the process of watching your little home take shape.
Mushroom Cap (Make 1)
The cap is a simple dome shape, created by decreasing stitches after knitting a rectangle.
- Cast On: Using your red yarn, cast on 30 stitches.
- Body of the Cap:
- Row 1 (Right Side): Knit all stitches.
- Row 2 (Wrong Side): Purl all stitches.
- Repeat Rows 1 and 2 until the piece measures 4 inches from the cast-on edge, ending with a Wrong Side row. This creates the stockinette stitch fabric.
- Shaping the Dome (Decreases):
- Next Row (RS): Knit 2 together (k2tog) across the row. You will have 15 stitches remaining.
- Next Row: Purl all stitches.
- Next Row: Knit 2 together (k2tog) across the row. You will have 8 stitches remaining.
- Finishing: Cut the yarn, leaving a long tail (about 12 inches). Thread the tail onto your tapestry needle and slide it through the remaining 8 stitches on your knitting needle. Pull tight to gather the top of the cap into a closed dome. Use the same tail to sew the side seam of the cap closed, creating a 3D dome shape. Weave in the end.
Mushroom Stem (Make 1)
The stem is a simple cylinder that will hold the door and window.
- Cast On: Using your cream yarn, cast on 20 stitches.
- Body of the Stem:
- Work in stockinette stitch (knit on the Right Side, purl on the Wrong Side) for 3 inches, ending with a Wrong Side row.
- Shaping the Top (Decreases):
- Next Row (RS): Knit 2 together (k2tog) across the row. You will have 10 stitches remaining.
- Next Row: Purl all stitches.
- Finishing: Cut the yarn, leaving a long tail. Thread the tail through the remaining 10 stitches and pull tight to close the top of the stem. Sew the side seam to form a cylinder, leaving the bottom open for stuffing. Weave in the end.
Door (Make 1)
This little arched door adds so much character to the cottage.
- Cast On: Using your brown yarn, cast on 8 stitches.
- Body of the Door:
- Work in stockinette stitch for 1.5 inches, ending with a Wrong Side row.
- Shaping the Arch (Decreases):
- Next Row (RS): K2tog, knit to the last 2 stitches, k2tog. (6 stitches)
- Next Row: Purl all stitches.
- Next Row: K2tog, knit to the last 2 stitches, k2tog. (4 stitches)
- Finishing: Bind off all stitches. Weave in the ends. Sew the door onto the front of the stem, centered vertically and horizontally.
Window (Make 1)
A tiny square of yellow light brings warmth to the cottage.
- Cast On: Using your yellow yarn, cast on 6 stitches.
- Body of the Window:
- Work in stockinette stitch for 1 inch.
- Finishing: Bind off all stitches. Weave in the ends. Sew the window to the stem, positioning it to the left of the door.
Moss Base (Make 1)
The garter stitch base gives a bumpy, mossy texture for the cottage to sit on.
- Cast On: Using your green yarn, cast on 30 stitches.
- Body of the Base:
- Work in garter stitch (knit every row) for 2 inches.
- Finishing: Bind off all stitches. Weave in the ends. This flat rectangle is the base that the mushroom will sit on.
Assembly
Now for the fun part—bringing all the pieces together to create your gnome home!
- Attach the Stem to the Base: Stuff the stem lightly with fiberfill. Position the open bottom of the stem onto the center of the green moss base. Using your tapestry needle and cream yarn, sew the stem securely to the base with a whipstitch, going through the edge of the stem and the top of the base.
- Attach the Cap: Stuff the red cap lightly with fiberfill. Place the cap on top of the stem, slightly overlapping the top edge of the stem. Using your tapestry needle and red yarn, sew the cap onto the stem, ensuring it is centered and secure.
- Final Touches: Weave in any remaining loose ends. For an extra whimsical detail, you can roll a small tube of brown yarn and sew it to the top of the cap to look like a chimney.
Your Mossy Gnome Home is complete! Place it on a shelf, a mantelpiece, or a desk to add a little bit of forest magic to your everyday life. Happy knitting!



