The Meadow Mallow Bunny Free Pattern – Crochet a Cloud-Soft Floral Friend
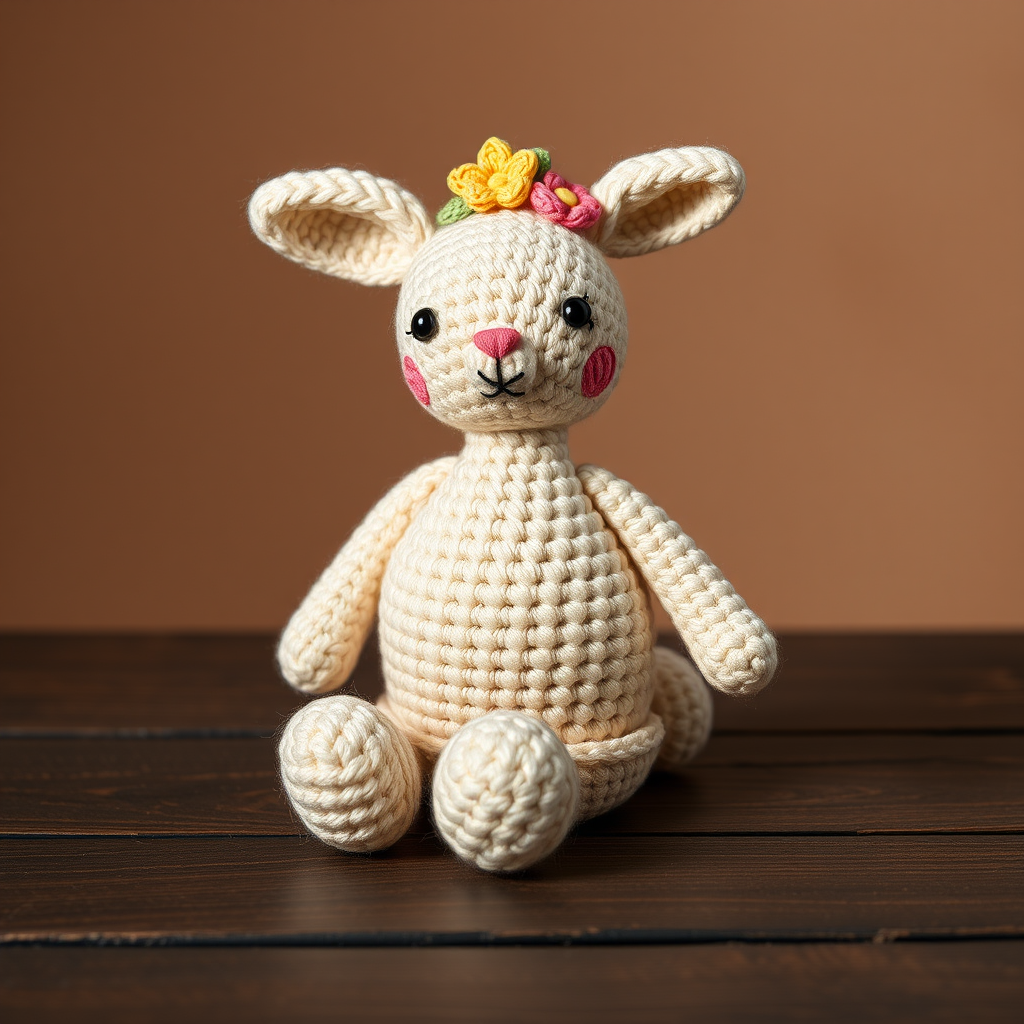
The Meadow Mallow Bunny: A Heirloom-Quality Crochet Companion
There's something truly magical about creating a soft, handmade friend that feels like it was plucked straight from a storybook meadow. The Meadow Mallow Bunny is exactly that—a dreamy, cloud-soft amigurumi project that combines heirloom charm with modern crochet techniques. With its oversized ears, rounded plump body, and a delicate crown of hand-stitched wildflowers, this bunny is destined to become a cherished keepsake for little ones or a whimsical accent on your favorite shelf.
Crocheted in a muted palette of oat, blush, sage, and buttercup, this pattern is perfect for intermediate beginners who are ready to take their amigurumi skills to the next level. The tight, even single crochet stitches create a smooth, dense texture that feels luxurious to the touch. Whether you're crafting a gift for a baby shower, a birthday, or simply treating yourself to a cozy afternoon project, the Meadow Mallow Bunny is a delightful journey from first stitch to final bloom.
Materials Needed: Gather Your Meadow Essentials
Before you begin, let's make sure you have everything you need to bring this little bunny to life. The beauty of this pattern is that it uses simple, accessible materials that you can easily find at your local craft store or online.
Yarn
You'll need worsted weight cotton or acrylic blend yarn in the following colors:
- Oat (cream): Main body color – approximately 150 yards
- Blush (soft pink): Ears and face details – approximately 30 yards
- Sage (dusty green): Leaves and accents – approximately 20 yards
- Buttercup (pale yellow): Flower crown – approximately 15 yards
Recommended: Lion Brand 24/7 Cotton for a smooth, durable finish that holds its shape beautifully.
Hook and Notions
- 3.5 mm crochet hook (E-4) – The perfect size for tight, even stitches
- Stitch markers – To keep track of your rounds
- Tapestry needle – For sewing pieces together and weaving in ends
- Polyester fiberfill stuffing – For a soft, squishable body
- Small amount of black embroidery floss – For the eyes (or 6mm safety eyes if preferred)
- Scissors
Gauge
4 sc x 4 rows = 1 inch. Gauge is not critical for this pattern, but maintaining consistent tension throughout will ensure your bunny comes out perfectly proportioned.
Step-by-Step Instructions: Crochet Your Meadow Friend
Now, let's dive into the fun part! This pattern is worked in continuous spirals unless otherwise noted. Use a stitch marker to keep track of the beginning of each round. Remember to keep your tension even and tight enough that the stuffing doesn't show through.
Head
Round 1: Magic ring, 6 sc in ring. (6)
Round 2: Inc in each st around. (12)
Round 3: (Sc in next st, inc) around. (18)
Round 4: (Sc in next 2 sts, inc) around. (24)
Round 5: (Sc in next 3 sts, inc) around. (30)
Rounds 6-10: Sc in each st around. (30)
Round 11: (Sc in next 3 sts, dec) around. (24)
Round 12: (Sc in next 2 sts, dec) around. (18)
Stuff firmly with fiberfill, shaping the head into a smooth, round ball. Fasten off, leaving a long tail for sewing.
Body
Round 1: Magic ring, 6 sc in ring. (6)
Round 2: Inc in each st around. (12)
Round 3: (Sc in next st, inc) around. (18)
Round 4: (Sc in next 2 sts, inc) around. (24)
Rounds 5-8: Sc in each st around. (24)
Round 9: (Sc in next 2 sts, dec) around. (18)
Round 10: (Sc in next st, dec) around. (12)
Stuff firmly, creating a plump, rounded body that will allow your bunny to sit upright. Fasten off, leaving a long tail for sewing.
Ears (Make 2)
Round 1: Magic ring, 6 sc in ring. (6)
Round 2: (Sc in next st, inc) around. (9)
Rounds 3-8: Sc in each st around. (9)
Round 9: (Sc in next 2 sts, inc) around. (12)
Rounds 10-12: Sc in each st around. (12)
Flatten the ear and sew the bottom closed. Do not stuff—the ears should remain soft and floppy. Fasten off, leaving a long tail for sewing.
Arms (Make 2)
Round 1: Magic ring, 6 sc in ring. (6)
Rounds 2-6: Sc in each st around. (6)
Stuff lightly—just enough to give the arms a bit of shape without making them stiff. Fasten off, leaving a long tail for sewing.
Legs (Make 2)
Round 1: Magic ring, 6 sc in ring. (6)
Round 2: Inc in each st around. (12)
Rounds 3-5: Sc in each st around. (12)
Stuff lightly. Fasten off, leaving a long tail for sewing.
Tail
Round 1: Magic ring, 6 sc in ring. (6)
Round 2: Inc in each st around. (12)
Round 3: Sc in each st around. (12)
Stuff lightly. Fasten off, leaving a long tail for sewing.
Flower Crown (Make 5 Small Flowers)
Using Buttercup yarn, create each flower as follows:
Round 1: Magic ring, (ch 2, 3 dc, ch 2, sl st) in ring, repeat 5 times to make 5 petals. Pull ring tight. Fasten off, leaving a tail.
Once all five flowers are complete, you'll sew them around the top of the head in a pleasing cluster. For extra charm, you can add tiny sage green leaves between the flowers using simple chain stitches.
Assembly: Bringing Your Bunny to Life
Now comes the most rewarding part—watching your bunny come together! Take your time with the assembly to ensure a polished, professional finish.
Step 1: Sew the head to the body, making sure the seam is hidden at the back. Use a whip stitch and pull gently to secure.
Step 2: Sew the ears to the top of the head, positioning them slightly to the sides. The ears should flop forward naturally for that adorable, relaxed look.
Step 3: Sew the arms to the sides of the body, about 1 inch below the neck. Position them so they hang naturally at the bunny's sides.
Step 4: Sew the legs to the bottom front of the body, so the bunny can sit upright. Make sure they're evenly spaced for stability.
Step 5: Sew the tail to the back bottom of the body. This little detail adds so much charm!
Step 6: Using Blush yarn, embroider a small 'x' for the nose and two tiny straight stitches for the eyes (or use safety eyes if preferred). For the sweetest expression, place the eyes about 6 stitches apart and the nose centered below them.
Step 7: Attach the flower crown to the top of the head, arranging the flowers in a pleasing cluster. Add a few tiny sage green leaves between the flowers for that meadow-fresh look.
Final Thoughts: Your Heirloom Masterpiece
Congratulations! You've just created your very own Meadow Mallow Bunny—a soft, whimsical friend that carries the warmth of handmade love. This pattern is perfect for gifting, and once you've mastered it, you'll find yourself reaching for it again and again to create bunnies in different colorways or with personalized touches.
Remember, the beauty of handmade items lies in their imperfections—each stitch tells a story, and no two bunnies will ever be exactly alike. So embrace the process, enjoy the journey, and don't forget to share your creation with the crochet community. Happy stitching!



