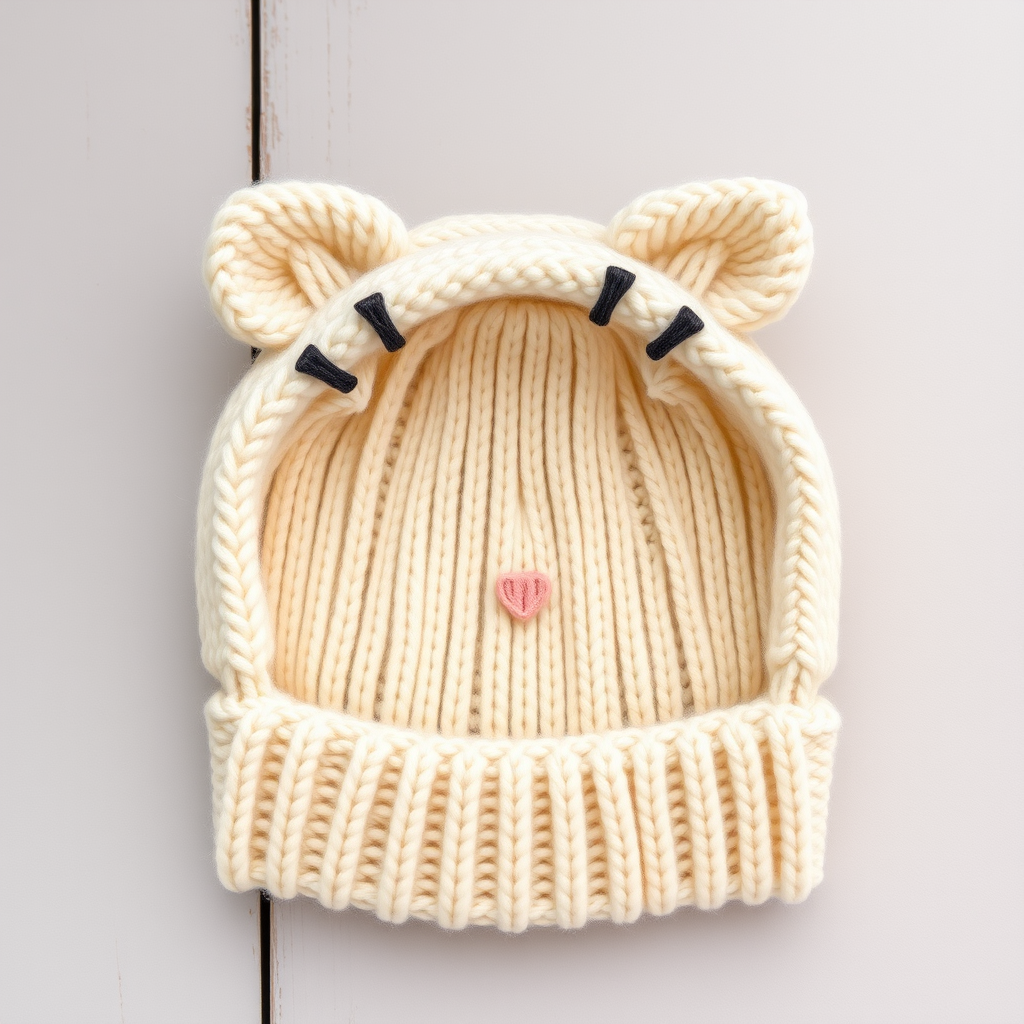
The Honeycomb Hideaway Hat Free Pattern – A Knitted Ode to Cozy Forest Dens

The Honeycomb Hideaway Hat Free Pattern – A Knitted Ode to Cozy Forest Dens
Wrap your little one in the warmth of a woodland haven with this textured honeycomb hat, complete with tiny bear ears and a soft, rolled brim. Knitted in a rich, earthy palette of warm honey brown and cream, this hat is the perfect blend of snug comfort and playful charm. The distinctive honeycomb stitch creates a subtle, geometric texture that evokes the cozy interior of a forest den, while the adorable bear ears and embroidered snout add a touch of whimsy that both babies and parents will adore. Whether you're a seasoned knitter or a brave beginner ready for a fun project, this free pattern will guide you through every step to create a handmade treasure.
Materials Needed
Before you begin your knitting adventure, gather these essential supplies. The beauty of this pattern lies in its simplicity—you only need a few items to create something truly special.
- Yarn: Worsted weight yarn in two colors:
- Main Color (MC): Warm honey brown (approximately 100-120 yards depending on size)
- Contrast Color (CC): Cream or soft beige (small amount for the snout embroidery)
- Needles: US Size 6 (4.0 mm) 16-inch circular knitting needle and double-pointed needles (DPNs) for small circumference, or size needed to obtain gauge
- Gauge: 20 stitches and 28 rows = 4 inches in honeycomb stitch pattern (blocked)
- Notions: Stitch markers, tapestry needle for weaving in ends and embroidery, scissors
Step-by-Step Instructions
This pattern is written for three sizes: Newborn (0-3 months, 3-6 months, 6-12 months). Finished circumference: 12 (13, 14) inches. Follow the numbers in parentheses for your chosen size—the first number is for Newborn, the second for 0-3 months, and the third for 3-6 months. For the 6-12 months size, use the third number throughout.
Abbreviations
- CO: Cast on
- K: Knit
- P: Purl
- K2tog: Knit two stitches together (decrease)
- P2tog: Purl two stitches together (decrease)
- sl: Slip stitch
- wyif: With yarn in front
- wyib: With yarn in back
- rep: Repeat
- st(s): Stitch(es)
- rnd(s): Round(s)
Special Stitch – Honeycomb Pattern (multiple of 4 sts)
This beautiful textured stitch is easier than it looks! You'll be alternating knit and purl stitches in a simple 4-round repeat to create the honeycomb effect.
- Rnd 1: *K2, P2*; rep from * to end of round.
- Rnd 2: *K2, P2*; rep from * to end of round.
- Rnd 3: *P2, K2*; rep from * to end of round.
- Rnd 4: *P2, K2*; rep from * to end of round.
These 4 rounds form the honeycomb pattern. The key is that rounds 1-2 have knits first, while rounds 3-4 have purls first, creating that lovely offset honeycomb texture.
Hat Body
Now let's begin crafting your honeycomb hideaway hat!
- Cast On: With MC, CO 60 (64, 68) sts. Join in the round, being very careful not to twist your stitches. Place a stitch marker at the beginning of the round to keep track.
- Ribbing: Work in K2, P2 ribbing for 1 inch. This creates the rolled brim effect that gives the hat its cozy, casual look. The ribbing will naturally curl, which is exactly what we want!
- Begin Honeycomb Pattern: Start working the honeycomb pattern, repeating Rnds 1-4 until the piece measures 4 (4.5, 5) inches from the cast-on edge, ending with Rnd 4. This will give you the beautiful textured body of the hat.
Shape Crown
This is where the hat begins to take its rounded shape. Switch to DPNs when your stitches become too tight on the circular needle—usually around the first decrease round.
- Rnd 1 (Decrease): *K2tog, P2*; rep from * to end of round – you'll now have 45 (48, 51) sts.
- Rnd 2: *K1, P2*; rep from * to end of round.
- Rnd 3 (Decrease): *K1, P2tog*; rep from * to end of round – you'll now have 30 (32, 34) sts.
- Rnd 4: *K1, P1*; rep from * to end of round.
- Rnd 5 (Decrease): *K2tog*; rep from * to end of round – you'll now have 15 (16, 17) sts.
- Finish: Cut yarn, leaving a long tail (about 8-10 inches). Thread the tail through a tapestry needle, then pass it through the remaining stitches on your needles. Pull tight to gather the crown, and secure with a few small stitches. Weave the end inside the hat.
Bear Ears (make 2)
These adorable little ears are worked flat and then sewn onto the hat. They're quick to knit and add so much charm!
- Cast On: With MC, CO 8 sts.
- Work Stockinette: Work back and forth in stockinette stitch (K on right side, P on wrong side) for 4 rows.
- Row 5 (Right Side): K2tog, K4, K2tog – you'll now have 6 sts.
- Row 6: P all 6 sts.
- Row 7: K2tog, K2, K2tog – you'll now have 4 sts.
- Row 8: P all 4 sts.
- Row 9: K2tog, K2tog – you'll now have 2 sts.
- Row 10: P2tog – you'll now have 1 st.
- Finish: Cut yarn and pull through the remaining stitch. Leave a long tail for sewing the ear onto the hat.
Finishing Touches
Now for the fun part—bringing your bear to life!
- Embroider the Snout: With CC, embroider a small oval on the front of the hat using duplicate stitch or satin stitch. Position it about 1 inch above the brim, centered on the front of the hat. This will be your bear's adorable snout. For a more detailed look, you can add a tiny vertical line or small triangle in a darker shade for the nose, but the simple oval is perfectly charming.
- Attach the Ears: Sew the ears onto the top of the hat, spacing them about 2 inches apart. Position them slightly toward the front of the crown for the most natural bear look. Use the long tail from each ear to sew them securely, weaving the ends inside the hat.
- Weave in Ends: Carefully weave in all remaining loose ends using your tapestry needle. Make sure to weave them on the inside of the hat so they're completely hidden.
- Block Gently: To shape the hat and even out the honeycomb texture, gently block it. You can either wet block (soak in lukewarm water, gently squeeze out excess, and lay flat to dry on a towel) or steam block (hold a steam iron slightly above the hat without touching it). This step will help the honeycomb pattern really pop and give the hat a professional finish.
And there you have it—a gorgeous, handcrafted Honeycomb Hideaway Hat that's ready to keep your little one cozy and adorable. The combination of the textured honeycomb stitch, the warm honey brown color, and those irresistible bear ears makes this hat a true woodland treasure. Whether you're gifting it at a baby shower or keeping it for your own little cub, this hat is sure to become a cherished handmade keepsake. Happy knitting!