The Heirloom Harvest Gourd Trio: A Textured Crochet Free Pattern
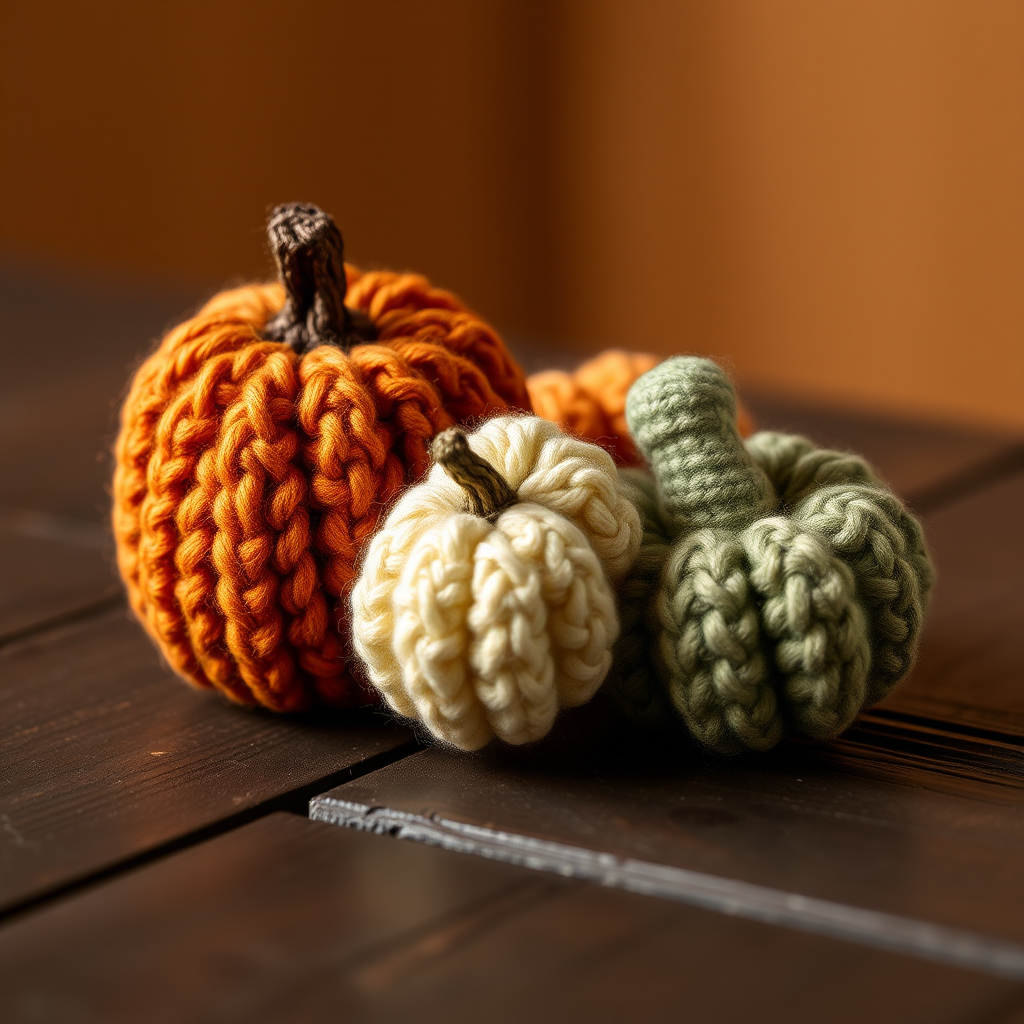
Introducing the Heirloom Harvest Gourd Trio
Celebrate the beauty of the harvest season with a charming set of three uniquely textured crochet gourds. This pattern uses simple stitches and clever shaping to produce a rustic, heirloom-quality decoration that will never go out of style. Whether you're a seasoned crocheter or a beginner looking for a rewarding project, these gourds are the perfect way to add a touch of handmade warmth to your fall decor. The trio includes a large burnt orange pumpkin, a medium cream acorn squash, and a small sage green gourd, each with its own distinct character. With clear, step-by-step instructions, you'll be able to create a cozy cluster that looks beautiful on a mantel, table, or shelf.
Materials Needed
Before you begin, gather the following supplies. Gauge is not critical for this project, but consistent tension is important. Aim for a tight fabric so stuffing does not show. Approximately 4 single crochet stitches = 1 inch.
- Yarn: Worsted weight (#4) cotton or acrylic yarn in three colors:
- Color A: Burnt Orange (for the main pumpkin)
- Color B: Cream (for the acorn squash)
- Color C: Sage Green (for the small gourd)
- Small amount of brown yarn for stems
- Hook: Size G/6 (4.0 mm) crochet hook
- Other: Stitch marker, tapestry needle, polyester fiberfill stuffing, scissors
Step-by-Step Instructions
General Notes
Work in continuous rounds unless otherwise stated. Do not join at the end of rounds; use a stitch marker to keep track of your place. Stuff firmly as you go to maintain shape.
Burnt Orange Pumpkin (Large)
This is the largest gourd, featuring 6 distinct vertical ridges and a short brown stem.
- Round 1: With Color A, make a magic ring, work 6 single crochet (sc) into the ring. (6 stitches)
- Round 2: 2 sc in each stitch around. (12 stitches)
- Round 3: (Sc in next stitch, 2 sc in next stitch) repeat around. (18 stitches)
- Round 4: (Sc in next 2 stitches, 2 sc in next stitch) repeat around. (24 stitches)
- Round 5: (Sc in next 3 stitches, 2 sc in next stitch) repeat around. (30 stitches)
- Round 6: (Sc in next 4 stitches, 2 sc in next stitch) repeat around. (36 stitches)
- Rounds 7-12: Sc in each stitch around. (36 stitches) – This creates the body of the pumpkin.
- Round 13: (Sc in next 4 stitches, sc2tog) repeat around. (30 stitches) – Begin decreasing.
- Round 14: (Sc in next 3 stitches, sc2tog) repeat around. (24 stitches)
- Round 15: (Sc in next 2 stitches, sc2tog) repeat around. (18 stitches)
- Round 16: (Sc in next stitch, sc2tog) repeat around. (12 stitches) – Stuff the pumpkin firmly with fiberfill.
- Round 17: Sc2tog around. (6 stitches) – Fasten off, leaving a long tail (about 12 inches). Thread the tail onto a tapestry needle. Weave through the front loops of the remaining 6 stitches and pull tight to close the hole. Hide the tail inside the pumpkin.
Pumpkin Ridges
Using a long strand of Color A (about 18 inches), thread a tapestry needle. Insert the needle from the bottom center of the pumpkin to the top center. Pull gently to create a slight indentation. Repeat this process 5-6 times around the pumpkin, spacing the ridges evenly. Secure the yarn at the top and bottom by making a small knot or weaving the ends in.
Stem
With brown yarn, chain 6. Single crochet in the 2nd chain from the hook and across. (5 stitches) Fasten off, leaving a tail. Sew the stem to the top center of the pumpkin. For an optional curly vine, chain 10 and slip stitch back into the chain, then attach to the stem.
Cream Acorn Squash (Medium)
This gourd has a slightly elongated shape with 4-5 subtle ridges.
- Round 1: With Color B, make a magic ring, work 6 sc into the ring. (6 stitches)
- Round 2: 2 sc in each stitch around. (12 stitches)
- Round 3: (Sc in next stitch, 2 sc in next stitch) repeat around. (18 stitches)
- Round 4: (Sc in next 2 stitches, 2 sc in next stitch) repeat around. (24 stitches)
- Rounds 5-8: Sc in each stitch around. (24 stitches) – This creates the body.
- Round 9: (Sc in next 2 stitches, sc2tog) repeat around. (18 stitches) – Begin decreasing.
- Round 10: (Sc in next stitch, sc2tog) repeat around. (12 stitches) – Stuff the squash firmly.
- Round 11: Sc2tog around. (6 stitches) – Fasten off and close as for the pumpkin.
Acorn Squash Ridges
Use a long strand of Color B to create 4-5 vertical indentations from top to bottom, similar to the pumpkin but less pronounced. Pull gently to shape the squash.
Stem
With brown yarn, chain 4. Single crochet in the 2nd chain from the hook and across. (3 stitches) Fasten off, leaving a tail. Sew to the top of the squash.
Sage Green Small Gourd (Small)
This is the smallest gourd with 3-4 ridges and a tiny stem.
- Round 1: With Color C, make a magic ring, work 6 sc into the ring. (6 stitches)
- Round 2: 2 sc in each stitch around. (12 stitches)
- Round 3: (Sc in next stitch, 2 sc in next stitch) repeat around. (18 stitches)
- Rounds 4-6: Sc in each stitch around. (18 stitches) – This creates the body.
- Round 7: (Sc in next stitch, sc2tog) repeat around. (12 stitches) – Stuff the gourd firmly.
- Round 8: Sc2tog around. (6 stitches) – Fasten off and close as for the pumpkin.
Gourd Ridges
Use a long strand of Color C to create 3-4 vertical indentations from top to bottom.
Stem
With brown yarn, chain 3. Single crochet in the 2nd chain from the hook and across. (2 stitches) Fasten off, leaving a tail. Sew to the top of the gourd.
Assembly
Arrange the three gourds together in a cluster. Optionally, use a hot glue gun or sew them together at the base to form a stable group. For added detail, make a few small leaves from green yarn: chain 5, single crochet in the 2nd chain from the hook, half double crochet in the next chain, double crochet in the next chain, half double crochet in the next chain, single crochet in the last chain. Fasten off and attach the leaves to the stems. Your Heirloom Harvest Gourd Trio is now complete!



