The Dune Drifter Tote Free Pattern – A Crocheted Oasis of Woven Stripes and Tassel Fringe

The Dune Drifter Tote Free Pattern – A Crocheted Oasis of Woven Stripes and Tassel Fringe
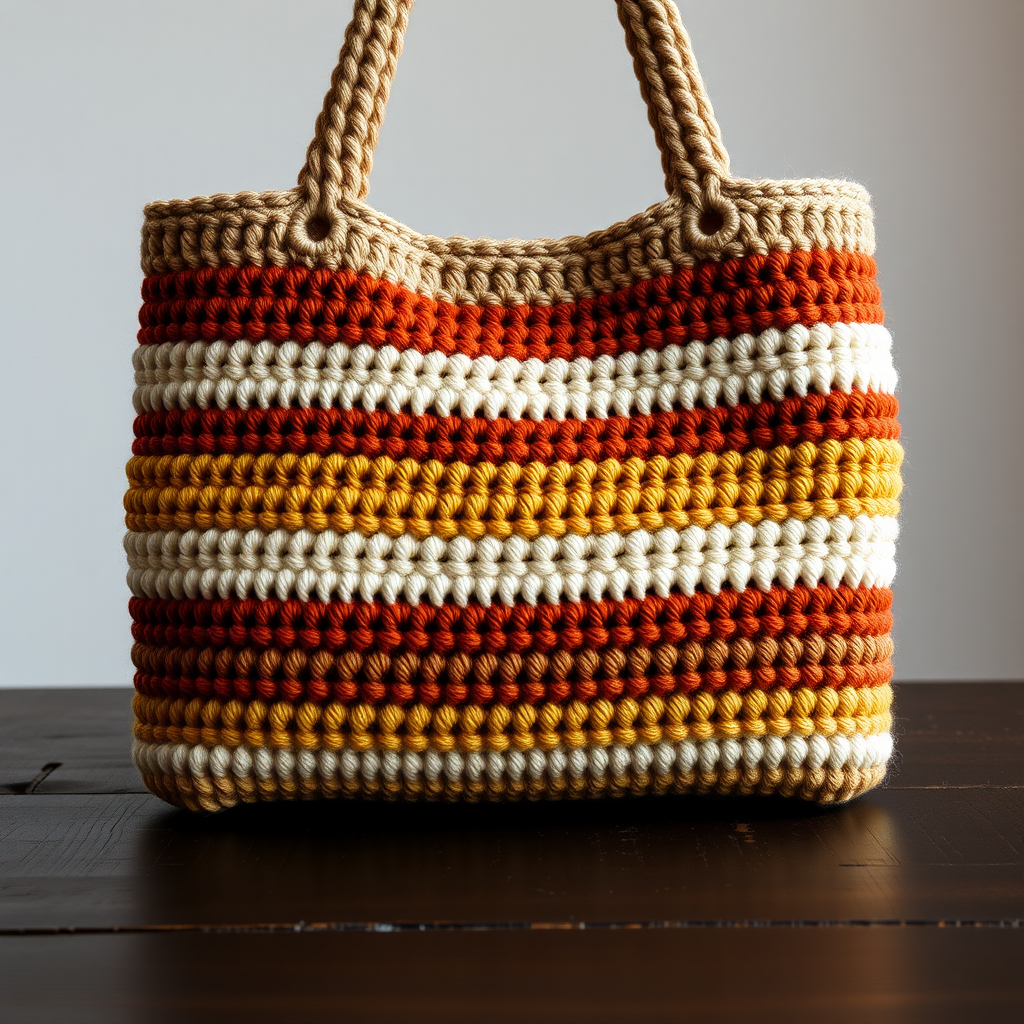
Carry a piece of the desert with you wherever you go! The Dune Drifter Tote is a stunning, boho-chic accessory that combines the warmth of sand-toned stripes with the playful texture of tassel fringe. Crocheted in soft, durable cotton, this bag is as practical as it is beautiful—perfect for market days, beach adventures, or adding a handcrafted touch to your daily commute. Whether you're a seasoned crocheter or just starting your yarn journey, this pattern is designed to be accessible, rewarding, and utterly wearable. Let's dive into creating your very own woven oasis!
Materials Needed
Before you begin, gather your supplies. This project uses simple, readily available materials to create a professional-looking finish.
- Yarn: Worsted weight cotton yarn (e.g., Lion Brand 24/7 Cotton) in 4 colors:
- Sand (A) – approx. 250g
- Terracotta (B) – approx. 150g
- Oatmeal (C) – approx. 100g
- Deep Rust (D) – approx. 100g
- Hook: 5.0 mm (H-8) crochet hook
- Notions: Tapestry needle for seaming and weaving in ends, scissors
- Gauge: 16 sc x 18 rows = 4 x 4 inches (10 x 10 cm) in single crochet. Always check your gauge to ensure the correct finished size!
Step-by-Step Instructions
This pattern is worked in flat panels and then seamed together. Don't worry—the repetitive single crochet rhythm is meditative, and the color changes keep it exciting. Follow along carefully, and you'll have a gorgeous tote in no time.
Bag Body (Make 2 Panels – Front and Back)
Note: Each panel is worked flat, turning at the end of every row. The color sequence creates the beautiful striped effect.
Panel Instructions
Row 1: With color A, ch 46. Sc in 2nd ch from hook and in each ch across. (45 sc) Turn.
Row 2: Ch 1, sc in each st across. Turn.
Rows 3-4: Repeat Row 2 with color A.
Row 5: Switch to color B. Ch 1, sc in each st across. Turn.
Rows 6-8: Repeat Row 5 with color B.
Row 9: Switch to color C. Ch 1, sc in each st across. Turn.
Rows 10-11: Repeat Row 9 with color C.
Row 12: Switch to color D. Ch 1, sc in each st across. Turn.
Row 13: Repeat Row 12 with color D.
Row 14: Switch to color A. Ch 1, sc in each st across. Turn.
Rows 15-16: Repeat Row 14 with color A.
Row 17: Switch to color B. Ch 1, sc in each st across. Turn.
Rows 18-20: Repeat Row 17 with color B.
Row 21: Switch to color C. Ch 1, sc in each st across. Turn.
Rows 22-23: Repeat Row 21 with color C.
Row 24: Switch to color D. Ch 1, sc in each st across. Turn.
Row 25: Repeat Row 24 with color D.
Row 26: Switch to color A. Ch 1, sc in each st across. Turn.
Rows 27-28: Repeat Row 26 with color A.
Row 29: Switch to color B. Ch 1, sc in each st across. Turn.
Rows 30-32: Repeat Row 29 with color B.
Row 33: Switch to color C. Ch 1, sc in each st across. Turn.
Rows 34-35: Repeat Row 33 with color C.
Row 36: Switch to color D. Ch 1, sc in each st across. Turn.
Row 37: Repeat Row 36 with color D.
Row 38: Switch to color A. Ch 1, sc in each st across. Turn.
Rows 39-40: Repeat Row 38 with color A.
Row 41: Switch to color B. Ch 1, sc in each st across. Turn.
Rows 42-44: Repeat Row 41 with color B.
Row 45: Switch to color C. Ch 1, sc in each st across. Turn.
Rows 46-47: Repeat Row 45 with color C.
Row 48: Switch to color D. Ch 1, sc in each st across. Turn.
Row 49: Repeat Row 48 with color D.
Row 50: Switch to color A. Ch 1, sc in each st across. Turn.
Rows 51-52: Repeat Row 50 with color A.
Row 53: Switch to color B. Ch 1, sc in each st across. Turn.
Rows 54-56: Repeat Row 53 with color B.
Row 57: Switch to color C. Ch 1, sc in each st across. Turn.
Rows 58-59: Repeat Row 57 with color C.
Row 60: Switch to color D. Ch 1, sc in each st across. Turn.
Row 61: Repeat Row 60 with color D.
Row 62: Switch to color A. Ch 1, sc in each st across. Turn.
Rows 63-64: Repeat Row 62 with color A.
Fasten off. This completes one panel. Repeat the entire sequence to create the second (back) panel.
Seaming the Panels
Now it's time to bring your tote together.
- Place the two panels together with right sides facing each other.
- Using color A and a tapestry needle, whip stitch along the bottom edge and up both sides, leaving the top edge open.
- Turn the bag right side out. Gently push out the corners for a crisp shape.
Straps (Make 2)
These sturdy straps are crocheted flat and sewn on for durability.
Row 1: With color A, ch 8. Sc in 2nd ch from hook and in each ch across. (7 sc) Turn.
Row 2-60: Ch 1, sc in each st across. Turn.
Fasten off, leaving a long tail for sewing.
Attaching the Straps: Position each strap on the inside of the bag, about 3 inches from the side seams. Using a whip stitch and the long tail, securely sew the ends of each strap to the bag. Ensure the straps are evenly spaced and not twisted.
Fringe (Optional but Highly Recommended)
This is what gives the Dune Drifter its signature boho flair!
- Cut strands of colors B, C, and D, each 12 inches long. You'll need about 20-25 strands for a full fringe.
- Fold each strand in half to create a loop.
- Insert the folded end through the bottom edge of the bag (from front to back).
- Pull the tails through the loop and tighten gently.
- Repeat across the entire bottom edge, alternating colors (e.g., B, C, D, B, C, D...).
- Trim the fringe evenly to about 6 inches for a polished look.
Finishing Touches
Weave in all loose ends with your tapestry needle. If desired, lightly block the bag to shape—simply mist with water and lay flat to dry. Your Dune Drifter Tote is now ready to accompany you on all your adventures!
Enjoy your handcrafted oasis. Happy crocheting!