Prairie Ripple Off-Shoulder Crochet Crop Top Free Pattern
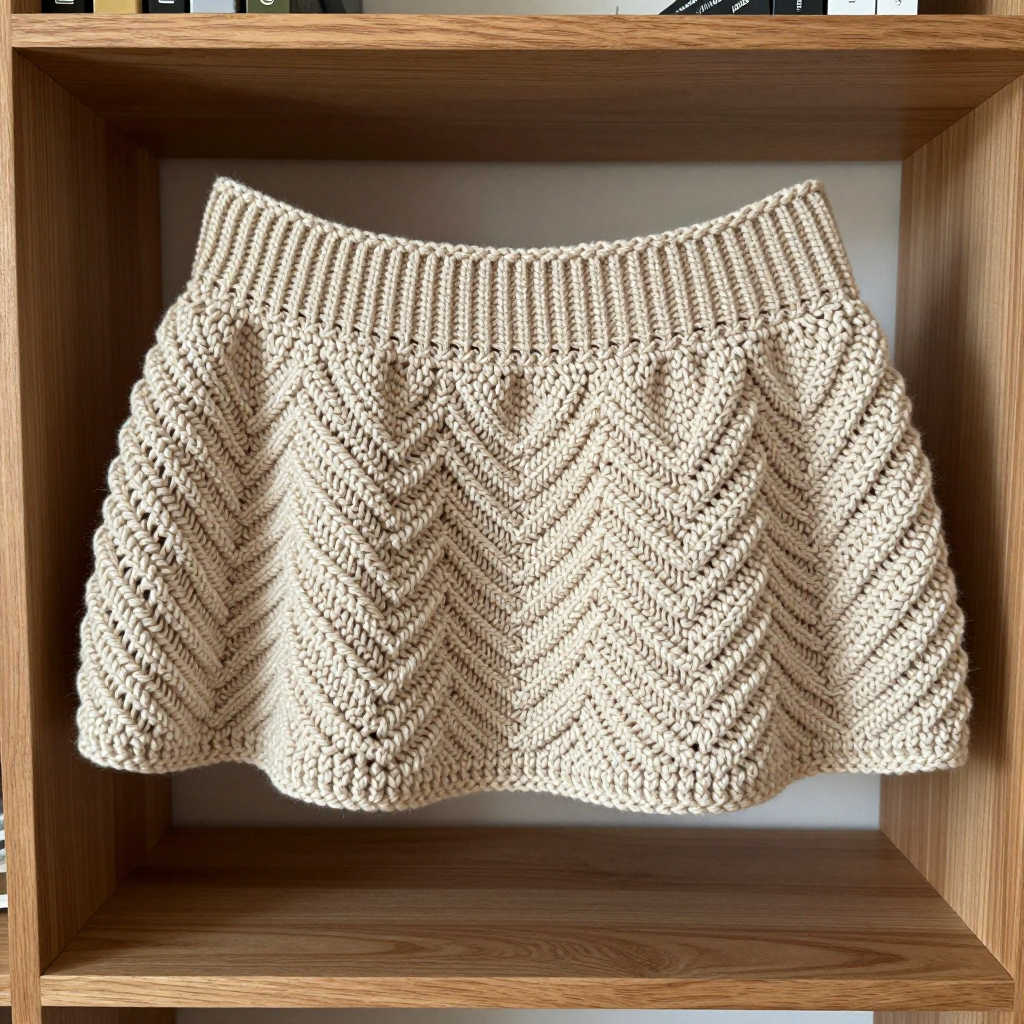
Prairie Ripple Off-Shoulder Crochet Crop Top
Introduction
This slouchy, retro-inspired off-shoulder crop top is the perfect first garment for someone who has never crocheted a stitch in their life — it is worked as one simple tube, so there is no shaping, no sleeves, and no complicated seaming to worry about. The ripple (chevron) stitch creates gentle waves that run horizontally around your body, giving the top a soft, scalloped texture that looks far more impressive than the skills it requires. Worked in natural undyed tweed wool, it has a rustic, cozy 90s feel with tiny flecks of color running through the cream. The finished top is wide and relaxed, sitting off the shoulders with a deep ribbed band that holds it gently in place. If you can chain and single crochet, you can make this — and you will end up with a piece you will genuinely want to wear.
Materials Needed
- Yarn: Worsted-weight yarn (CYC category 4) — tweed wool in natural undyed cream/oatmeal with flecks. You need approximately 400–450 yards / 365–410 meters (about 2 skeins of 220 yards each).
- Main hook: 5.0 mm (US H-8) crochet hook — used for the body.
- Second hook: 4.0 mm (US G-6) crochet hook — used for the ribbed top band.
- Stitch markers: at least 2 (one to mark the join of your round, one spare).
- Tapestry needle: a large blunt needle with an eye big enough for worsted yarn — for weaving in ends and whipstitching the band.
- Scissors for cutting yarn.
- Measuring tape for checking gauge and length.
- Finished size: One size fits XS–M (bust 30–36 in / 76–91 cm). Finished tube circumference approx. 40 in / 102 cm (worn wide and slouchy). Length approx. 12 in / 30 cm before the ribbed band, plus a 2 in / 5 cm ribbed turn-back band.
Abbreviations and Beginner Glossary
- ch — chain. Make a loop of yarn on your hook, wrap yarn over the hook, and pull it through the loop. That is one chain.
- st / sts — stitch / stitches. A "stitch" is one completed loop of yarn in your fabric.
- sc — single crochet. Insert your hook into the stitch, wrap yarn over the hook, pull up a loop (2 loops on hook), wrap yarn over again, pull through both loops. One single crochet made.
- dc — double crochet. Wrap yarn over the hook first, insert hook into the stitch, wrap yarn over, pull up a loop (3 loops on hook), wrap yarn over, pull through 2 loops (2 loops left), wrap yarn over, pull through the last 2 loops. One double crochet made.
- dc2tog — double crochet 2 together (a decrease). Start a double crochet in the first stitch but stop when you have 2 loops left on your hook; start another double crochet in the next stitch and pull through all remaining loops at the end. Two stitches become one.
- sl st — slip stitch. Insert hook into the stitch, wrap yarn over, and pull it straight through both the stitch and the loop on your hook in one motion. Used here to join rounds.
- BLsc — single crochet in the back loop only. A single crochet worked into just the back half of the "V" at the top of the stitch. This pushes the front loop forward and creates the ribbed texture.
- rep — repeat. Do the instruction again.
- RS — right side. The side of the fabric that faces outward when worn.
- 2 sc in next st — work two single crochets into the same stitch (an increase).
- Join with sl st — after working all the way around, slip stitch into the first stitch of the round to close the circle.
- Fasten off — cut the yarn leaving a tail, then pull the tail all the way through the last loop to lock it.
Gauge
In ripple pattern with the 5.0 mm (H-8) hook: 1 ripple repeat (14 stitches) = 3.5 in / 9 cm wide, and 8 rows = 4 in / 10 cm tall.
Ribbed band (BLsc) with the 4.0 mm (G-6) hook: 9 stitches and 8 rows = 2 in / 5 cm.
Why gauge matters: Gauge is simply how big your stitches turn out. If your stitches are bigger than the pattern's, your top will be too wide and long; if smaller, it will be too tight. Because this top is a simple tube with no shaping, gauge is the only thing controlling the fit.
How to make a gauge swatch: With the 5.0 mm hook, chain 29 (two ripple repeats + 1). Work Ripple Row 1, then repeat Row 2 until you have 8 rows. Lay it flat without stretching and measure the width of one full ripple repeat (peak to peak) and the height of all 8 rows. If your repeat is wider than 3.5 in, go down a hook size; if narrower, go up a hook size. Always swatch before you begin.
Beginner Tips Before You Start
- Count your chains twice. The set-up chain of 141 is long. Count it in groups of 10 using stitch markers so you do not lose your place — an off-by-one chain will throw off the whole ripple.
- Do not twist the tube. When you join the first row into a circle, make sure the chain lies flat and untwisted all the way around. Once you have crocheted a few rounds it is almost impossible to fix.
- Use a stitch marker at the join. Place a marker in the first stitch of every round so you always know where the round begins and ends.
- Keep your tension relaxed. Do not pull the yarn too tight, especially on the dc2tog decreases — tight decreases make the valleys pucker. Aim for smooth, even loops.
- Trust the ripple. The pattern looks wavy and "wrong" for the first two or three rounds. Keep going — the peaks and valleys settle into place as the fabric grows.
- Try it on as you go. After about 10 rounds, slip the tube over your shoulders to check the width. It should feel loose and slouchy, not snug.
Step-by-Step Instructions
The Ripple Pattern (read this first)
The ripple pattern is a multiple of 14 stitches + 1. Every row is identical, which is what makes this pattern so beginner-friendly. Each 14-stitch repeat contains: 2 sc, 4 dc, 2 dc2tog, 4 dc, 2 sc, then 2 sc in one stitch (the peak).
Ripple Row 1 (RS): Ch 1, sc in first st, *sc in next 2 sts, dc in next 4 sts, dc2tog twice, dc in next 4 sts, sc in next 2 sts, 2 sc in next st; rep from * to last st, sc in last st.
Ripple Row 2: Ch 1, sc in first st, *sc in next 2 sts, dc in next 4 sts, dc2tog twice, dc in next 4 sts, sc in next 2 sts, 2 sc in next st; rep from * to last st, sc in last st.
Each row mirrors the one below it, creating smooth peaks and valleys. Repeat Row 2 for the pattern.
Set-Up
Set-Up Row: With the 5.0 mm (H-8) hook, ch 141 (10 ripple repeats + 1).
Row 1: Work Ripple Row 1 across. (141 sts) Join with sl st to the first st to work in the round (forming the tube), being careful not to twist. Place a marker at the join.
Body
You will now work in joined rounds, repeating Ripple Row 2 all the way around.
Round 2: Ch 1, work Ripple Row 2 around, join with sl st to first st. (141 sts)
Rounds 3–24: Repeat Round 2. (141 sts each round)
That gives 24 rounds total (Row 1 plus Rounds 2–24), approximately 11.5 in / 29 cm tall at the stated gauge of 8 rows = 4 in. Fasten off and weave in the ends. Try it on: the tube should sit wide and slouchy across your upper arms.
Ribbed Turn-Back Top Edge
Switch to the 4.0 mm (G-6) hook for a tighter, firmer ribbing.
Round 1: Join yarn at the top edge (the last round you worked) at the join marker. Ch 1, work 1 sc in each st around the top edge, join with sl st. (141 sc)
Round 2: Ch 1, BLsc in each st around, join with sl st. (141 sts)
Rounds 3–10: Repeat Round 2. (141 sts each round)
That is 8 rounds of ribbing, approximately 2 in / 5 cm deep at the stated gauge of 8 rows = 2 in. Fasten off, leaving a 24 in / 60 cm tail.
Assembly and Finishing
Creating the turn-back edge: Fold the ribbed band to the inside of the top so the ribbing sits behind the top edge. Thread the 24 in tail onto your tapestry needle. Working from the inside, whipstitch the final round of the band to the inside of Round 1 of the band — bring the needle up through one stitch of the final round, then over and down through the matching stitch of Round 1, and repeat all the way around. Keep the stitches loose so the band stays stretchy. This hides the raw edge and gives a clean, folded finish.
Weaving in ends: Thread each remaining tail onto the tapestry needle and run it through the back of about 2 inches of stitches, changing direction once so it cannot work loose. Trim close to the fabric.
Blocking: Lightly mist the top with cool water and lay it flat, smoothing the ripple texture open with your hands. Do not stretch or pin out the ribbing — let it relax naturally. Leave it to dry completely. Blocking opens up the chevron waves and softens the tweed.
Wearing: The top is worn pulled down over the shoulders. The wide tube and ribbed band hold it in place.
Pro Tips and Variations
- Change colors for a striped ripple: Work 4 rounds in cream, then 4 rounds in a contrast color, repeating to the top. Carry the unused color loosely up the inside of the tube, or fasten off and rejoin each time.
- Adjust the size: Because the pattern is a multiple of 14 + 1, add or remove 14 chains to change the circumference by about 3.5 in per repeat. For a longer top, simply work more rounds of Ripple Row 2 before the ribbing.
- Substitute the yarn: Any worsted-weight (CYC 4) yarn works — cotton gives a crisper summer top, acrylic is budget-friendly and machine washable. Always re-check your gauge with the new yarn.
- Deeper ribbing: Work extra rounds of BLsc for a wider turn-back band (each extra round adds about 1/4 in / 6 mm of depth).