Jolly Berry Gift Bag Free Pattern – A Knitted Holiday Treasure Pouch
Jolly Berry Gift Bag Free Pattern – A Knitted Holiday Treasure Pouch
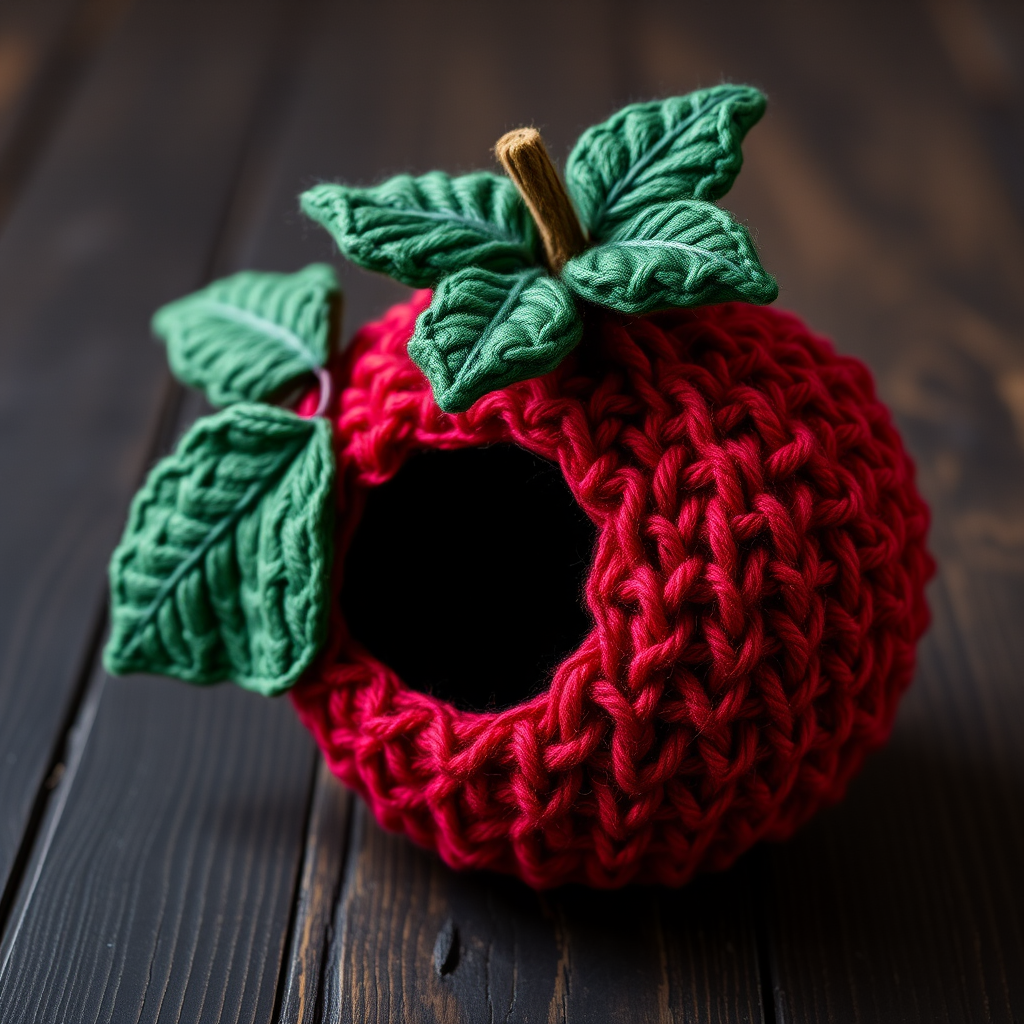
Looking for a unique, handmade way to wrap your holiday gifts this year? This charming knitted gift bag, shaped like a plump cranberry with a leafy top, adds a festive touch to any present. Its textured berry stitch and cozy wool construction make it a delightful, reusable wrapping alternative that will impress your loved ones before they even open their gift. Whether you're a seasoned knitter or a beginner looking for a fun project, this pattern is perfect for creating a memorable, eco-friendly gift presentation.
This adorable pouch is knitted flat in one piece, then seamed, making it an approachable project for knitters of all skill levels. The bumpy, textured surface mimics a real cranberry, while the forest green leaves and brown stem complete the realistic berry silhouette. Let's dive into this delightful holiday craft!
Materials Needed
Before you begin, gather the following materials to ensure a smooth knitting experience:
- Yarn: Worsted weight wool yarn in:
- Deep red (Color A) – for the bag body
- Forest green (Color B) – for the leaves
- Small amount of brown (Color C) – for the stem
- Needles: US 7 (4.5 mm) knitting needles
- Notions: Tapestry needle for seaming and weaving in ends
- Optional: Ribbon or yarn tie for closing the bag
Gauge: 20 stitches and 28 rows = 4 inches in stockinette stitch. (Gauge is important for achieving the correct size, but this project is forgiving – even if your gauge is slightly off, the bag will still be adorable!)
Step-by-Step Instructions
This bag is knitted flat in one piece, then seamed. The berry stitch pattern creates a bumpy, textured surface reminiscent of a real cranberry. Follow along carefully, and you'll have a beautiful gift pouch in no time.
Abbreviations
- K = knit
- P = purl
- K2tog = knit two together (decrease)
- P2tog = purl two together (decrease)
- St(s) = stitch(es)
- RS = right side
- WS = wrong side
Berry Stitch Pattern (multiple of 4 + 2)
This pattern creates the textured, bumpy surface of the cranberry. Repeat these 6 rows for the body of the bag:
- Row 1 (RS): *K1, P1, K1, P1* repeat to last 2 sts, K2.
- Row 2 (WS): *P1, K1, P1, K1* repeat to last 2 sts, P2.
- Row 3: *K1, P1, K1, P1* repeat to last 2 sts, K2.
- Row 4: *P1, K1, P1, K1* repeat to last 2 sts, P2.
- Row 5: *K1, P1, K1, P1* repeat to last 2 sts, K2.
- Row 6: *P1, K1, P1, K1* repeat to last 2 sts, P2.
Bag Body
- With Color A (deep red), cast on 42 stitches.
- Work in Berry Stitch Pattern for 40 rows (about 6 inches). This will form the main body of the bag.
Decrease for Bottom
Now we'll shape the rounded bottom of the cranberry by decreasing stitches:
- Row 41 (RS): K2tog, *K1, P1, K1, P2tog* repeat to last 2 sts, K2tog. (You should now have 32 stitches)
- Row 42 (WS): *P1, K1, P1, K1* repeat to last 2 sts, P2.
- Row 43: K2tog, *K1, P1, K2tog* repeat to last 2 sts, K2tog. (22 stitches remain)
- Row 44: *P1, K1, P1, K1* repeat to last 2 sts, P2.
- Row 45: K2tog, *K1, K2tog* repeat to last 2 sts, K2tog. (12 stitches remain)
- Row 46: Purl all stitches.
- Row 47: K2tog across. (6 stitches remain)
- Cut yarn, leaving a long tail (about 12 inches). Thread the tail through the remaining 6 stitches on your needle, pull tight to gather, and secure firmly. This will close the bottom of the bag.
Leaf Top (Make 2)
These leaves will sit on top of the bag, creating the cranberry's leafy crown:
- With Color B (forest green), cast on 10 stitches.
- Row 1 (RS): K1, K2tog, K4, K2tog, K1. (8 stitches remain)
- Row 2: Purl all stitches.
- Row 3: K1, K2tog, K2, K2tog, K1. (6 stitches remain)
- Row 4: Purl all stitches.
- Row 5: K1, K2tog, K2tog, K1. (4 stitches remain)
- Row 6: Purl all stitches.
- Row 7: K2tog, K2tog. (2 stitches remain)
- Row 8: K2tog. (1 stitch remains)
- Cut yarn, pull through the last stitch to secure. Weave in the end or leave a tail for sewing. Repeat to make a second leaf.
Stem
- With Color C (brown), cast on 4 stitches.
- Knit in stockinette stitch (knit one row, purl one row) for 6 rows.
- Cut yarn, pull through all stitches to secure. Leave a tail for sewing.
Assembly
Now it's time to bring all the pieces together to create your beautiful berry bag:
- Seam the bag: Fold the bag body in half with right sides together. Using your tapestry needle and a length of Color A yarn, sew the side seams from the top edge down to the gathered bottom. Leave the top open. Turn the bag right side out.
- Attach leaves and stem: Position the two leaves on the top center of the bag, covering the gathered stitches where you pulled the yarn tight. Place the stem in the center of the leaves. Sew them securely in place using the tails you left, weaving in any loose ends.
- Weave in all ends: Use your tapestry needle to weave in any remaining yarn tails on the inside of the bag to keep it neat.
- Finishing touch: To close the bag, thread a ribbon or yarn tie through the top edge, or simply fold the top over and tie with the stem. Place your gift inside and enjoy the festive look!
Your Jolly Berry Gift Bag is now complete! This delightful, reusable pouch is perfect for small gifts, jewelry, or even as a decorative holiday ornament. The textured berry stitch and charming leaf top make it a standout piece that showcases your handmade love. Happy knitting, and enjoy spreading holiday cheer with your beautiful creation!



