Free Pattern: The Meadowlark Sleeve Shrug – A Lightweight Crochet Sleeve Wrap
The Meadowlark Sleeve Shrug: A Free, Beginner-Friendly Crochet Pattern
Introduction
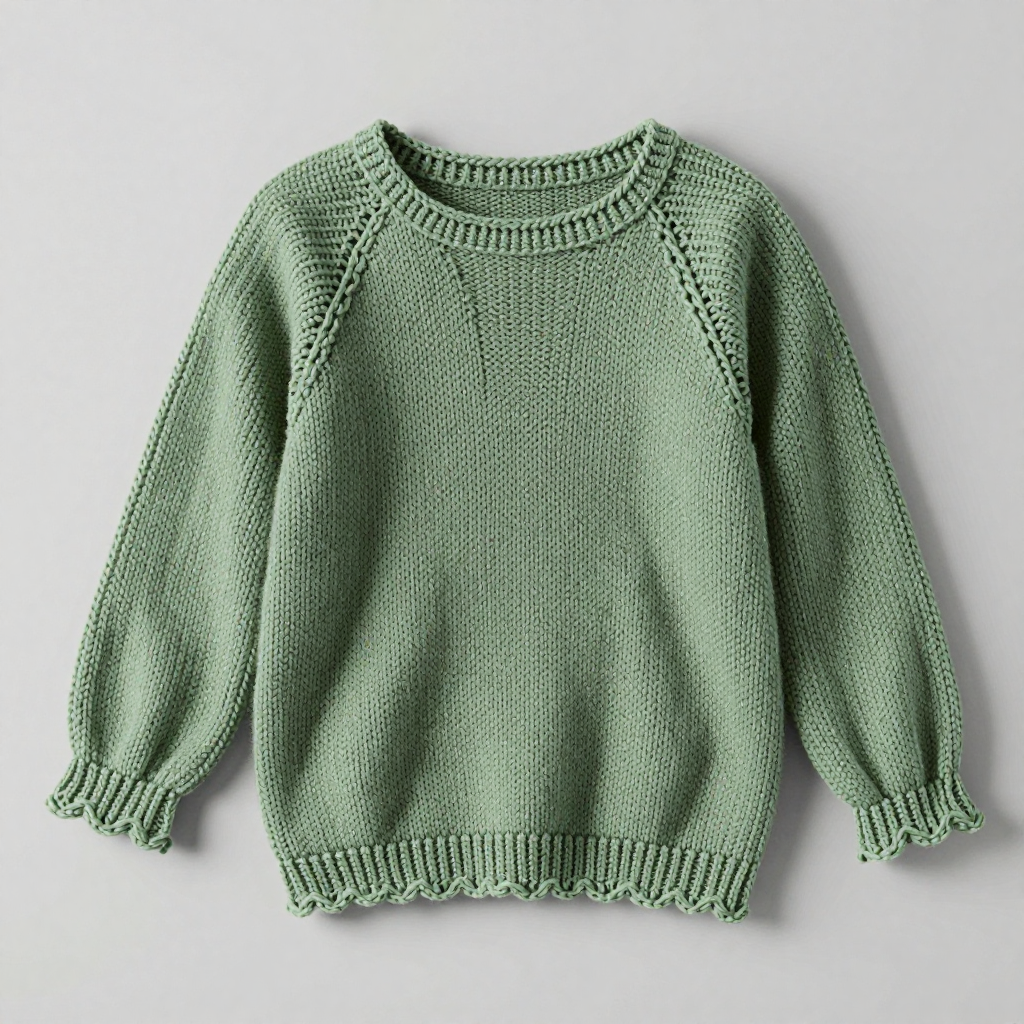
If you have ever wanted to make something you can actually wear but felt nervous about tackling a whole sweater, the Meadowlark Sleeve Shrug is the perfect first garment project for you. It is a breezy, romantic pair of crocheted sweater sleeves that slip on over bare arms or a thin top like a shrug, adding a soft, cozy layer to any outfit. Worked in airy DK-weight wool with a gentle scalloped edge at the wrist, this is the ideal transitional-weather accessory for confident beginners and beyond. The finished sleeves feel light and slightly springy, with a soft matte, faintly fuzzy handmade texture and clearly visible double crochet stitch definition that shows off your work beautifully. Best of all, each sleeve is simply a flat rectangle seamed into a tube — no shaping nightmares, no complicated stitch patterns, just relaxing, repetitive stitches you can master in minutes.
Materials Needed
- Yarn: DK / Light (3) weight wool or wool-blend yarn — approximately 400–450 yards (365–410 m) total for a pair of sleeves in the average adult size. A soft, slightly springy wool shows the stitch definition best. (The sample is shown in a warm sage green.)
- Crochet hook: 3.5 mm (US E/4) crochet hook.
- Stitch markers: At least 4 removable stitch markers (or scrap yarn) to mark your first stitch and your increase points.
- Tapestry needle: A blunt-tipped yarn needle (tapestry needle) for seaming and weaving in ends.
- Scissors: Sharp craft scissors for cutting yarn.
- Measuring tape: For checking gauge and measuring your sleeve length.
- Blocking supplies (optional but recommended): A spray bottle of water, rust-proof pins, and a blocking mat or towel.
Finished size / dimensions: Each sleeve measures approximately 8½ inches (21.5 cm) in circumference at the shoulder end, widening to about 11 inches (28 cm) in circumference at the wrist end, and approximately 17 inches (43 cm) in length from shoulder to wrist. This fits most adult women and teens. See the Pro Tips section for how to adjust the size.
Abbreviations and Beginner Glossary
Every abbreviation used in this pattern is explained below in plain English. If you have never crocheted before, read this whole section first — then keep it open beside you as you work.
- ch – chain: Make a loop with your yarn on the hook (a slip knot), then wrap the yarn over the hook and pull it through the loop on your hook. That is one chain. Repeat to make a row of chains.
- dc – double crochet: Wrap the yarn over your hook (yarn over), insert the hook into the stitch, yarn over again and pull up a loop (you now have 3 loops on the hook), yarn over and pull through the first 2 loops (2 loops remain), yarn over and pull through the last 2 loops (1 loop remains). That is one double crochet.
- sc – single crochet: Insert the hook into the stitch, yarn over and pull up a loop (2 loops on the hook), yarn over and pull through both loops. That is one single crochet.
- sl st – slip stitch: Insert the hook into the stitch, yarn over and pull the yarn through both the stitch and the loop on your hook in one motion. This creates a nearly invisible joining stitch.
- st(s) – stitch(es): One completed stitch, or several stitches.
- ch-sp – chain space: The small gap or hole created underneath a chain (or chains) from the previous row. You work into the space, not into a stitch.
- rep – repeat: Do the instruction again as many times as stated.
- yarn over – Wrap the working yarn from back to front over your hook.
- turn – Flip your work over so you can work back across the row you just made.
- fasten off – Cut the yarn a few inches from your work, then pull the tail all the way through the last loop on your hook to lock it.
- increase – Work two stitches into the same stitch, which adds one stitch to your row.
- right side – The front, outward-facing side of your finished fabric.
- whipstitch – A simple seaming stitch: bring the needle through both edges from front to back, over and over, like a spiral of small stitches.
Gauge
Gauge: 5 double crochet stitches = 1 inch (2.5 cm); 2 rows of double crochet = 1 inch (2.5 cm). Gauge is measured over double crochet worked in rows.
Why gauge matters: Gauge is how many stitches and rows fit into a set measurement. If your stitches are bigger than the pattern's, your sleeve will come out too wide and long; if they are smaller, it will be too tight and short. Checking gauge first means your finished sleeves will actually fit.
How to make a gauge swatch: With your 3.5 mm (E/4) hook and your chosen yarn, chain 24. Work double crochet in each chain across, then work 12 more rows of double crochet. Lay the swatch flat without stretching it and measure a 4-inch (10 cm) section in the middle. You should count about 20 double crochet stitches across and about 8 rows. If you have more stitches than that, your tension is tight — try a slightly larger hook (such as 4 mm / US G-6). If you have fewer, your tension is loose — try a slightly smaller hook (such as 3.25 mm / US D-3).
Beginner Tips Before You Start
- Mark your first stitch of every row. Place a stitch marker in the very first stitch you make after the turning chain. It is the single easiest way to avoid losing or adding stitches at the edges.
- Count your stitches at the end of every row. The pattern tells you the count in parentheses, like (32 dc). If your count is off, fix it before moving on — it is much easier to fix one row than ten.
- Do not pull your yarn too tight. Tension is the number one beginner struggle. Hold the yarn gently; your stitches should slide easily on the hook. If the hook fights you, relax your grip.
- Remember the turning chain counts as your first stitch. On every row, the ch 3 at the beginning stands in for the first double crochet. Your first real dc goes into the next stitch — not the same one — or you will add an extra stitch each row.
- Work your increase rows slowly. On increase rows you add one stitch at each end. Mark both increase points with stitch markers so you can see exactly where the extra stitches go.
- Make both sleeves in the same sitting if you can. Your tension naturally changes from day to day, and working both sleeves back-to-back keeps them matching in size.
Step-by-Step Instructions
SIZE: Fits most adult women (and teens). Each sleeve is worked flat as a rectangle, then seamed along the long edge to form a tube. Make two identical sleeves.
NOTE: The sleeve is worked sideways (from shoulder to wrist) as a flat rectangle. The width of the rectangle becomes the circumference of the sleeve; the length becomes the shoulder-to-wrist length. The ch 3 at the start of each row counts as the first double crochet throughout.
Body (make 2 identical rectangles)
Row 1: Ch 34. Dc in the 4th ch from hook (the first 3 ch count as the first dc) and in each ch across. Turn. (32 dc)
Row 2: Ch 3 (counts as first dc here and throughout), dc in each st across. Turn. (32 dc)
Row 3: Ch 3, dc in each st across. Turn. (32 dc)
Row 4: Ch 3, dc in each st across. Turn. (32 dc)
Row 5 (increase row): Ch 3, 2 dc in the next st, dc in each st across to the last 2 sts, 2 dc in the next st, dc in the last st. Turn. (34 dc)
Row 6: Ch 3, dc in each st across. Turn. (34 dc)
Row 7: Ch 3, dc in each st across. Turn. (34 dc)
Row 8: Ch 3, dc in each st across. Turn. (34 dc)
Row 9: Ch 3, dc in each st across. Turn. (34 dc)
Row 10 (increase row): Ch 3, 2 dc in the next st, dc in each st across to the last 2 sts, 2 dc in the next st, dc in the last st. Turn. (36 dc)
Row 11: Ch 3, dc in each st across. Turn. (36 dc)
Row 12: Ch 3, dc in each st across. Turn. (36 dc)
Row 13: Ch 3, dc in each st across. Turn. (36 dc)
Row 14: Ch 3, dc in each st across. Turn. (36 dc)
Row 15 (increase row): Ch 3, 2 dc in the next st, dc in each st across to the last 2 sts, 2 dc in the next st, dc in the last st. Turn. (38 dc)
Row 16: Ch 3, dc in each st across. Turn. (38 dc)
Row 17: Ch 3, dc in each st across. Turn. (38 dc)
Row 18: Ch 3, dc in each st across. Turn. (38 dc)
Row 19: Ch 3, dc in each st across. Turn. (38 dc)
Row 20 (increase row): Ch 3, 2 dc in the next st, dc in each st across to the last 2 sts, 2 dc in the next st, dc in the last st. Turn. (40 dc)
Row 21: Ch 3, dc in each st across. Turn. (40 dc)
Row 22: Ch 3, dc in each st across. Turn. (40 dc)
Row 23: Ch 3, dc in each st across. Turn. (40 dc)
Row 24: Ch 3, dc in each st across. Turn. (40 dc)
Row 25 (increase row): Ch 3, 2 dc in the next st, dc in each st across to the last 2 sts, 2 dc in the next st, dc in the last st. Turn. (42 dc)
Row 26: Ch 3, dc in each st across. Turn. (42 dc)
Row 27: Ch 3, dc in each st across. Turn. (42 dc)
Row 28: Ch 3, dc in each st across. Turn. (42 dc)
Row 29: Ch 3, dc in each st across. Turn. (42 dc)
Row 30: Ch 3, dc in each st across. Turn. (42 dc)
Do not fasten off. You will now work the cuff edge along the short edge you just finished.
Cuff Edge (worked along the wrist end of the rectangle)
Row 1: Ch 1, sc evenly along the short edge (about 30 sc). Turn. (about 30 sc)
Row 2: Ch 1, sc in each st across. Turn. (about 30 sc)
Row 3 (scallop row): Ch 1, *sc in the next 3 sts, ch 2, skip 1 st, sc in the next 3 sts; rep from * across, ending with sc in the last st. Fasten off. (the ch-2 loops create the scalloped edge)
Shoulder Edge (worked along the opposite short edge)
Row 1: Join yarn with a sl st at one corner. Ch 1, sc evenly along the short edge (about 30 sc). Turn. (about 30 sc)
Row 2: Ch 1, sc in each st across. Fasten off, leaving a long tail (about 18 inches / 45 cm) for seaming. (about 30 sc)
Assembly
See the Assembly and Finishing section below for full seaming instructions. Make the second sleeve exactly the same way, then seam both.
Assembly and Finishing
- Fold each sleeve rectangle in half lengthwise with right sides together, matching the long edges. The scalloped cuff and the shoulder border should line up at the two short ends.
- Seam the long edges together using the long tail and a tapestry needle. Work a whipstitch: bring the needle through both edges from front to back, over and over, keeping your stitches small and even (about ¼ inch / 6 mm apart). This forms the tube. Leave the shoulder edge open — that is the opening your arm slips through. Do not seam the short ends.
- Weave in all ends. Thread each yarn tail onto the tapestry needle and run it back and forth through the inside of several stitches (about 2 inches / 5 cm), then trim close to the fabric. Never knot your ends — weaving hides them invisibly and securely.
- Turn right side out. Gently smooth the seam flat with your fingers.
- Block the sleeves. Lightly mist each sleeve with water until damp (not soaking), lay it flat on a blocking mat or towel, and gently pat it into shape to the finished measurements. Pin the scalloped edges so they lie flat and open. Let it dry completely — usually overnight. Blocking opens up the stitches, relaxes the wool, and makes the fabric drape beautifully.
- Repeat for the second sleeve.
Wearing: Slip both sleeves on over bare arms or a thin top; the open shoulder edge sits comfortably at the upper arm and the scalloped cuff finishes at the wrist.
Pro Tips and Variations
- Change colors for a striped look: Work the body in one color and the cuff and shoulder borders in a contrasting shade, or change colors every 10 rows for soft stripes. Simply fasten off at the end of a row and join the new color with a sl st at the start of the next row.
- Adjust the size: To make the sleeves longer or shorter, add or remove plain double crochet rows (Rows 26–30 style) before the cuff — each row adds about ½ inch (1.25 cm). To make them wider or narrower, start with a longer or shorter beginning chain in a multiple of 2 chains, and keep the same increase rhythm.
- Substitute the yarn: Any DK / Light (3) weight yarn works — cotton gives a crisper, cooler sleeve for summer, while alpaca or a wool-blend gives extra warmth and drape. Always swatch first, since fiber changes gauge.
- Add a thumb hole or fingerless-glove finish: For a cozier, more fitted look, work the cuff edge a few rows longer and leave a 1-inch (2.5 cm) gap unseamed near the wrist when you seam the long edge — this creates a thumb opening so the sleeve stays put like a fingerless glove.